| (同じ利用者による、間の6版が非表示) | |||
| 1行目: | 1行目: | ||
| + | {{version nav |
||
| − | <!-- title:utorials/Creating a resource pack--> |
||
| + | |title=Minecraft 3D Shareware v1.34 |
||
| − | {{Exclusive|Java}} |
||
| + | |edition=java |
||
| − | {{about|[[Java Edition]]におけるリソースパックの作り方|Bedrock Editionにおけるリソースパックの作り方|チュートリアル/Bedrock Edition/リソースパックの作成}} |
||
| + | |image=3D Shareware 1994.jpg |
||
| − | {{TOC|right}} |
||
| + | |date=April 1, 2019 |
||
| + | |clienthash=44db7d7bcd5a1bee6f54f6a623f26a1b3d1e293f |
||
| + | |json=14b4bda35d123bb53313ce099943d40cf25fc159 |
||
| + | |serverhash=ffd306fc2aaa884755c5a6bf9fbd87aed26dd78f |
||
| + | |prevparent=1.RV-Pre1 |
||
| + | }} |
||
| + | {{April Fools|There is no actual "Minecraft 3D" version of ''Minecraft'' in development.}} |
||
| + | |||
| + | '''3D Shareware v1.34''' はエイプリルフールのジョークとしてリリースされたもので、公式には'''Minecraft 3D'''と呼ばれるものである。<ref name="3d">{{article|minecraft-3d-rediscovered|Minecraft 3D Rediscovered}}</ref>このバージョンは1990年代のテレビゲームが多く参考にされている。 |
||
| + | 開発者によると、''Minecraft 3D'' Shareware v1.34 は、1994年4月1日にリリースされたMinecraftの「古いバージョン」が地下の昔のオフィスの「すべての瓦礫の中で」発見され、その一部がコピーされたものである。 |
||
| − | ==概要== |
||
| + | ジョークの一部ではあるが、多くの賞を受賞し、「最先端の技術」を特色とする、「史上最高の傑作」と言われていた。<ref name="3d"/> |
||
| − | ===所用時間=== |
||
| − | およそ1~1.5時間で終えれる内容となっている。 |
||
| − | <!--This tutorial should take around 1 to 1.5 hours to complete.--> |
||
| − | == |
+ | == 追加要素 == |
| − | ここではリソースパックの作り方についてガイドする。リソースパックでは |
||
| − | * アイテムやブロック、エンティティなどのテクスチャ |
||
| − | * アイテムやブロックのテクスチャのアニメーション |
||
| − | * ユーザーインターフェース |
||
| − | * 音楽や効果音 |
||
| − | * 言語 |
||
| − | * アイテムやブロックの形状(モデル) |
||
| − | * スプラッシュテキストやエンドポエム、クレジット |
||
| − | * フォント |
||
| − | を変更することができる。 |
||
| − | <!--We are going to start off small and teach you how to make a resource pack. Resource packs can modify textures, models, animations, music sounds, user interfaces, and languages.--> |
||
| − | === |
+ | === アイテム === |
| + | ; Red Key |
||
| − | 以下に、リソースパックのフォルダ構造を示す。 |
||
| + | * アイテム説明文によると、"Red door"を開けられる |
||
| − | {{:リソースパック/Folders}} |
||
| + | * [[ウィザー]]がドロップする |
||
| + | ; Blue Key |
||
| + | * アイテム説明文によると、"Blue door"を開けられる |
||
| + | * [[エルダーガーディアン]]がドロップする |
||
| + | ; Yellow Key |
||
| − | ===リソースパックの作成にあたってやってはいけないこと<!--Donts in creating resource packs-->=== |
||
| + | * アイテム説明文によると、"Yellow door"を開けられる |
||
| − | リソースパック以前の問題として、以下にあげるようなことはやってはならない。 |
||
| + | * [[ラヴェジャー]]がドロップする |
||
| − | *[[Mojang]]の規約に反する行為をとる |
||
| − | *「Minecraft」を購入せずに遊べるよう改造したものを公開する |
||
| − | *Minecraftのソースコードを逆コンパイルして公開する |
||
| − | <!--Before creating resource pack, you should first know what not to do. Here is a list of the things you should not do: |
||
| − | *Do anything that violates [[Mojang]]'s terms of use for ''Minecraft''. |
||
| − | *Release ''Minecraft'' versions or modifications that allow you to play without having bought ''Minecraft'' from Mojang. |
||
| − | *Release the decompiled source code of ''Minecraft'' in any way.--> |
||
| + | ; 3D |
||
| − | ==リソースパックを作る== |
||
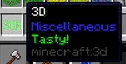
| + | * アイテム説明文によると、"tasty" |
||
| − | まず、[[.minecraft|.minecraftフォルダ]]から<code>resourcepacks</code>フォルダを開こう。開いたら何か新しくフォルダを作り(例えば、「Tutotial_Resource_Pack」と名前をつけよう)、それを開こう。 |
||
| + | ** サバイバルモードで、[[満腹度]]が最大未満だと食べることができ、食べるとMinecraftの開発者の写真が表示される |
||
| − | <!--Start off by navigating to our <code>resourcepacks</code> folder. To find the folder, you must first locate the [[.minecraft|''Minecraft'' folder]]. Once you are in the resource pack folder, create a new folder and name it: “''Tutorial_Resource_Pack''”. Then, open that folder.--> |
||
| + | * チートコード "NEEEERD" を通して召喚されたクリーパーがドロップする |
||
| + | <gallery> |
||
| − | このフォルダの中には、まず、<code>pack.mcmeta</code>ファイルを作る必要がある。これはMinecraftにリソースパックであることを認識させるファイルで、これがないとリソースパックとして認識されない。また、ここに書いたものがリソースパック選択画面に表示される。 |
||
| + | Red Key.gif|Red Key |
||
| − | <!--The first thing we need to do is create a <code>pack.mcmeta</code> file. This lets ''Minecraft'' know that the folder is a resource pack and it also allows you to customize the description that appears when you're selecting which resource pack to use in the game.--> |
||
| + | Blue Key.gif|Blue Key |
||
| + | Yellow Key.gif|Yellow Key |
||
| + | 3D (item).png|3D |
||
| + | </gallery> |
||
| + | === 全般 === |
||
| − | ===MCMETAファイルを作る=== |
||
| + | ; Boss Mode |
||
| − | まず、空いている場所を右クリックする。そうすると、新規作成という項目があり、その中にある「テキストドキュメント」をクリックする。すると「新しいテキスト ドキュメント.txt」というファイルができるので、その名前を"pack.mcmeta"にすればMCMETAファイルの出来上がりだ。'''このとき拡張子を<code>.txt</code>から<code>.mcmeta</code>に変えること。'''もしも拡張子が表示されていなければファイル > 表示 にある「ファイル名拡張子」にチェックを入れれば表示されるようになる。 |
||
| + | * {{key|B}}ボタンを押すと、単純なペイントエディターで作ったであろう絵が表示される |
||
| − | <!--To create an MCMETA file, right click in the 'Tutorial_Resource_Pack' folder and create a new text document. Name this file “''pack.mcmeta''”.--> |
||
| − | <center>[[File:FileExtensions.png|750px|link=]]</center> |
||
| + | ; Screen size |
||
| − | ====テキストエディタ==== |
||
| + | * 画面のサイズを{{key|F7}}で大きくし、{{key|F8}}で小さくすることができる |
||
| − | *使うテキストエディタは何でもよいがここではプログラムIDEを使用したものをお勧めする。Notepad++は無料であり、多くのプログラミング言語の構文ハイライト機能を備えた優れものだ。Notepad++は[https://notepad-plus-plus.org/ ここ]からダウンロードできる。 |
||
| + | ** ボーダーに[[土]]のテクスチャが使われ、画面サイズによって大きさが変化する |
||
| − | <!--*Any text editor should work but the suggested is a text editor using some sort of programming IDE. Notepad++ is an excellent, and FREE, text editor with syntax highlighting for lots of programming languages. You can download Notepad++ from here: [https://notepad-plus-plus.org/]--> |
||
| + | ; Cheat codes |
||
| − | ===pack.mcmeta=== |
||
| + | * 以下のチートコードを入力すると、メッセージが表示され、何らかのアクションが発生する。チートコードの入力はチャット欄である必要はない。 |
||
| − | pack.mcmetaファイルの構造は以下のようになっている。これは[[1.11]]以降のものである。 |
||
| + | : {| class="wikitable" |
||
| − | <!--Open <code>pack.mcmeta</code> in a text editor of your choice and copy or type the following for [[1.11]] and [[1.12]]:--> |
||
| + | ! Cheat Code !! Message !! Action |
||
| − | |||
| − | ;pack.mcmeta |
||
| − | { |
||
| − | "pack": { |
||
| − | "pack_format": 3, |
||
| − | "description": "Tutorial Resource Pack" |
||
| − | } |
||
| − | } |
||
| − | |||
| − | <code>"pack_format"</code>に入れる数字はバージョンによって異なる。[[1.9]]より前なら<code>1</code>、1.9と[[1.10]]なら<code>2</code>である。 |
||
| − | <!--<code>"pack_format"</code> requires <code>1</code> in versions before [[1.9]], and <code>2</code> as of 1.9 and [[1.10]].--> |
||
| − | |||
| − | <code>"description"</code>には、リソースパックの説明文にあたるものである(ここではTutorial Resource Pack)。基本的に英文字が推奨されるが、保存形式をUTF-8にするか、Unicodeを書くことで日本語や特殊文字も使用可能である。 |
||
| − | :*例えばÞ(ソーン)を使いたい場合は<code>\u00DE</code>と書けばよい(<code>\</code>はバックスラッシュの方)。 |
||
| − | |||
| − | <!--You can leave the description or you can change it to something more exciting. If you decide you need something with fancy characters, you can look up the code for it [[Wikipedia:List of Unicode characters|here]]. Say you want to use the letter thorn: Þ. You'd put that in as <code>\u00DE</code>. Just make sure you use a backslash and not a forward slash. --> |
||
| − | |||
| − | <span style="color:red;font-size:17px;">''';注意'''</span> |
||
| − | |||
| − | このファイルはJSON形式で書かれています!<code>""</code>や<code>()</code>、<code>{}</code>を書き漏らしていないか確認してください。さもないと'''正しく認識されません。''' |
||
| − | <!--;Note |
||
| − | This file is written in JSON! We won’t go into specifics about the format now, but be aware about how things are laid out. '''Be very careful not to forget quotation marks, colons, and curly or square brackets. Missing one of these can lead to your resource pack not working correctly!'''--> |
||
| − | |||
| − | ===リソースパックを試してみる<!--Testing our Pack-->=== |
||
| − | この段階でリソースパックとして認識されている。試しに、ゲームを起動し、[[オプション]]から[[リソースパック]]をクリックしてみよう。このようになっているはずだ。 |
||
| − | <!--Now we are ready to test it out in game! Launch ''Minecraft'' and open the [[options]], then click on ''Resource Packs''. Your game should look something like this if you used the above code:--> |
||
| − | |||
| − | <center>[[File:TestingJavaPack.png|480px|link=]]</center> |
||
| − | |||
| − | こうなっていなければpack.mcmetaに間違いがないか確認し、<code>{}</code>や<code>""</code>、<code>[]</code>に間違いがないか確認してみよう。<!--If you don’t see your pack in game, make sure your pack.mcmeta is correct. If it isn't, look for any missing curly braces { }, commas, colons :, quotation marks “”, or square brackets [ ]. Remember for each open brace, quotation, or square bracket, you must have a closing brace, quotation, or square bracket.--> |
||
| − | |||
| − | ===サムネイルを作る<!--Creating an Icon-->=== |
||
| − | [[ファイル:Default pack.png.png|サムネイル|サムネイルを作成してない場合に表示される画像|right]] |
||
| − | このままではパックのサムネイルが存在せず、右のような画像がリソースパック選択画面に表示される。これは必要ではないが気に入らなければ作ってみるとよい。<!--As you may have noticed, our pack does not have an icon! If you do not specify an icon, a grayscale icon will show up next to your pack.--> |
||
| − | |||
| − | ====画像編集ソフト==== |
||
| − | *Windows標準のペイントでもテクスチャの編集は可能だがニワトリのような透過性をもつテクスチャには向いていない。そこで、GIMPやAzPainter2(どちらもフリーソフトで透過させた画像を保存できる)のようなものを使うとよい。GIMPは[https://www.gimp.org ここ]から入手できる |
||
| − | <!--*MS Paint will work for modifying most textures, but will not work for saving out textures that have transparency (like the chicken’s). GIMP (GNU Image Manipulation Program) is a free image editing program that will allow you to save out transparent images. You can download GIMP from here: [https://www.gimp.org]--> |
||
| − | |||
| − | サムネイルの画像は128×128である。 |
||
| − | <!--In the image editor of your choice, create a new image with a size of 128 by 128 pixels.--> |
||
| − | |||
| − | ペイントを使用する場合、 |
||
| − | <!--To do this with MS Paint:--> |
||
| − | |||
| − | [[File:CreatingAnIconJava.png|thumb|left]] |
||
| − | # 「サイズ変更」をクリック |
||
| − | # 単位を「パーセント」から「ピクセル」に変え、「縦横比を維持」するのチェックを外す |
||
| − | # 「水平方向」、「垂直方向」ともに128にする |
||
| − | # 「OK」をクリック |
||
| − | <!--# Click resize |
||
| − | # Change from percentage to pixels in the resize dialog that pops up |
||
| − | # Uncheck maintain aspect ratio |
||
| − | # Type in 128 in both horizontal and vertical text entry boxes |
||
| − | # Click OK--> |
||
| − | |||
| − | これでサイズの調整は完了である。さあ、好きなアイコンを描こう。ここでは、簡単にスマイルをアイコンとして作成してみるとする。 |
||
| − | <!--Once you have the correct canvas size, draw whatever you want your icon to be. For this tutorial, we’ve created a crudely drawn smiley face:--> |
||
| − | |||
| − | <center>[[File:Crudelydrawnsmileyface.png|128px|link=]]</center> |
||
| − | |||
| − | これを<code>pack.png</code>として保存する。ちゃんと拡張子が.pngになっているか確認するように。また、保存する場所は<code>pack.mcmeta</code>と同じ場所である。 |
||
| − | |||
| − | この場合、フォルダの構成はこのようになる。 |
||
| − | <!--Save your icon with the name “''pack''” and make sure that it is saved as a <code>.png</code>. Save it into the same folder that we put our <code>pack.mcmeta</code> file. For reference, our folder should look like this now:--> |
||
| − | |||
| − | <center>[[File:Pack Icon Java.png|640px|link=]]</center> |
||
| − | |||
| − | ゲームを起動してリソースパック選択画面を開くとこのようになっているはずだ。 |
||
| − | <!--Now if we launch the game and go to the resource packs list it should look something like this:--> |
||
| − | |||
| − | <center>[[File:ResourcepackssectionJava.png|480px|link=]]</center> |
||
| − | |||
| − | さあ、リソースパックを適用しよう! |
||
| − | <!--Apply the tutorial resource pack!--> |
||
| − | |||
| − | ===エンティティのテクスチャを変更する=== |
||
| − | リソースパックのセットアップができたら次は試しにクリーパーのテクスチャを変えてみよう! |
||
| − | <!--Now that we have our resource pack set up, let’s modify the creeper’s texture! --> |
||
| − | |||
| − | その前にフォルダを構成しよう。次の要領でファイルを作成しよう。 |
||
| − | <!--However, before we can do some painting, we need to set up the folder structure that ''Minecraft'' expects resource packs to be in. To do this, do the following:--> |
||
| − | |||
| − | # ''Tutorial_resource_pack''を開き、その画面で"assets"という名前のフォルダを新規作成 |
||
| − | # 作成した"assets"フォルダを開き、"minecraft"フォルダを作成 |
||
| − | # "minecraft"フォルダを開き"textures"フォルダを作成 |
||
| − | # "textures"フォルダを開き、"entity"フォルダを作成 |
||
| − | # "entity"フォルダ内に"creeper"フォルダを作成 |
||
| − | # デフォルトのcreeper.pngをコピーし、"creeper"フォルダ内に貼り付ける。デフォルトのテクスチャは\<code>.minecraft</code>\<code>versions</code>\<code>バージョンのフォルダ</code>\<code>バージョン.jar</code>内にある。 |
||
| − | <!--# Create a folder named “''assets''” in our ''Tutorial_resource_pack'' folder |
||
| − | # Inside “''assets''”, create a folder called “''minecraft''” |
||
| − | # Inside “''minecraft''”, create a folder called “''textures''” |
||
| − | # Inside “''textures''”, create a folder called “''entity''” |
||
| − | # Inside “''entity''”, create a folder called “''creeper''” |
||
| − | # Copy the creeper texture from the Vanilla Minecraft resource pack into our newly created creeper folder.--> |
||
| − | |||
| − | 移動させたクリーパーのテクスチャを画像編集ソフトなどで開くと次のようになる。 |
||
| − | <!--Now that we have the normal creeper texture, open it up in the image editor of your choice. It should look something like this: --> |
||
| − | |||
| − | <center>[[File:CreeperTexture1.png|360px|link=]]</center> |
||
| − | |||
| − | 恐らく小さくて見づらいと感じるだろう。そんなときは表示倍率を変えるとよい。例えばWIndows標準のペイントなら右下の方に表示倍率を変えるスライダーがある。 |
||
| − | <!--You might notice your texture looking small, make sure to zoom in on the texture. In MS Paint you can control magnification in the bottom right hand corner of the window with the slider.--> |
||
| − | |||
| − | <center>[[File:CreeperTexture2.png|360px|link=]]</center> |
||
| − | |||
| − | 初めてリソースパックを作る場合、これだけ見ても何の事か分からないだろう。サイコロの展開図のようなものをイメージすると分かりやすいかもしれない。その場合、レイアウトは以下のようになっている。 |
||
| − | <!--If you’ve never seen a texture before, the above image might surprise you. The best way to think about it is like wrapping a gift with wrapping paper, but instead our wrapping paper is our texture. Here is how the creeper’s texture is laid out:--> |
||
| − | |||
| − | [[File:TextureLayoutMap.png|256px|left|link=]] |
||
| − | {| class="wikitable" |
||
| − | ! colspan=2 | Image Key |
||
|- |
|- |
||
| + | | POWEROVERWHELMING || Nothing can stop you! || プレイヤーが無敵になる。満腹度は減らなくなり、まるでクリエイティブモードであるかのように、Mob がプレイヤーを攻撃しなくなる。 |
||
| − | | Top || 上面 |
||
|- |
|- |
||
| + | | PIGSONTHEWING || FLYING=VERY YES || サバイバルモードでも飛べるようになる |
||
| − | | Bot || 下面 |
||
|- |
|- |
||
| + | | FLASHAAAAA || Gordon's ALIVE! || 1分間、「跳躍力上昇」と「移動速度上昇」、「採掘速度上昇」が付与される。 |
||
| − | | Left || 向かって左の面 |
||
|- |
|- |
||
| + | | MOREDAKKA || Got all equipment! || 非常に強力なアイテムが手に入る。 |
||
| − | | Frnt || 正面 |
||
|- |
|- |
||
| + | | IDKFA || Got all keys! || 3つの key が手に入る。 |
||
| − | | Rt || 向かって右の面 |
||
|- |
|- |
||
| + | | COWSCOWSCOWS || There is no cow level ''(but obfuscated)'' || 何も起こらない。 |
||
| − | | Bck || 後ろの面 |
||
| + | |- |
||
| + | | HOWDOYOUTURNTHISON || VROOM! || 非常に速い馬が召喚される。 |
||
| + | |- |
||
| + | | NEEEERD || Special creeper has been spawned nearby! || 特殊な[[クリーパー]]を召喚する。このクリーパーは白衣とガラスを纏っており、倒すと "3D" をドロップする。 |
||
|} |
|} |
||
| + | ; Obligatory nightmare mode |
||
| + | * ゲーム開始時に表示される難易度で選択可能な難易度の一つ。これを選ぶと、プレイヤーの体力が死ぬまで減り続け、死ぬと "<playername> was too soft for this world" と表示される |
||
| + | * この難易度を選ぼうとすると画面が赤くなる |
||
| + | <gallery> |
||
| − | <!--'''Areas with matching colors face the same direction (i.e. Red areas are always the front of a cube).'''--> |
||
| + | File:3D Shareware MS Paint drawing.png|Boss Mode |
||
| − | |||
| + | File:3D Shareware Mojang Team.png|The developer cast of Minecraft |
||
| − | これを組み立てると以下の写真のようになる。 |
||
| + | File:Tasty 3D Item.gif|The "Tasty!" 3D Item lore. |
||
| − | <!--How this looks in game:--> |
||
| + | File:Obligatory nightmare mode.png|The tint given when the player hovers over the "Obligatory nightmare mode" |
||
| − | |||
| + | </gallery> |
||
| − | <center>[[File:Howthislooksingame.jpg|480px|link=]]</center> |
||
| − | |||
| − | このテクスチャを編集してみよう。ここでは簡単にヘッドバンドを追加してみるとする。 |
||
| − | <!--Now it’s time to be creative! Edit the creeper however you want. I’m just going to add a headband for sake of simplicity.--> |
||
| − | |||
| − | <center>[[File:Creeperheadband.png|360px|link=]]</center> |
||
| − | |||
| − | 後は、<code>.png</code>形式で名前をつけて保存しよう。ただし、'''この名前は元々あったファイルと同じでなければならない(この場合は<code>creeper.png</code>)。''' |
||
| − | <!--Once you are happy with your texture, save out the file as a <code>.png</code> and '''make sure that the file name is “''creeper''”. The game will only look for files with the correct name.'''--> |
||
| − | |||
| − | ===ブロックやアイテムの形状を変える=== |
||
| − | {{Main|モデル}} |
||
| − | 時にブロックやアイテムの形状を変えたいと思うことがあるだろう。ここではその簡単なやり方を解説する。 |
||
| − | <!--Sometimes you may want to change one of the ''Minecraft'' models. Here is a quick and easy way on how to do it. --> |
||
| − | |||
| − | ====用意すべきツールなど==== |
||
| − | * モデルの変更は直接JSONテキストを編集することでも可能だが、まずはblockbenchなどのツールの利用をおすすめする。 |
||
| − | * 7-zipなどのZIPファイルを閲覧できるソフト。 |
||
| − | <!--*A 3D Modelling Editor like [http://www.minecraftforum.net/forums/mapping-and-modding/minecraft-tools/2146545-opls-model-creator-free-3d-model-editor opl's Model Creator]. You can use other modelling editors but it is recommended to use this because it is easier to use and can export to <code>.json</code> format. |
||
| − | *A ZIP viewer like [http://www.rarlab.com/download.htm WinRAR] for Windows. Other ZIP viewers can be used but this can view JAR files as well.--> |
||
| − | |||
| − | ====変更するブロックを決める<!--Replacing a Block-->==== |
||
| − | まず、モデルを変更したいブロックを決めよう。ここでは例としてデフォルトでは3Dになっていない[[はしご]]のモデルを変更する。 |
||
| − | |||
| − | まず、はしごに関するファイルの場所を示そう。 |
||
| − | <!--Because the default [[ladder]] in ''Minecraft'' isn't 3D, you can replace it with your own model. First, get all the ladder's files into this resource pack:--> |
||
| − | |||
| − | *設置されている面ごとにモデルを指定する''blockstates''ファイル ''':''' <code>assets/minecraft/blockstates</code> |
||
| − | *設置したときのモデル ''':''' <code>assets/minecraft/models/block</code> |
||
| − | *インベントリにあるときのモデル ''':''' <code>assets/minecraft/models/item</code> |
||
| − | これらを''Tutorial_Resource_Pack''内の対応したフォルダに入れておけばモデルの変更ができる。 |
||
| − | <!--#Open the ''Minecraft'' JAR file using a ZIP viewer of your choice. |
||
| − | *Navigate into the <code>assets/minecraft/blockstates</code> folder, then extract <code>ladder.json</code> to <code>Tutorial_Resource_Pack/assets/minecraft/blockstates</code> |
||
| − | *Navigate into the <code>assets/minecraft/models/block</code> folder, then extract <code>ladder.json</code> to <code>Tutorial_Resource_Pack/assets/minecraft/models/block</code> |
||
| − | *Navigate into the <code>assets/minecraft/models/item</code> folder, then extract <code>ladder.json</code> to <code>Tutorial_Resource_Pack/assets/minecraft/models/item</code> |
||
| − | *Lastly, navigate into the <code>assets/minecraft/textures/block</code> folder, then extract <code>ladder.png</code> to <code>Tutorial_Resource_Pack/assets/minecraft/textures/block</code>. |
||
| − | |||
| − | Now you can either edit the <code>ladder.png</code> using your preferred image editor, or you can edit it in your preferred modelling editor.--> |
||
| − | |||
| − | <!--====Modelling the Ladder==== |
||
| − | In modelling the ladder, we will use the recommended ''opl's Model Creator''. To open it, simply double-click it. After it has opened, press <code>Ctrl+O</code> to open the ladder model. After the open dialog has appeared, paste in <code>resourcepacks/Tutorial_Resource_Pack/assets/minecraft/models/block/ladder.json</code> in the ''"File Name"'' box. |
||
| − | |||
| − | You then should be facing a ladder which is on the south side of the box. |
||
| − | |||
| − | *Press <code>R</code> to create a new block. |
||
| − | *Resize the model to as small as one of the rungs of the ladder. Then, on the menu bar, go to ''"View -> Dialog -> Texture Manager"'' |
||
| − | *Type in the first box to ''"texture"'' and the second to ''"blocks/ladder"'' and the last, double-click the ''"C"'' button and paste in the box, <code>resourcepacks/Tutorial_Resource_Pack/assets/minecraft/textures/blocks/ladder.png</code> |
||
| − | *In the next row, type in the first box ''"particle"'', then follow the third step above. |
||
| − | |||
| − | Now we have created the particle texture of the block when broken and the main texture. |
||
| − | |||
| − | To assign a texture to a block, select all its faces and press <code>T</code> to toggle face visibility, then go to ''"View -> Dialog -> UV Editor"''. Put on the texture. This part is a little bit hard to document, so try to do it yourself.--> |
||
| − | |||
| − | ====Finishing off==== |
||
| − | When you have completed the 3D model of the ladder and saved it, launch ''Minecraft'', and test it out. Place a ladder on a wall, and you should see it's replaced model. |
||
| − | |||
| − | ===言語を追加する=== |
||
| − | {{Main|リソースパック#言語}} |
||
| − | リソースパックでは新しく言語を追加することもできる。「言語コード」を"LANG"<ref>[https://ja.wikipedia.org/wiki/ISO_639-1%E3%82%B3%E3%83%BC%E3%83%89%E4%B8%80%E8%A6%A7 ISO 639]</ref>、国・地域コードを"COUNTRY"<ref>[https://ja.wikipedia.org/wiki/ISO_3166-1#略号一覧 ISO_3166-1]</ref>とすると<code>pack.mcmeta</code>ファイルの内容はこのようになる。 |
||
| − | <!--You can add new languages to ''Minecraft'' using a resource pack.Assume your language code is 'LANG'<ref>[[wikipedia:ISO 639|ISO 639]]</ref> and country/region code is 'COUNTRY'<ref>[[wikipedia:ISO 3166-1#Current codes|ISO 3166-1]]</ref>, <code>pack.mcmeta</code> will look like:--> |
||
| − | |||
| − | ;pack.mcmeta |
||
| − | { |
||
| − | "pack": { |
||
| − | "pack_format": 3, |
||
| − | "description": "Tutorial Resource Pack" |
||
| − | }, |
||
| − | "language": { |
||
| − | "<span style='color:red'>LANG_COUNTRY</span>": { |
||
| − | "name": "<span style='color:red'>Tutorial Language</span>", |
||
| − | "region": "<span style='color:red'>Country/region name</span>", |
||
| − | "bidirectional": false |
||
| − | } |
||
| − | } |
||
| − | } |
||
| − | |||
| − | もし右から左に読ませたければ<code>"bidirectional"</code>を<code>true</code>にするとよい。 |
||
| − | <!--If you want your language to be right-to-left, set <code>"bidirectional"</code> to <code>true</code>.--> |
||
| − | |||
| − | その後、追加したい言語の言語ファイル(<code>LANG_COUNTRY.lang</code>)をリソースパックの<code>assets/minecraft/lang</code>内に設置すれば完了だ。ゲームを起動したらオプションの[[言語]]にその言語が追加されているだろう。<!--Then, put <code>LANG_COUNTRY.lang</code> in <code>assets/minecraft/lang</code> inside your resource pack. When you launch the game, choose your resource pack, open the [[Language]] selection screen, and your new language will be there.--> |
||
| + | == 変更要素 == |
||
| − | <span style="color:red;font-size:17px;">''';注意'''</span> |
||
| + | === ブロック === |
||
| − | *<code>pack.mcmeta</code>ファイルは'''langフォルダではなく<span title="assetsフォルダがある場所" style="border-bottom:1px dotted">ルートフォルダ</span>にあります。'''そのため、始めに作った<code>pack.mcmeta</code>ファイルに追加した言語を追記してください。''' |
||
| + | ; [[樽]] |
||
| − | *[[1.7]]以降、複数のリソースパックを選択し、組み合わせられるようになりました。それ以前では1つのリソースパックに入れる必要があります。<!--The <code>pack.mcmeta</code> goes in the '''root folder of your resource pack, not in the <code>assets/minecraft/lang</code> folder'''. Also note that '''the above <code>pack.mcmeta</code> is the same file as the <code>pack.mcmeta</code> file that you have created a while ago'''. As of [[1.7]], you can choose multiple resource packs at once. If you want to use your new language and resource pack for before 1.7, you need to combine them manually because multiple resource packs could not be selected before the version.--> |
||
| + | * テクスチャが2Dになり、常にこちらを向くようになった。また、発火している |
||
| − | *バージョン[[1.11]]以降、ファイル名はすべて小文字でなければならなくなりました。1.11以降なら国・地域コードは小文字で書きましょう(日本語ファイルなら<code>ja_jp.lang</code>)。 |
||
| + | * 閉じると常時樽の閉じる音が再生される。このとき樽の中が空だと爆発する。この爆発はブロックを破壊しない |
||
| + | * ワールドのあちこちにランダムに生成される |
||
| + | ** この生成のため、新しく"bonus_barrel"というルートテーブルが追加された。この中には"BFC9000"という名前で[[拡散]]エンチャントレベル1~12のクロスボウや、様々な防具や武器、効能付きの矢(効果はランダム)、様々なポーション、スプラッシュポーション、残留ポーション(効果はランダム)が含まれている |
||
| + | * 射ると爆発する。樽を空にした場合と違い、この爆発はブロックを破壊する |
||
| + | ===Mob=== |
||
| − | ===アニメーションのプロパティ=== |
||
| + | ;[[エルダーガーディアン]] |
||
| − | {{Main|リソースパック#アニメーション}} |
||
| + | * "Blue key" をドロップするようになった |
||
| − | テクスチャを変更するとき、その画像の幅を揃えて縦に並べることでアニメーションさせることができる。これはそのアニメーションに必要なファイルで、 |
||
| + | ;[ラヴェジャー]] |
||
| − | どのようにアニメーションさせるかを決める。 |
||
| + | * "Yellow key" をドロップするようになった |
||
| + | ;[[ウィザー]] |
||
| + | * "Red key" をドロッするようになった |
||
| + | ;レンダリング |
||
| − | アニメーションのプロパティには次のような例がある。 |
||
| + | * 大抵のエンティティは2Dテクスチャになり、常にこちらを向くようになった |
||
| − | <!--An example of an animation file is this:--> |
||
| + | ** [[プレイヤー]]は例外である |
||
| + | ===Gameplay=== |
||
| − | ;stone.png.mcmeta |
||
| + | * The game always runs in demo mode, even if no <code>--demo</code> flag is present, which is why no [[Realms]] button exists. |
||
| − | { |
||
| + | ** Like normal, after a 5 in-game day counter, the player is unable to use, break or place any blocks, at which point attempting to do so will show a message that the demo has expired, but normally the player can start a new world, but in this case the player cannot play anymore unless they delete their world file and create a new one. |
||
| − | "animation": { |
||
| + | * Pop-ups will appear randomly saying "Next disc required", similar to the "Minecraft [[Demo mode]]" pop-up, telling the player to "enter a new disc and press ENTER", if the player presses a button besides {{key|ENTER}} it will say "I SAID ENTER!!!" in red text below the message. If the player presses {{key|ENTER}} the popup will disappear. |
||
| − | "interpolate": true, |
||
| + | * Upon selecting an "episode" and difficulty, the player will be prompted to a traditional Minecraft Demo popup. Clicking "Purchase Now!" will have the game create a text document called "ORDER.TXT" which contains several fake games and merchandise which the player can "order" in the "MOJANG ORDER SHEET" which appears to ship your purchase to "Mojang PC Repair and Software AB" in Stockholm, Sweden. |
||
| − | "width": 1, |
||
| + | **The fake games/merchandise are as listed below: |
||
| − | "height": 7, |
||
| + | *** "MineCraft 3D - Immersive virtual-reality mining simulation with intense crafting capabilities! Our freshest and radicalest game!" |
||
| − | "frametime": 1, |
||
| + | *** "MineCraft 3D: Deeper and darker - Gigantic expansion pack: 3 new ores, 7 new weapons and 11 new enemy variants. Including Buff Crepper {{tag|[[Wikipedia:sic|sic]]}} and Evilshroom II!" |
||
| − | "frames": [ |
||
| + | *** "MineCraft 3D: Mines of North Pole - Obligatory holiday map pack. Ideal for X-mas '94!" |
||
| − | { |
||
| + | *** "MineCraft 3D: Strategy Guide - Only the hottest of tips, guides and cheats! Mandatory for every pickaxe maniac!" |
||
| − | "index": 0, |
||
| + | *** "MineCraft 3D: Themed PC-Speaker Set - Collectors' item! Guarantees best sound experience!" |
||
| − | "time": 0 |
||
| + | *** "MineCraft 3D: Sticket set - "Better than nothing". Ideal for your younger sibling!" |
||
| − | }, |
||
| + | *** "[COMMING SOON] MineCraft 3D: Action figurine set - You have to acquire them all!" |
||
| − | 1, 2, 3, 4, 5, 6, 4, 2 |
||
| + | *** "MineCraft 2 - Classic 2D Minecraft experience. If you haven't played it yet, shame on you!" (possible reference to the [[Java Edition 2.0]] April Fools' update) |
||
| − | ] |
||
| + | *** "MineCraft 2: Swedish Parliamentary Elections edition - Finally, the expansion pack you've been waiting for!" |
||
| − | } |
||
| + | *** "MineCraft 2: All the guns! - 'Nuff said" |
||
| − | } |
||
| + | *** "Fermented Herring Simulator VII - Why do you keep asking for this?" |
||
| + | *** "Fermented Herring Simulator VII: Thorium Pack - No! Really, stop!" |
||
| + | *** "Fermented Herring Simulator VII: Scratch and sniff" |
||
| + | *** "Doom 2 - Completely not related to other games named Doom. This one is about gardening." |
||
| + | ** The document has several typos that seem to be intentional. |
||
| + | ** According to the document, "Orders must be received by April 1st 1995 or while stocks last". |
||
| + | ; Difficulty |
||
| + | * When selecting difficulty in the "Select difficulty" menu each mode is displayed differently than is in-game: |
||
| + | ** Peaceful is "Hello, NoobVille" |
||
| + | ** Easy is "Filthy casual!" |
||
| + | ** Normal is "Lemon curry?" |
||
| + | ** Hard is "eXtreme to the maXxXxX!" |
||
| + | ** "Obligatory nightmare mode" functions the same as hard, but the player will continually receive damage. |
||
| + | ===General=== |
||
| − | ;Note |
||
| + | ; Loading Screen |
||
| − | All you really need to make a texture animated is the following code, though it will make each frame last only one frame: |
||
| + | * The loading screen will at first appear similar to a command prompt, displaying "By 1991–1994 Mojang Repair and Software... Loading Minecraft 3D" and several other pieces of information. |
||
| + | ** Shortly after this prompt the screen will switch to a pure white background, with a version of the Mojang logo appearing in the center of the screen, floating around, rotating and growing bigger as it gets closer until it comes to a halt at the center of the screen, displaying the company name MOJANG underneath it with a person saying "Mojang!" similar to how "Sega!" would be said on a Sega start up screen. |
||
| + | * A prompt above the loading- and title screens will display the message "UNREGISTERED VERSION" in green text against a red background scrolling from left to right. |
||
| + | ; Title screen |
||
| − | ;stone.png.mcmeta |
||
| + | * "Demo mode" is always set to "true". |
||
| − | { |
||
| + | * The "Play Demo World" button is now labeled as "Select episode" |
||
| − | "animation": {} |
||
| + | ** Clicking on it will display a list of five "episodes", only one of which is actually accessible, the others only "Available in registered version". The list of episodes as follows: |
||
| − | } |
||
| + | *** "The player is you!" (the only accessible episode) |
||
| + | *** "Knee-deep in lava" |
||
| + | *** "Not just the endermen" |
||
| + | *** "Removing [[Herobrine]]" |
||
| + | *** "All these worlds are yours except..." |
||
| + | * The "Reset Demo World" button is now labeled as "ModemPlay(TM)" <!--Is it literally "(TM)" or is it "™" ? If it's literally "(TM)" replace this comment with {{sic}}--> and clicking on it will display "Blip blop". |
||
| + | ** Clicking on it again will display "Nej!" (No! in Swedish) until the player reloads the title screen. |
||
| + | **The button is always available even if the demo world doesn't exist. |
||
| + | * A large image of a rotating 3D logo will be displayed next to splashes. |
||
| + | ; HUD |
||
| − | 保存する際、上の<code>stone.png.mcmeta</code>のように'''.pngを含めて'''アニメーションさせたいテクスチャと同じ名前にして、その後ろに<code>.mcmeta</code>をつけること。また、パック内に保存する場所もテクスチャと同じ場所に置くこと。 |
||
| + | * Health and armor are displayed as percentages |
||
| − | <!--Save the file as the same name as the texture you want animated with an <code>.mcmeta</code> in the same folder as your texture.--> |
||
| + | ** The display slots are empty in [[Creative]] mode |
||
| + | * The player's head and torso is displayed as a portrait, with the head randomly turning left and right. |
||
| + | * Hunger is displayed as a [[Raw Beef]] icon on top of a [[Bone]] |
||
| + | ** Only the bone is displayed in [[Creative]] mode |
||
| + | * The [[hotbar]] is displayed as a 3×3 grid, with the top-left slot being the first and the bottom-right being the ninth. |
||
| + | * Experience is no longer displayed |
||
| + | * Horse jump bar is displayed at the top of the screen |
||
| + | * Air bubbles are displayed above the hotbar |
||
| + | ; Pause screen |
||
| + | * Clicking the "Give Feedback" button will show a message telling players to "send us a postcard" containing the address of the [[Mojang AB]] office. |
||
| + | ; Exit screen |
||
| + | * When exiting the game, an additional screen will appear that displays "Thank you for playing MineCraft 3D" and imitates a command prompt, which can be closed out by pressing any key. |
||
| + | ; Sounds |
||
| − | ===テクスチャのプロパティ=== |
||
| + | * The Mojang jingle heard when starting up this version is a parody of the [[wikipedia:SEGA|SEGA]] jingle, most commonly heard during the early 1990s. |
||
| − | {{Main|リソースパック#プロパティ}} |
||
| + | * In place of the traditional clicking sound made normally when clicking on buttons in the menus, a more explosion-like sound will play. |
||
| − | 主に<code>assets/minecraft/textures/misc</code>内のテクスチャに適用される。その一例をここに挙げる。 |
||
| + | * All sounds have been converted to sound more "8-bit". |
||
| − | <!--An example of a texture property is this:--> |
||
| + | <gallery> |
||
| + | File:3D Shareware Loading Screen.png|Loading Screen |
||
| + | File:3D Shareware Exit Screen.png|Exit Screen |
||
| + | File:3D Shareware Default Resource Pack.png|Default Resource Pack |
||
| + | File:3D Shareware Programmer Art_Resource Pack.png|Programmer Art Resource Pack |
||
| + | File:3D Shareware Resource Pack Screen.png|Resource Pack screen |
||
| + | </gallery> |
||
| + | == Video == |
||
| − | ;shadow.png.mcmeta |
||
| + | {{yt|36d8SJJy4mw}} |
||
| − | { |
||
| + | <!-- |
||
| − | "texture": { |
||
| + | Video made by [[slicedlime]]: |
||
| − | "blur": false, |
||
| + | {{yt|phCU9oIvluo}} |
||
| − | "clamp": true |
||
| + | --> |
||
| − | } |
||
| − | } |
||
| − | + | == Issues == |
|
| + | * 3D Shareware v1.34 is not supported due to being an April Fools' joke, and therefore issues affecting it will be closed as "Invalid" in the issue tracker.<ref>{{bug|MC-147193}}</ref> |
||
| − | {{Main|Resource pack#Fonts}} |
||
| − | Character sizes in fonts are determined by the last line of pixels that contains pixels which contain a non-zero alpha. This allows additional padding to be added around characters by adding a color with an alpha level of 1, which ''Minecraft'' will consider as part of the character. |
||
| + | == Trivia == |
||
| − | ===作ったリソースパックを使ってみる<!--Testing your Resource Pack-->=== |
||
| + | * This version has the same protocol and data version with [[13w42a]]/[[13w42b|b]] and [[19w13b]] respectively, despite being incompatible. |
||
| − | * ゲームを起動する。 |
||
| + | * The only world created in this version is named "MoJang Presents" and saved under "shareware" (seen with other versions). |
||
| − | * [[オプション]]をクリック |
||
| + | * Reloading the resources via {{key|F3+T}} will briefly show the game without shaders. Changing language or changing resource packs in the settings will also remove the shaders for the duration of the loading screen. |
||
| − | * [[リソースパック]]をクリック |
||
| + | * Inside the JAR file, it contains a <code>sound.sys</code> file under the <code>assets/minecraft</code> folder. This file is a Printfox bitmap, containing the image of the developer cast of Minecraft, shown after eating the "3D" item. |
||
| − | * 左側のリストから使いたいリソースパックを探し、<span style="font-size:10pt">▶</span>を押す。 |
||
| + | * Color phrases of the keys (e.g. "Opens ''Blue'' doors") are translated to the selected language of the game. |
||
| − | * 右側のリストに表示されたら「完了」をクリック |
||
| + | * The file <code>loading.png</code> contains the text found when starting/exiting the game. At the bottom of the image, the word "Cheeky!" can be seen, which cannot be seen during normal gameplay. |
||
| − | <!--*Launch the game |
||
| + | * If the internal server kicks the player from the game it will then display the multiplayer server select screen, which should be normally inaccessible (since this version is in demo mode). This can be triggered manually by using {{cmd|kick|@s}}. |
||
| − | *Click on ''[[Options]]'' |
||
| + | * The text in the loading screen saying "Loading MINECRAF.WAD" is a reference to the file format ([[Wikipedia:.wad|.wad]]) commonly used for storing data in the games {{Wikipedia|Doom (1993 video game)|Doom}} and its sequel {{Wikipedia|Doom II}}, most likely because according to this version's backstory, Minecraft 3D was made 5 months after the initial release of the first Doom game (1994). |
||
| − | *Click on ''[[Resource Pack]]s'' |
||
| + | ** The file is named MINECRAF.WAD and not MINECRAFT.WAD per the [[Wikipedia:8.3 filename|8.3 filename]] convention of the time limiting filenames (excluding the file extension) to 8 characters. |
||
| − | *Find “''Tutorial Resource Pack''” in the list on the left and click the arrow next to it |
||
| + | * The Red, Blue and Yellow keys are also a reference to Doom and Doom II, which used the three keycard system extensively throughout much of their level designs. The IDKFA code also comes from the Doom games and, much like its functionality here, provides the player with the three keycards when typed in-game. The crossbow named BFC9000 found in barrels is most likely another reference to ''Doom'', as there is a very powerful weapon in ''Doom'' called the BFG9000. |
||
| − | *Click ''Done''--> |
||
| + | * The "Thank you for playing MineCraft 3D" text on the exit screen is a reference to the "Thank you for playing Wing Commander." message from the game [[Wikipedia:Wing Commander (video game)|Wing Commander]], which was actually an error message that was changed to the thank you message to hide the error<ref>https://www.gamasutra.com/view/news/249475/More_dirty_coding_tricks_from_game_developers.php</ref>. |
||
| + | * Several cheat codes and their output messages are references. |
||
| + | ** PIGSONTHEWING granting flight is a reference to the Pink Floyd song, "Pigs on the wing" |
||
| + | ** The output message for PIGSONTHEWING is a reference to the ''Homestar Runner'' sbemail [http://www.hrwiki.org/wiki/virus virus]. |
||
| + | ** HOWDOYOUTURNTHISON is a reference to a cheat code from ''Age of Empires II''. In that game, the cheat code, <code>how do you turn this on</code> (case-insensitive, spaces are required as this is entered into the in-game chat) spawns a Cobra car unit at a town center owned by the player. This code has become a meme in the general gaming community ([https://knowyourmeme.com/memes/age-of-empires-cobra-car-how-do-you-turn-this-on details on Know Your Meme]). |
||
| + | *** The Cobra car from ''Age of Empires 2'' is an extremely fast unit, much faster than any non-cheat unit, which is referenced by that the ''Minecraft'' cheat code summons an excessively fast horse. |
||
| + | *** This is not the first ''Age of Empires'' reference Mojang added into ''Minecraft'', the other one being the [[evoker]]s' sheep conversion spell and the associated "wololo" sound. |
||
| + | ** The COWSCOWSCOWS cheat and its output, "There is no cow level", reference a meme from the ''Diablo'' community. The alleged cow level didn't exist in the first ''Diablo'', when the rumors started and the phrase became a meme, but was added as an easter egg in ''Diablo II''. See [https://diablo.fandom.com/wiki/The_Secret_Cow_Level a wiki article on the subject]. |
||
| + | **The cheat code POWEROVERWHELMING is a reference to the invincibility cheat from ''Starcraft'' and ''Starcraft: Brood War''. |
||
| + | **MOREDAKKA is a reference to an Ork World from ''Warhammer 40K'', Moredakka. The cheat's effect likely refers to an internet meme where the phrase "More Dakka" is used to mean "more firepower." This is spawned from the fact that in the Ork's language, "Dakka" means "Attack," "Shoot," "Noisy weapon," or "Fight." Orks believe that a gun needs to be loud in order to be effective, so they make their guns as loud as possible to enhance their performance. As such, Ork Shootas (Rifles) and Sluggas (Pistols) tend to make a lot of noise when shot. |
||
| + | **FLASHAAAAA is a reference to the song ''Flash'' by ''Queen'', and the output text "Gordon's ALIVE!" is a reference to the 1980 film ''Flash Gordon'', which had a soundtrack largely composed, performed, and produced by ''Queen''. |
||
| + | * The name of the sound played when the Mojang logo is shown is called <code>awesome_intro</code>, and the sound file name is called <code>bim_bom.ogg</code>. |
||
| + | == Gallery == |
||
| − | ここから更にリソースパックの内容を変更したくなったら一度ゲームを閉じてから編集してゲームを再起動してから上の手順に従って再びテストしてください。 |
||
| + | <gallery> |
||
| − | <!--If you decide you want to make some changes to your resource pack, just close the game, edit your resource pack, relaunch the game, and follow the steps above to test your resource pack again.--> |
||
| + | File:Minecraft 3D Package.jpg |
||
| + | </gallery> |
||
| + | == See also == |
||
| − | ===ワールドに同梱する<!--Packaging Resource Packs with Worlds-->=== |
||
| − | シングルプレイではZIP形式に圧縮し、名前を<code>resources.zip</code>にしてワールドデータに入れることでワールドにリソースパックを同梱することができる。こうすることで自動的に使用される。 |
||
| − | <!--For using in singleplayer worlds, you can package your resource pack as a ZIP file named <code>resources.zip</code> inside the world directory. This will then be automatically used when playing the singleplayer world.--> |
||
| + | * [[Java Edition 2.0]] |
||
| − | ==サーバーリソースパック== |
||
| + | * [[Java Edition 15w14a]] |
||
| − | サーバーのホストなら、[[サーバー#Setting_the_server.27s_resource_pack|サーバーリソースパックに設定することができる。]] |
||
| + | * [[Java Edition 1.RV-Pre1]] |
||
| − | <!--If you are the owner of a server, you may [[Server#Setting_the_server.27s_resource_pack|set it as the resource pack of your server]].--> |
||
| − | == |
+ | == References == |
| − | 言語および国・地域コードのリスト |
||
{{reflist}} |
{{reflist}} |
||
| + | {{Java Edition versions}} |
||
| − | {{tutorials}} |
||
| + | [[fr:3D Shareware v1.34]] |
||
| − | [[en:Tutorials/Creating a resource pack]] |
||
| + | [[pl:Minecraft 3D Shareware 1.34]] |
||
| − | [[zh:教程/制作资源包]] |
||
| + | [[zh:Java版3D Shareware v1.34]] |
||
| + | [[ru:3D Shareware v1.34]] |
||
2019年6月9日 (日) 08:42時点における最新版
この記事の内容は、エイプリルフールのジョークです。
There is no actual "Minecraft 3D" version of Minecraft in development.
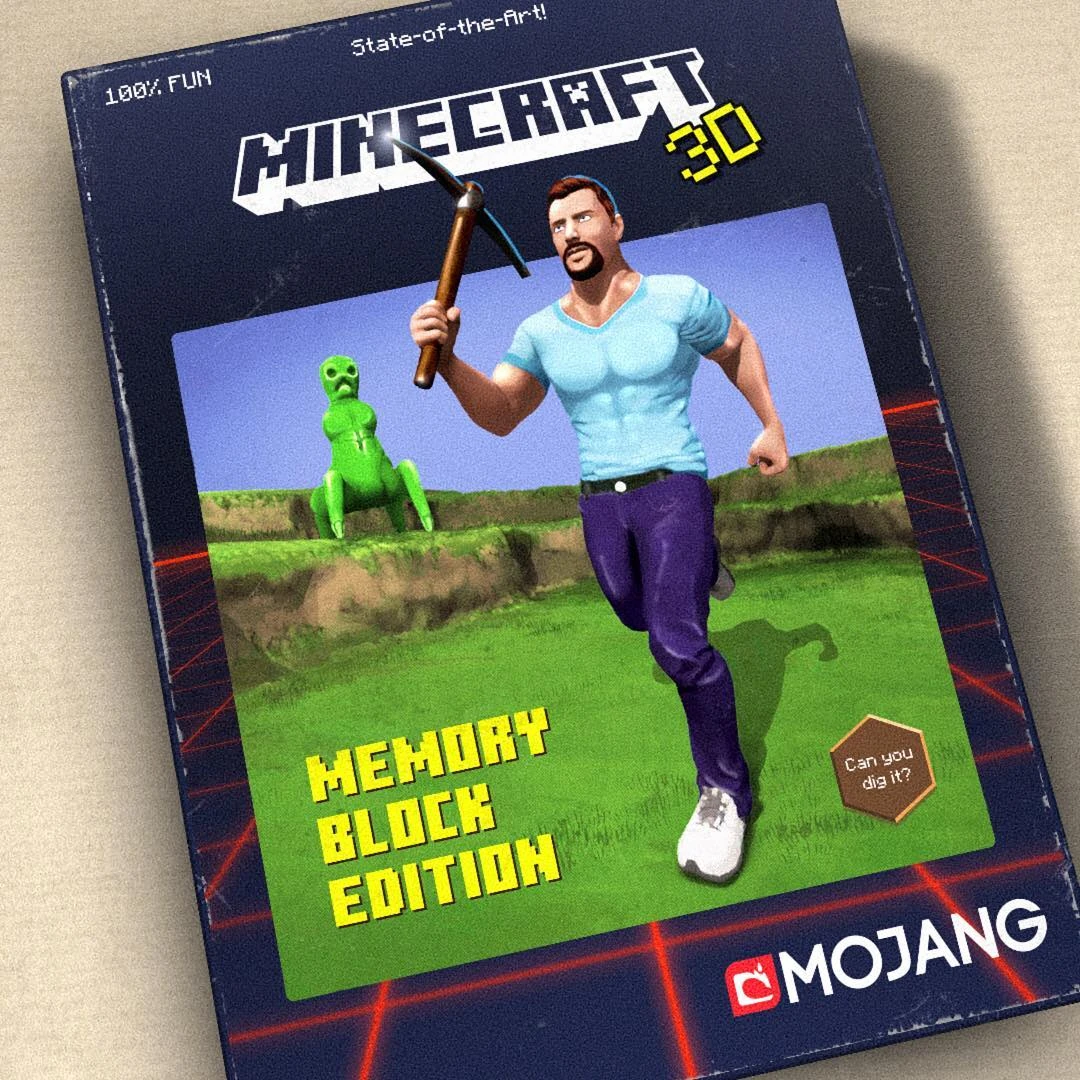
3D Shareware v1.34 はエイプリルフールのジョークとしてリリースされたもので、公式にはMinecraft 3Dと呼ばれるものである。[1]このバージョンは1990年代のテレビゲームが多く参考にされている。
開発者によると、Minecraft 3D Shareware v1.34 は、1994年4月1日にリリースされたMinecraftの「古いバージョン」が地下の昔のオフィスの「すべての瓦礫の中で」発見され、その一部がコピーされたものである。 ジョークの一部ではあるが、多くの賞を受賞し、「最先端の技術」を特色とする、「史上最高の傑作」と言われていた。[1]
追加要素
アイテム
- Red Key
- アイテム説明文によると、"Red door"を開けられる
- ウィザーがドロップする
- Blue Key
- アイテム説明文によると、"Blue door"を開けられる
- エルダーガーディアンがドロップする
- Yellow Key
- アイテム説明文によると、"Yellow door"を開けられる
- ラヴェジャーがドロップする
- 3D
- アイテム説明文によると、"tasty"
- サバイバルモードで、満腹度が最大未満だと食べることができ、食べるとMinecraftの開発者の写真が表示される
- チートコード "NEEEERD" を通して召喚されたクリーパーがドロップする

Red Key

Blue Key

Yellow Key

3D


全般
- Boss Mode
- Bボタンを押すと、単純なペイントエディターで作ったであろう絵が表示される
- Screen size
- 画面のサイズをF7で大きくし、F8で小さくすることができる
- ボーダーに土のテクスチャが使われ、画面サイズによって大きさが変化する
- Cheat codes
- 以下のチートコードを入力すると、メッセージが表示され、何らかのアクションが発生する。チートコードの入力はチャット欄である必要はない。
Cheat Code Message Action POWEROVERWHELMING Nothing can stop you! プレイヤーが無敵になる。満腹度は減らなくなり、まるでクリエイティブモードであるかのように、Mob がプレイヤーを攻撃しなくなる。 PIGSONTHEWING FLYING=VERY YES サバイバルモードでも飛べるようになる FLASHAAAAA Gordon's ALIVE! 1分間、「跳躍力上昇」と「移動速度上昇」、「採掘速度上昇」が付与される。 MOREDAKKA Got all equipment! 非常に強力なアイテムが手に入る。 IDKFA Got all keys! 3つの key が手に入る。 COWSCOWSCOWS There is no cow level (but obfuscated) 何も起こらない。 HOWDOYOUTURNTHISON VROOM! 非常に速い馬が召喚される。 NEEEERD Special creeper has been spawned nearby! 特殊なクリーパーを召喚する。このクリーパーは白衣とガラスを纏っており、倒すと "3D" をドロップする。
- Obligatory nightmare mode
- ゲーム開始時に表示される難易度で選択可能な難易度の一つ。これを選ぶと、プレイヤーの体力が死ぬまで減り続け、死ぬと "<playername> was too soft for this world" と表示される
- この難易度を選ぼうとすると画面が赤くなる
Boss Mode
The developer cast of Minecraft
The "Tasty!" 3D Item lore.
The tint given when the player hovers over the "Obligatory nightmare mode"


変更要素
ブロック
- テクスチャが2Dになり、常にこちらを向くようになった。また、発火している
- 閉じると常時樽の閉じる音が再生される。このとき樽の中が空だと爆発する。この爆発はブロックを破壊しない
- ワールドのあちこちにランダムに生成される
- この生成のため、新しく"bonus_barrel"というルートテーブルが追加された。この中には"BFC9000"という名前で拡散エンチャントレベル1~12のクロスボウや、様々な防具や武器、効能付きの矢(効果はランダム)、様々なポーション、スプラッシュポーション、残留ポーション(効果はランダム)が含まれている
- 射ると爆発する。樽を空にした場合と違い、この爆発はブロックを破壊する
Mob
- "Blue key" をドロップするようになった
- [ラヴェジャー]]
- "Yellow key" をドロップするようになった
- "Red key" をドロッするようになった
- レンダリング
- 大抵のエンティティは2Dテクスチャになり、常にこちらを向くようになった
- プレイヤーは例外である
Gameplay
- The game always runs in demo mode, even if no
--demoflag is present, which is why no Realms button exists.- Like normal, after a 5 in-game day counter, the player is unable to use, break or place any blocks, at which point attempting to do so will show a message that the demo has expired, but normally the player can start a new world, but in this case the player cannot play anymore unless they delete their world file and create a new one.
- Pop-ups will appear randomly saying "Next disc required", similar to the "Minecraft Demo mode" pop-up, telling the player to "enter a new disc and press ENTER", if the player presses a button besides ↵ Enter it will say "I SAID ENTER!!!" in red text below the message. If the player presses ↵ Enter the popup will disappear.
- Upon selecting an "episode" and difficulty, the player will be prompted to a traditional Minecraft Demo popup. Clicking "Purchase Now!" will have the game create a text document called "ORDER.TXT" which contains several fake games and merchandise which the player can "order" in the "MOJANG ORDER SHEET" which appears to ship your purchase to "Mojang PC Repair and Software AB" in Stockholm, Sweden.
- The fake games/merchandise are as listed below:
- "MineCraft 3D - Immersive virtual-reality mining simulation with intense crafting capabilities! Our freshest and radicalest game!"
- "MineCraft 3D: Deeper and darker - Gigantic expansion pack: 3 new ores, 7 new weapons and 11 new enemy variants. Including Buff Crepper[sic] and Evilshroom II!"
- "MineCraft 3D: Mines of North Pole - Obligatory holiday map pack. Ideal for X-mas '94!"
- "MineCraft 3D: Strategy Guide - Only the hottest of tips, guides and cheats! Mandatory for every pickaxe maniac!"
- "MineCraft 3D: Themed PC-Speaker Set - Collectors' item! Guarantees best sound experience!"
- "MineCraft 3D: Sticket set - "Better than nothing". Ideal for your younger sibling!"
- "[COMMING SOON] MineCraft 3D: Action figurine set - You have to acquire them all!"
- "MineCraft 2 - Classic 2D Minecraft experience. If you haven't played it yet, shame on you!" (possible reference to the Java Edition 2.0 April Fools' update)
- "MineCraft 2: Swedish Parliamentary Elections edition - Finally, the expansion pack you've been waiting for!"
- "MineCraft 2: All the guns! - 'Nuff said"
- "Fermented Herring Simulator VII - Why do you keep asking for this?"
- "Fermented Herring Simulator VII: Thorium Pack - No! Really, stop!"
- "Fermented Herring Simulator VII: Scratch and sniff"
- "Doom 2 - Completely not related to other games named Doom. This one is about gardening."
- The document has several typos that seem to be intentional.
- According to the document, "Orders must be received by April 1st 1995 or while stocks last".
- The fake games/merchandise are as listed below:
- Difficulty
- When selecting difficulty in the "Select difficulty" menu each mode is displayed differently than is in-game:
- Peaceful is "Hello, NoobVille"
- Easy is "Filthy casual!"
- Normal is "Lemon curry?"
- Hard is "eXtreme to the maXxXxX!"
- "Obligatory nightmare mode" functions the same as hard, but the player will continually receive damage.
General
- Loading Screen
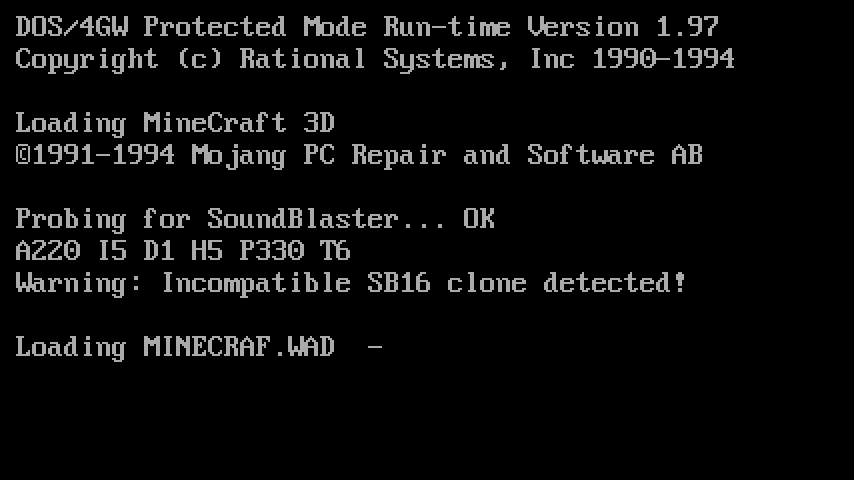
- The loading screen will at first appear similar to a command prompt, displaying "By 1991–1994 Mojang Repair and Software... Loading Minecraft 3D" and several other pieces of information.
- Shortly after this prompt the screen will switch to a pure white background, with a version of the Mojang logo appearing in the center of the screen, floating around, rotating and growing bigger as it gets closer until it comes to a halt at the center of the screen, displaying the company name MOJANG underneath it with a person saying "Mojang!" similar to how "Sega!" would be said on a Sega start up screen.
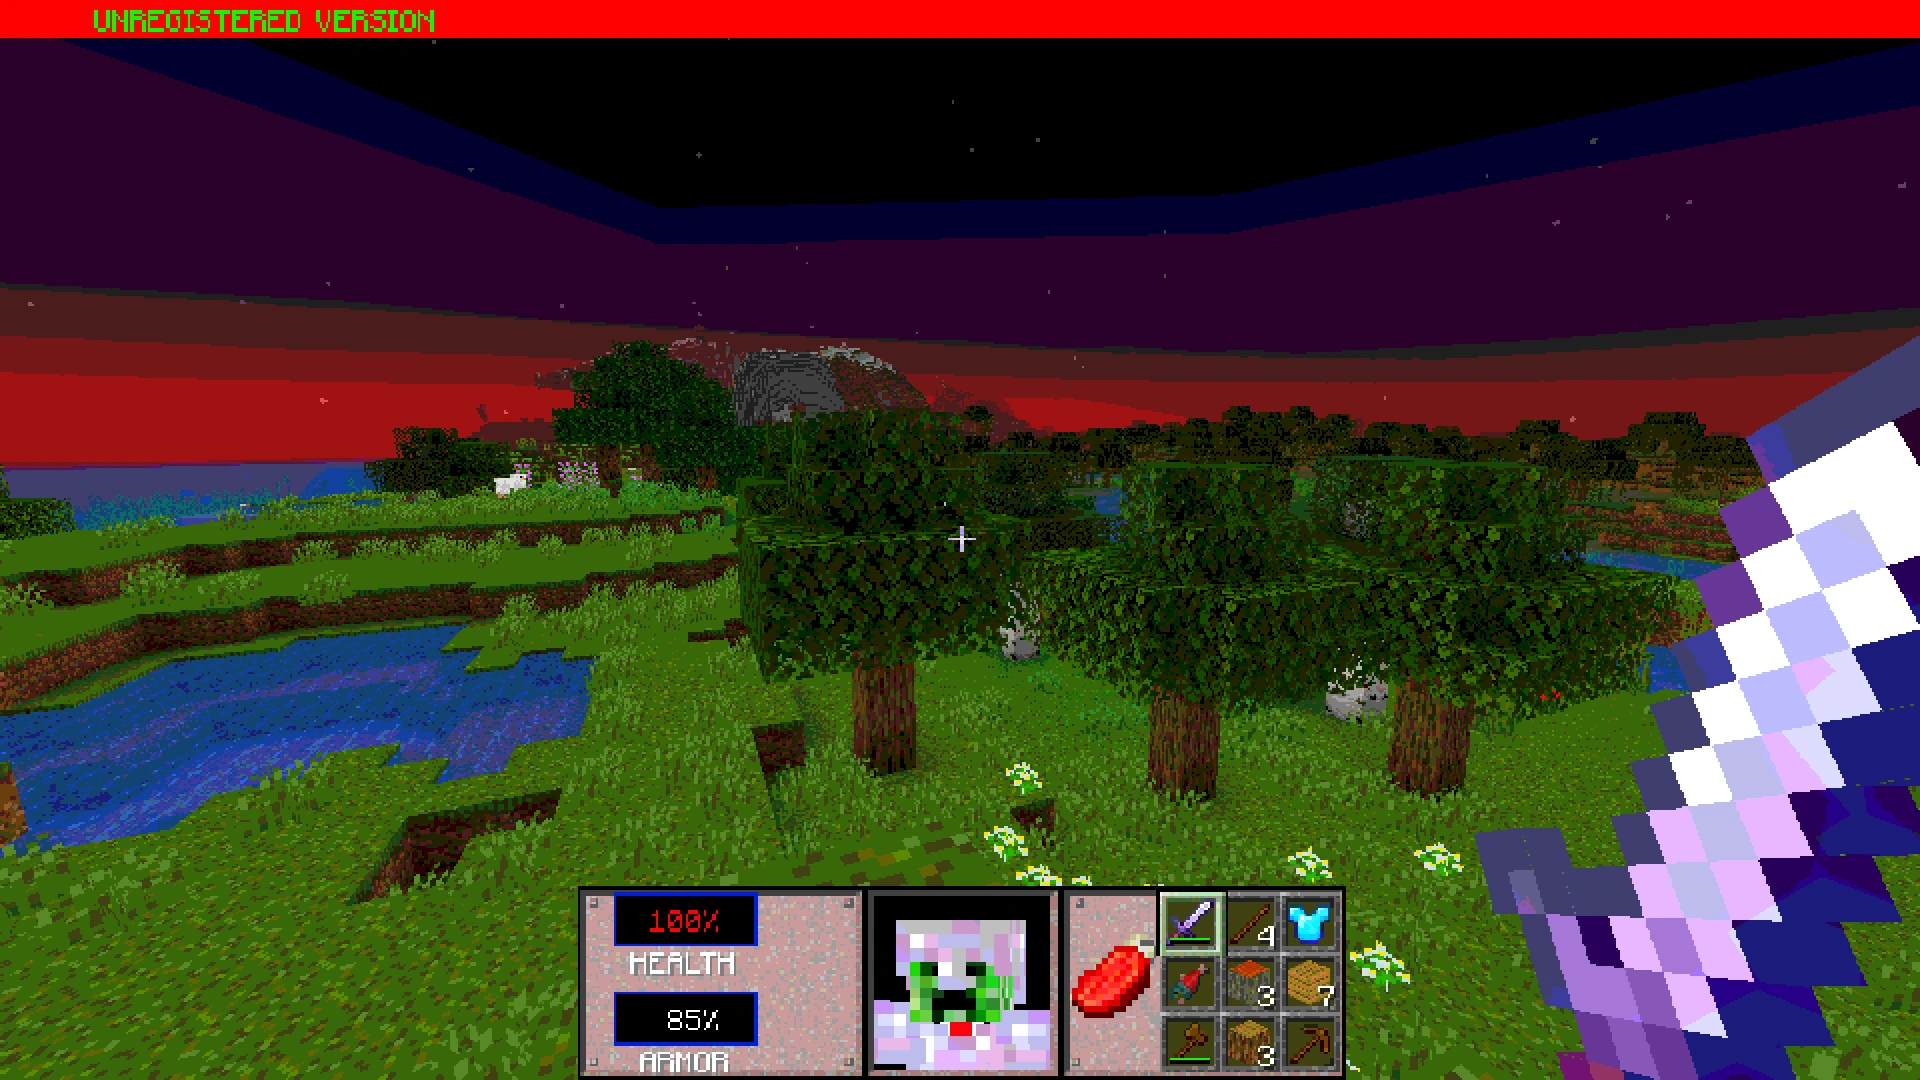
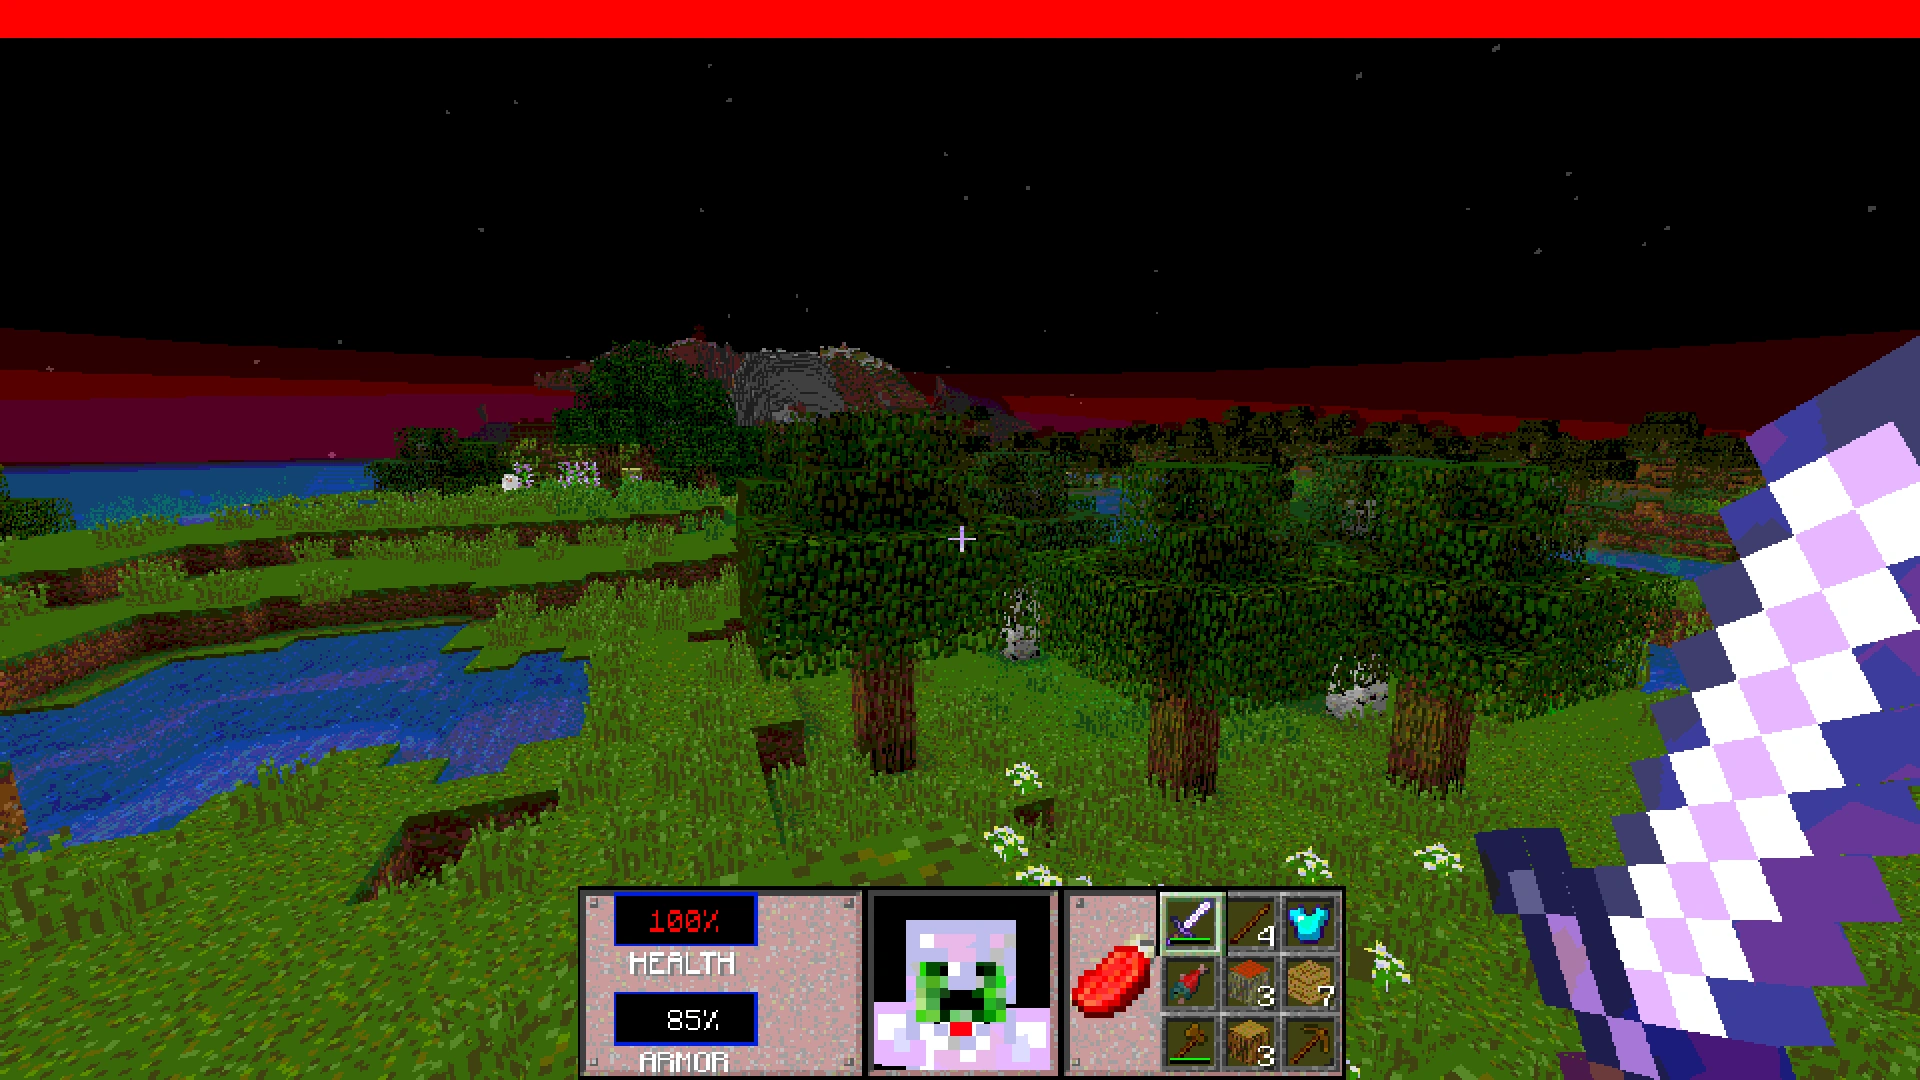
- A prompt above the loading- and title screens will display the message "UNREGISTERED VERSION" in green text against a red background scrolling from left to right.
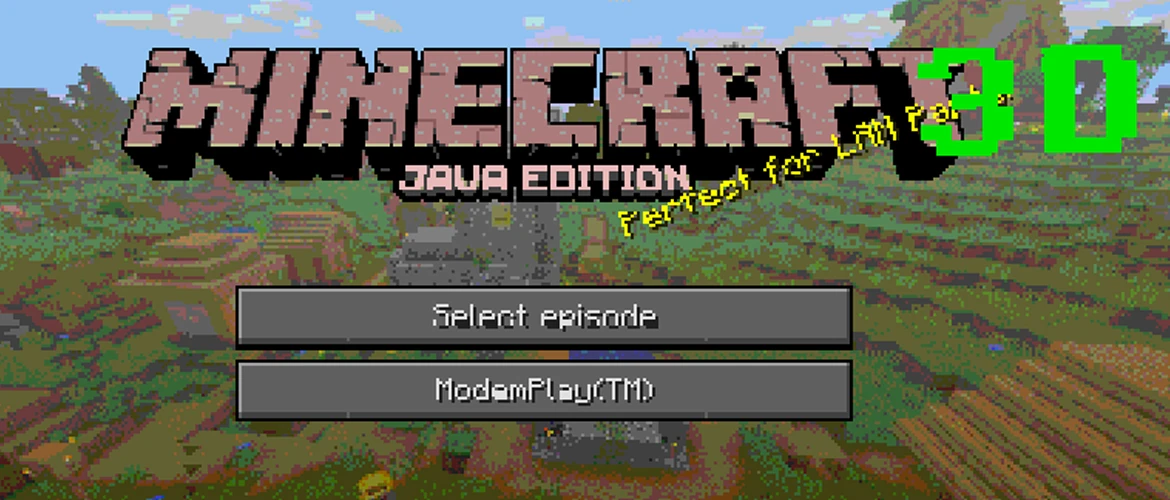
- Title screen
- "Demo mode" is always set to "true".
- The "Play Demo World" button is now labeled as "Select episode"
- Clicking on it will display a list of five "episodes", only one of which is actually accessible, the others only "Available in registered version". The list of episodes as follows:
- "The player is you!" (the only accessible episode)
- "Knee-deep in lava"
- "Not just the endermen"
- "Removing Herobrine"
- "All these worlds are yours except..."
- Clicking on it will display a list of five "episodes", only one of which is actually accessible, the others only "Available in registered version". The list of episodes as follows:
- The "Reset Demo World" button is now labeled as "ModemPlay(TM)" and clicking on it will display "Blip blop".
- Clicking on it again will display "Nej!" (No! in Swedish) until the player reloads the title screen.
- The button is always available even if the demo world doesn't exist.
- A large image of a rotating 3D logo will be displayed next to splashes.
- HUD
- Health and armor are displayed as percentages
- The display slots are empty in Creative mode
- The player's head and torso is displayed as a portrait, with the head randomly turning left and right.
- Hunger is displayed as a Raw Beef icon on top of a Bone
- Only the bone is displayed in Creative mode
- The hotbar is displayed as a 3×3 grid, with the top-left slot being the first and the bottom-right being the ninth.
- Experience is no longer displayed
- Horse jump bar is displayed at the top of the screen
- Air bubbles are displayed above the hotbar
- Pause screen
- Clicking the "Give Feedback" button will show a message telling players to "send us a postcard" containing the address of the Mojang AB office.
- Exit screen
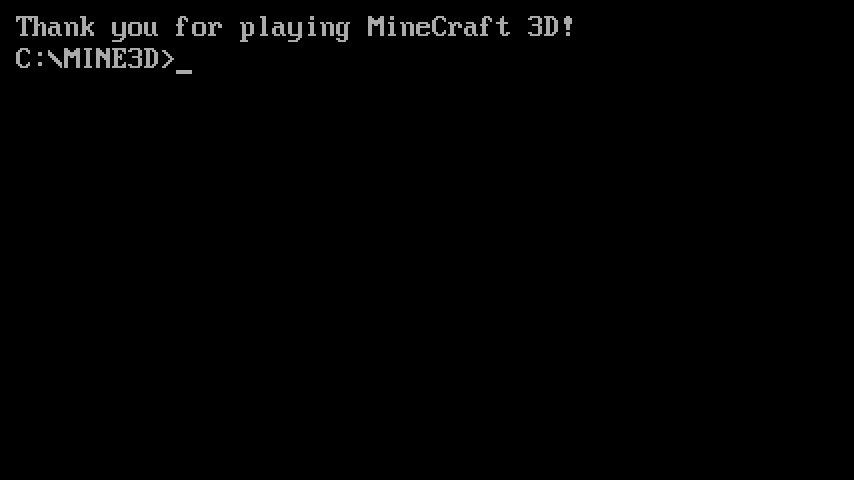
- When exiting the game, an additional screen will appear that displays "Thank you for playing MineCraft 3D" and imitates a command prompt, which can be closed out by pressing any key.
- Sounds
- The Mojang jingle heard when starting up this version is a parody of the SEGA jingle, most commonly heard during the early 1990s.
- In place of the traditional clicking sound made normally when clicking on buttons in the menus, a more explosion-like sound will play.
- All sounds have been converted to sound more "8-bit".
Loading Screen
Exit Screen
Default Resource Pack
Programmer Art Resource Pack
Resource Pack screen

Video
Issues
- 3D Shareware v1.34 is not supported due to being an April Fools' joke, and therefore issues affecting it will be closed as "Invalid" in the issue tracker.[2]
Trivia
- This version has the same protocol and data version with 13w42a/b and 19w13b respectively, despite being incompatible.
- The only world created in this version is named "MoJang Presents" and saved under "shareware" (seen with other versions).
- Reloading the resources via F3 + T will briefly show the game without shaders. Changing language or changing resource packs in the settings will also remove the shaders for the duration of the loading screen.
- Inside the JAR file, it contains a
sound.sysfile under theassets/minecraftfolder. This file is a Printfox bitmap, containing the image of the developer cast of Minecraft, shown after eating the "3D" item. - Color phrases of the keys (e.g. "Opens Blue doors") are translated to the selected language of the game.
- The file
loading.pngcontains the text found when starting/exiting the game. At the bottom of the image, the word "Cheeky!" can be seen, which cannot be seen during normal gameplay. - If the internal server kicks the player from the game it will then display the multiplayer server select screen, which should be normally inaccessible (since this version is in demo mode). This can be triggered manually by using
/kick @s. - The text in the loading screen saying "Loading MINECRAF.WAD" is a reference to the file format (.wad) commonly used for storing data in the games Doom and its sequel Doom II, most likely because according to this version's backstory, Minecraft 3D was made 5 months after the initial release of the first Doom game (1994).
- The file is named MINECRAF.WAD and not MINECRAFT.WAD per the 8.3 filename convention of the time limiting filenames (excluding the file extension) to 8 characters.
- The Red, Blue and Yellow keys are also a reference to Doom and Doom II, which used the three keycard system extensively throughout much of their level designs. The IDKFA code also comes from the Doom games and, much like its functionality here, provides the player with the three keycards when typed in-game. The crossbow named BFC9000 found in barrels is most likely another reference to Doom, as there is a very powerful weapon in Doom called the BFG9000.
- The "Thank you for playing MineCraft 3D" text on the exit screen is a reference to the "Thank you for playing Wing Commander." message from the game Wing Commander, which was actually an error message that was changed to the thank you message to hide the error[3].
- Several cheat codes and their output messages are references.
- PIGSONTHEWING granting flight is a reference to the Pink Floyd song, "Pigs on the wing"
- The output message for PIGSONTHEWING is a reference to the Homestar Runner sbemail virus.
- HOWDOYOUTURNTHISON is a reference to a cheat code from Age of Empires II. In that game, the cheat code,
how do you turn this on(case-insensitive, spaces are required as this is entered into the in-game chat) spawns a Cobra car unit at a town center owned by the player. This code has become a meme in the general gaming community (details on Know Your Meme).- The Cobra car from Age of Empires 2 is an extremely fast unit, much faster than any non-cheat unit, which is referenced by that the Minecraft cheat code summons an excessively fast horse.
- This is not the first Age of Empires reference Mojang added into Minecraft, the other one being the evokers' sheep conversion spell and the associated "wololo" sound.
- The COWSCOWSCOWS cheat and its output, "There is no cow level", reference a meme from the Diablo community. The alleged cow level didn't exist in the first Diablo, when the rumors started and the phrase became a meme, but was added as an easter egg in Diablo II. See a wiki article on the subject.
- The cheat code POWEROVERWHELMING is a reference to the invincibility cheat from Starcraft and Starcraft: Brood War.
- MOREDAKKA is a reference to an Ork World from Warhammer 40K, Moredakka. The cheat's effect likely refers to an internet meme where the phrase "More Dakka" is used to mean "more firepower." This is spawned from the fact that in the Ork's language, "Dakka" means "Attack," "Shoot," "Noisy weapon," or "Fight." Orks believe that a gun needs to be loud in order to be effective, so they make their guns as loud as possible to enhance their performance. As such, Ork Shootas (Rifles) and Sluggas (Pistols) tend to make a lot of noise when shot.
- FLASHAAAAA is a reference to the song Flash by Queen, and the output text "Gordon's ALIVE!" is a reference to the 1980 film Flash Gordon, which had a soundtrack largely composed, performed, and produced by Queen.
- The name of the sound played when the Mojang logo is shown is called
awesome_intro, and the sound file name is calledbim_bom.ogg.