Engineer314 (トーク | 投稿記録) 編集の要約なし タグ: モバイル編集 モバイルウェブ編集 |
(49.96.35.139 (トーク) による版 250015 を取り消し) タグ: 取り消し |
||
| (7人の利用者による、間の72版が非表示) | |||
| 1行目: | 1行目: | ||
| + | '''TNTキャノン'''({{en|TNT cannon}})は、[[TNT]]あるいは[[爆発]]を引き起こす[[エンティティ]]の爆風によって[[TNT]]や[[TNT付きトロッコ]]を発射させる装置である。 |
||
| − | 3{{翻訳途中}} |
||
| − | '''TNTキャノン''' ('''TNT cannon''') は、[[TNT]] あるいは[[爆発]]を引き起こす[[エンティティ]]の爆風によって [[TNT]] や [[TNT付きトロッコ]]を発射させる装置である。 |
||
{{TOC|right}} |
{{TOC|right}} |
||
== 概要 == |
== 概要 == |
||
| − | ここではTNT炸薬でTNT弾頭を発射する旧式のキャノンについて解説してい |
+ | ここではTNT炸薬でTNT弾頭を発射する旧式のキャノンについて解説している。Java Edition 1.8以上では[[スライムブロック]]でTNTを打ち上げるTNTキャノンを作ることも可能である。 |
=== 構成 === |
=== 構成 === |
||
| 12行目: | 11行目: | ||
* 配線 |
* 配線 |
||
** 着火用 |
** 着火用 |
||
| + | *** 圧縮用 |
||
| − | *** 着火後の1箇所への収集用 |
||
** 発射用 |
** 発射用 |
||
** その他 |
** その他 |
||
* 爆発物 |
* 爆発物 |
||
| + | ** 炸薬用 |
||
| − | ** 発射に必要なエネルギー用 |
||
| − | ** |
+ | ** 弾頭用 |
* 爆発耐性に優れた外装 |
* 爆発耐性に優れた外装 |
||
* その他ブロック |
* その他ブロック |
||
| 23行目: | 22行目: | ||
=== 基本概念 === |
=== 基本概念 === |
||
| − | * TNTキャノンは[[TNT]]が水中で[[爆発]]した場合、[[ブロック]]を破壊しないという仕様を基に作動する。通常、TNT等の着火にはレッドストーンが用いられる |
+ | * TNTキャノンは[[TNT]]が水中で[[爆発]]した場合、[[ブロック]]を破壊しないという仕様を基に作動する。通常、TNT等の着火には[[レッドストーン]]が用いられる(まず炸薬に着火し、信号を遅延させて弾頭に着火する)。 |
| − | * [[プレイヤー]]、[[ |
+ | * [[プレイヤー]]、[[Mob]]、[[TNT]]、[[矢]]、[[砂]]や[[砂利]]、[[金床]]など、ほとんどの[[エンティティ]]を弾頭として使用できる。 |
| + | * 射撃の際は弾頭が[[水]]に着弾しないようにすることを推奨する(耐水弾を使用していない場合)。 |
||
| − | * 炸薬とは、弾頭を発射するための[[TNT]]である。 |
||
| − | * |
+ | * 炸薬とは、弾頭を発射するためのTNTである。 |
| + | * テストの際は、着弾点に水を設置しよう。でなければ景観が破壊され、Mobも[[ダメージ]]を受けるだろう。 |
||
| − | * 適正に射撃するために(そしてキャノンの自爆を避けるために)弾頭に着火する前に炸薬に着火する必要がある。 |
||
| − | * 炸薬は |
+ | * 適正に射撃するために(そしてキャノンの自爆を避けるために)弾頭に着火する前に炸薬に着火する必要がある。炸薬は水に漬けられている為キャノンは破壊されないが、弾頭は水に漬けられていない為、ブロックを破壊しMobにダメージを与えるだろう。 |
| − | * 別の箇所で説明している通り、 |
+ | * 別の箇所で説明している通り、レッドストーンは爆縮用炸薬を除く全ての炸薬を同時に着火するために使用する。 |
* 射程を最大まで伸ばすには、射角を約30度に設定し、炸薬と弾頭の距離をできるだけ近づけて炸薬の爆風を最大限に弾頭へ伝える必要がある。 |
* 射程を最大まで伸ばすには、射角を約30度に設定し、炸薬と弾頭の距離をできるだけ近づけて炸薬の爆風を最大限に弾頭へ伝える必要がある。 |
||
* さらに射程を伸ばしたい場合は、高い位置にTNTキャノンを作ると良い。 |
* さらに射程を伸ばしたい場合は、高い位置にTNTキャノンを作ると良い。 |
||
| − | * |
+ | * 矢、砂や砂利、金床、またはMobを弾頭として使用する場合はピストンで落とす必要がある。 |
| − | |||
| − | これは、基本的な TNTキャノンのチュートリアル動画である。 |
||
| − | |||
| − | {{yt|5HXQBVbF6iQ}} |
||
== キャノンの名前 == |
== キャノンの名前 == |
||
| 48行目: | 43行目: | ||
一般名称はTNTキャノンの性能を示す。これは二種類のTNTキャノンの性能を比較するときに便利であり、名前を見るだけで基本的な性能を知ることができる。 |
一般名称はTNTキャノンの性能を示す。これは二種類のTNTキャノンの性能を比較するときに便利であり、名前を見るだけで基本的な性能を知ることができる。 |
||
| − | ダメージ量、コスト、弾頭数、有効射程とニックネームを下のテンプレートに当てはめて名付る。 |
+ | ダメージ量、コスト、弾頭数、有効射程とニックネームを下のテンプレートに当てはめて名付ける。 |
<ダメージ量>.<作成難度>:<弾頭数>.<有効射程> <ニックネーム> |
<ダメージ量>.<作成難度>:<弾頭数>.<有効射程> <ニックネーム> |
||
| 60行目: | 55行目: | ||
[[ファイル:TNTCannonCommonAccuracy.png|400px|right]] |
[[ファイル:TNTCannonCommonAccuracy.png|400px|right]] |
||
| + | 画像では、精度は青い線の長さの平均である。赤い点は爆発の位置の平均であり、青い線の終点である。他は爆発線。精度値の式は <code>(45-A)*2</code>ここで、Aが精度である。 |
||
| − | In the image to the right, the accuracy input is the average of the lengths of the blue lines. The red dot is the average of the positions of the explosions, and an endpoint of each of the blue lines, the others being the explosions.The accuracy value equation is <code>(45-A)*2</code>, where "A" is the accuracy input. |
||
| + | パワー値は弾頭数に10を掛けたものである。 |
||
| − | The power value is the number of TNT in the shot times ten. |
||
| + | 速度はキャノンの前面から爆発の中心までの距離の平均である。速度値の式はS/5である。Sが速度。 |
||
| − | The speed input is the distance between the front of the cannon to the average position of the centers of the explosions. The speed value equation is S/5, where "S" is the speed input. |
||
| − | + | 損傷値はこの式を用いて算出する: <code>(((45 - A)*2) + (P*10) + (S/5)) / 3</code> |
|
| + | ;人間工学値 |
||
| − | ;Ergonomic value |
||
| + | 人間工学値はキャノンの建設がどれだけ難しいかを示し、値が大きいほど簡単に 建設出来ることを意味する。これは、構築値、レッドストーン値およびTNT値の平均である。 |
||
| − | Ergonomic value tells how hard a cannon is to build, higher values signifying easier build. It is the average of the construction, redstone, and TNT values. |
||
| + | 構築値は、火、水、空気、TNTを除く、キャノンのブロック数の推定値である。算出には <code>(1000 - B)/10</code> を用いる。Bが構築値であると仮定する。 |
||
| − | The construction input is an estimate of the number of blocks in the cannon, excluding fire, water, air, and TNT. The construction value is <code>(1000 - B)/10</code>, assuming "B" is the construction input. |
||
| + | レッドストーン値はレッドストーンの複雑さの1~10の推定値から10を引いたものである。 <code>(10-R)*10</code> Rが推定値。 |
||
| − | The redstone value is ten minus an estimate from one to ten of the complexity of the redstone, times ten; <code>(10-R)*10</code>, where "R" is the estimate. |
||
| − | + | TNT値は <code>(50 - T) * 2</code> で、Tはキャノンをフル稼働させる為に必要なTNTの数を表す。 |
|
| − | + | EVを計算する方程式の全体は <code>((1000 - B)/10 + ((10 - R)*10) + ((50 - T)*2)) / 3</code> である。 |
|
| + | ;その他 |
||
| − | ;Other |
||
| + | 弾頭数、有効射程、ニックネームは一目瞭然だが、より明確にするために、EVのTNT値と同じであるTA、キャノンの前面から最も遠い場所での爆発までの距離であるMRを追加する。 |
||
| − | TNT amount, maximum range, and nickname are pretty self-explanatory, but to clarify, the TA is the same as the TNT value of the EV, and the MR is the distance from the front of the cannon to the farthest explosion. |
||
| + | 下品でないことや、他のキャノンのニックネームと被らないことを前提に、どんなニックネームを名付けてもよい。 |
||
| − | The nickname is whatever you name it, assuming it's not profane, and nobody else has already named a similar cannon. |
||
| − | + | これが 40.86:8.104 Basic Canonの名前の由来である。 |
|
| − | + | ダメージ値 = (((45 - {{Tooltip|0|Accuracy input}})*2) + ({{Tooltip|1|Power input}}*10) + ({{Tooltip|104|Speed input}}/5)) / 3 = 40 |
|
| − | + | 人間工学値 = ((1000 - {{Tooltip|50|Construction input}})/10 + ((10 - {{Tooltip|2|Redstone complexity}})*10) + ((50 - {{Tooltip|8|TNT used}})*2)) / 3 = 86 |
|
{{Tooltip|40|Damage value}}.{{Tooltip|80|Ergonomic value}}:{{Tooltip|8|TNT used}}.{{Tooltip|104|Maximum range}} {{Tooltip|Basic|Nickname}} |
{{Tooltip|40|Damage value}}.{{Tooltip|80|Ergonomic value}}:{{Tooltip|8|TNT used}}.{{Tooltip|104|Maximum range}} {{Tooltip|Basic|Nickname}} |
||
| − | === |
+ | === 技術的名称 === |
| + | 技術的名称は、機能、用途、操作方法を示す。TNTキャノンの技術のすべての革新を予測することは不可能だが、ほとんどのキャノンはこれらの標準を技術的名称に使用することで利益を得られる。 |
||
| − | A cannon's technical name should give its readers a complete picture of its function, use, and method of operation. While it is impossible to anticipate every innovation in TNT cannon technologies, most cannons will benefit from using these standards in their technical names. |
||
| + | * 技術的名称の最初の数字は、炸薬用の垂直列の数である。例のキャノンでは1。 |
||
| − | * The first number in a technical TNT cannon name designates how many vertical rows of TNT it has for the charge. The example cannon has 1. |
||
| + | * 次の数は、弾頭数である。繰り返すが例のキャノンでは1。 |
||
| − | * The next number is the amount of shot TNT. Again, the example cannon has 1. |
||
| + | * 次の数は炸薬数である。 |
||
| − | * Next, the number designates how many charge blocks of TNT the cannon has. |
||
| + | * 爆縮システム搭載の場合、炸薬数を書き込んだ後、小数点を書き、爆縮用炸薬数を書き込む。搭載していない場合は0を書き込む。 |
||
| − | * If there is a TNT condensation system, after you wrote the charge number, write a decimal point, then the amount of condensation charge TNT. If there is no such TNT, write 0 instead. |
||
| + | * その後、リピーター数と設定されている遅延をリストする。例えば、4ティック(最大遅延)の[[レッドストーンリピーター]]が10個ある場合、R4.10と表記する。レッドストーンリピーターがない場合は手動でMを作成する。 |
||
| − | * After that, you list how many repeaters there are, and how much they are set to. E.g. If you have 10 repeaters set to 4 (which is the maximum setting), you would list R4.10. If there are no repeaters, you would write an M for manual. |
||
| + | * 取り付けブロックはコードで指定する。ブロックなしの場合は0または1、フルブロックは2、[[ハーフブロック]]は3、[[はしご]]、[[ガラス板]]、[[鉄格子]]は4、[[トラップドア]]は5、[[フェンス]]、[[感圧板]]は6、[[ピストン]]は7。 |
||
| − | * The mounting block is designated by a code: 0 or 1 for no block, 2 for full block, 3 for slab, 4 for ladder, glass pane, or iron bar, 5 for trapdoor, 6 for fence post and pressure plate, 7 for piston. |
||
| + | * キャノンが特殊な射撃(垂直射撃など)を行う場合、または広角射撃を行う場合は取り付けブロックコードを書き込んだ後にそれを書き足す。 |
||
| − | * If the cannon does something special, like shoot vertically, or does a spread shot, write that after the mounting block code. |
||
| + | * そして、キャノンのニックネームはもちろんここに来る。 |
||
| − | * Then, of course, the nickname of the cannon goes here. |
||
| + | 上記のTNTキャノンは「114.0R4.4M2」という名前になる。 |
||
| − | The featured TNT cannon above would be named ''114.0R4.4M2''. |
||
== 建設に必要な材料 == |
== 建設に必要な材料 == |
||
| 112行目: | 107行目: | ||
1. 本体 |
1. 本体 |
||
* [[丸石]]など一般的な[[ブロック]]を使用する。 |
* [[丸石]]など一般的な[[ブロック]]を使用する。 |
||
| − | ** |
+ | ** マルチプレイで、別のキャノンへ向けて射撃する際は[[爆発耐性]]の高いブロックを使用する(TNTキャノンへの防御については以下を参照)。 |
| − | * もうひとつの要項は可視性である。 |
+ | * もうひとつの要項は可視性である。黒曜石で本体を作る際は、[[レッドストーン]]ダストが見えにくく、これが致命的なミスへ繋がる可能性がある。一方、森などで待ち伏せを想定している場合は、オレンジの[[羊毛]]や[[ラピスラズリブロック]]など、目立つブロックの使用は避ける。 |
2. 配線 |
2. 配線 |
||
* 炸薬に着火する配線と弾頭に着火する配線の、主要な2つの配線がある。 |
* 炸薬に着火する配線と弾頭に着火する配線の、主要な2つの配線がある。 |
||
| − | ** [[レッドストーンリピーター]]がない場合、[[ボタン]]などの2つの動力源を手動で操作する。 |
+ | ** [[レッドストーンリピーター]]がない場合、[[ボタン]]などの2つの動力源を手動で操作する。手動で操作する場合、弾頭用の[[ドロッパー]]に接続する回路と、炸薬に着火する回路だけでいい。ただし、自爆を防ぐためにそれぞれのボタンを押すタイミングを計らなければならない。 |
| − | ** |
+ | ** レッドストーンリピーターを使う場合は別の話になる。炸薬に着火してから弾頭に着火するまでの時間は40[[ティック]](最大遅延のレッドストーンリピーター×10)である。1つの動力源だけを使用し、操作も手動より簡単である。 |
| + | 3. 取り付けブロック |
||
| − | 3. Mounting block |
||
| + | * 取り付けブロック(以下で説明)は特殊なブロックのみである。 |
||
| − | * Mounting blocks (described below) are only certain special blocks. |
||
| + | 4. 耐爆カバー |
||
| − | 4. Explosion housing |
||
| + | * ドライキャノンでない限り、これは[[溶岩]]か[[水]]でなければならない(後者の場合、水源のみ)。液体は、キャノンと周囲のブロックが破壊されるのを防ぐ。 |
||
| − | * Unless it's a dry cannon, this must be water For lava (in the latter case, only source blocks). The liquid prevents the cannon and any other surrounding blocks from being destroyed. |
||
=== クリエイティブモード === |
=== クリエイティブモード === |
||
| 130行目: | 125行目: | ||
[[クリエイティブモード]]では、戦争用にTNTキャノンを建設する理由はないが、テストと開発に適している。 |
[[クリエイティブモード]]では、戦争用にTNTキャノンを建設する理由はないが、テストと開発に適している。 |
||
| − | === |
+ | === 派閥 === |
| + | 派閥では、TNTキャノンでの襲撃が基地に入る最も一般的な方法である。主に2つの方法がある。これは水のある黒曜石でのみ動作する。最初の(有効になっているサーバー上で)ものは外にエアバーすることである。爆発が黒曜石に到達するよう、キャノンの発射には遅延が必要だが、着火されたTNTは水の中にあってはいけない。これらのキャノンは他の壁では機能しない。他の方法は、以下で説明するハイブリッドキャノンを使用する方法である。基本的なハイブリッドは、最も一般的に使用される襲撃砲の1つである。 |
||
| − | In factions raiding with TNT cannons is the most common way of getting into a base. There are two main methods. st. This only works on obsidian with wateThe first(on servers where enabled) is to airburr outside. The cannon shot must have a delay so the explosion reaches the obsidian but the primed TNT must not be in the water. These cannons will not work on other walls. The other method is with hybrid cannons which are explained below. The basic hybrid is one of the most commonly used raiding cannons. |
||
| − | == 制限 |
+ | == 制限およびそれらを解除する方法 == |
TNTキャノンのエンジニアリングにおける5つの制限は以下の通り: |
TNTキャノンのエンジニアリングにおける5つの制限は以下の通り: |
||
| − | + | # 何をしてもTNTは着火されてから約4秒間、8回点滅する。これを回避するにはTNTをより速く飛ばす必要があるが、これによって制限が2になる。 |
|
| + | # [[エンティティ]]が脱出速度で飛行すると''Minecraft''がクラッシュする可能性がある。''Minecraft''のクラッシュを引き起こす可能性のあるもうひとつのことは、大量の炸薬が同時に爆発することである。割り当てられた1.5GBのRAMで、TNTの最大数は約500である。これを回避する方法は、''Minecraft''に許可されているRAMを増やすことだが、低スペックのコンピューターには推奨できない。 |
||
| − | *これを回避するには[[TNT]]をより速く飛ばす必要があるが、これによって制限が2になる。 |
||
| + | # TNTの爆発範囲は7ブロックなので、大きなキャノンを作るだけでは無駄である。弾頭と炸薬の距離が9ブロックを超えると、無駄な爆発が発生する。これは垂直機構を追加するか、圧縮システムを採用するか、または両方を組み合わせる事で回避できる。 |
||
| − | 2. [[エンティティ]]が脱出速度で飛行すると[[マインクラフト]]がクラッシュする可能性がある。[[マインクラフト]]のクラッシュを引き起こす可能性のあるもうひとつのことは、大量の炸薬が同時に爆発することである。 |
||
| + | # 着火されたTNTは[[水流]]に流される。これは状況に応じて、いい場合も悪い場合もある。[[水源]]にすることで回避出来る。 |
||
| − | *割り当てられた1.5GBのRAMで、TNTの最大数は約500である。これを回避する方法は、[[マインクラフト]]に許可されているRAMを増やすことだが、低スペックのコンピューターには推奨できない。 |
||
| + | # 垂直機構を強化し過ぎると弾速が速くなり過ぎて、ゲームがクラッシュする。キャノンの威力を落とすか、半垂直にすることで回避できる。 |
||
| − | 3. TNTの爆発範囲は7ブロックなので、大きなキャノンを作るだけでは無駄である。弾頭と炸薬の距離が9ブロックを超えると、無駄な[[爆発]]が発生する。 |
||
| − | *これは垂直機構追加するか、爆縮システムを採用するか、又は両方を組み合わせる事で回避できる。 |
||
| − | 4. 着火された[[TNT]]は[[水流]]に流される。これは状況に応じて、いい場合も悪い場合もある。 |
||
| − | *[[水源]]にすることで回避出来る。 |
||
| − | 5. 垂直機構を強化し過ぎると弾速が速くなり過ぎて、ゲームがクラッシュする。 |
||
| − | *キャノンの威力を落とすか、半垂直にすることで回避できる。 |
||
== キャノンのサイズと特別な機能 == |
== キャノンのサイズと特別な機能 == |
||
| − | [[ファイル:Front Daytime.png|263px|thumb|right| |
+ | [[ファイル:Front Daytime.png|263px|thumb|right|大規模なキャノンの例]] |
| + | キャノンのサイズのデフォルトの定義は、弾頭数または射程距離である。小規模なキャノンについて話している場合は、キャノンのサイズ(例えばそれが占めるスペース)で、大量破壊兵器について話している場合は、弾頭数であるかもしれない。しかし、多くの場合は炸薬数である。 |
||
| − | The default definition of cannon size is how many TNT are in the shot or how far it fires. If you are talking about compact cannons, you might be talking about literally the size of the cannon (e.g. how much space it takes up) or if you are talking about cannons meant for mass destruction, you might be talking about the size of the shot. But usually, people mean charge mass. |
||
| + | 112.0MM3 などの小型のキャノンは、射程が非常に狭い。対人用。 |
||
| − | A small cannon, such as a 112.0MM3 cannon, only has a very small range, and is meant for stopping large amounts of rushing players or mobs. |
||
| + | 116.0R4.6M2 などの中型のキャノンは、最初のラインシージャー(その後の射撃のための目安)として設定し、物資や壁などのターゲットへ向けて、[[矢]]のカバーを付けて設定するか、ターゲットとして設定することを目的としている。射手キャノン。 |
||
| − | A medium cannon, such as the 116.0R4.6M2 is meant for setting up as a first line sieger, to be set up and aimed at a target such as supplies or a wall while one has arrow cover, or to be set up as an anti-archer cannon. |
||
| + | 119.0R4.10M3 などの大型のキャノンは、遠くからの攻撃、国境からの長距離迫撃砲、対キャノン防御、2番目のラインシージャー、その他の多くの用途に使用する。 |
||
| − | A large cannon, such as the 119.0R4.10M3 is for attacking from a distance, a borderline long range mortar, an anti-cannon defense, a second line sieger, and many other uses. |
||
| + | 119.3R4.10M6 などの狙撃用キャノンはテント砲撃のためのものであり、キャノンが砲撃しているのを見ることができない場合に、敵の陣営やそのような他の範囲外の任務を設定する。 |
||
| − | A sniper cannon, such as the 119.3R4.10M6 is for a tent line sieger, setting up to shell opponents camp when they can't even see the cannon shelling them, and other out-of-sight range tasks such as that. |
||
| + | そして、187.0MM6 広角砲などの大規模なデモキャノンは、あらゆる防御システムを完全に破壊するために使用される。 |
||
| − | And of course, mass demo cannons, such as the 187.0MM6 spread-shot, which is used to completely mutilate any defenses whatsoever. |
||
| + | 次のような機能をキャノンに追加できる: |
||
| − | Players also like to add features to their cannons including: |
||
| − | * |
+ | * 複数の弾頭 [http://www.youtube.com/watch?v=DEq8YikeyAQ] |
| − | * |
+ | * 半自動/全自動の発射とリロード[https://www.youtube.com/watch?v=UE7p77QPV48] [http://www.youtube.com/watch?v=feEyb9NSO38] |
| + | * 爆縮用炸薬(メインの炸薬とは別のTNTで、炸薬を弾頭の方へ押し出して弾速を増加させる) |
||
| − | * Condenser charge (another set of TNT that explodes, pushing the charge towards the front of the cannon to increase the propulsion force.) |
||
| + | * 安全装置 爆発から[[プレイヤー]]や[[モブ]]を保護する耐爆シールド |
||
| − | * Safety features |
||
| + | * 調整可能な弾頭用遅延 |
||
| − | * Adjustable shot delay, which lets you change the range and trajectory of the cannon. |
||
| − | * |
+ | * [[砂]]、[[砂利]]、[[金床]]などの代替弾頭矢 [http://www.youtube.com/watch?v=JeV0XB-w_yM] |
| + | * ドライキャノン: [[爆発耐性]]の高い[[ブロック]]でキャノンを建設して、設計、管理を簡略化し、有効射程を伸ばしたキャノン。建設についての詳細は、[[#ドライキャノン|以下]]を参照。 |
||
| − | * Dry cannon: building a cannon from explosion-resistant material to simplify design, maintenance, and potentially improve firing distance (dry cannons fire farther than their wet counterparts, all other factors being the same). See [[#Dry cannons|below]] for construction details. |
||
| + | * 上方向や斜め方向など特殊な方向へ発射するキャノン |
||
| − | * [[矢]]を弾丸として |
||
| + | * 調整可能な射程、弾頭、方位(照準可能なキャノン) |
||
| − | * 上方向や斜め方向など特殊な方向へ発射するキャノン。 |
||
| + | * 散弾、大量破壊砲 |
||
| − | * 照準可能なキャノン。 |
||
| − | * 散弾 |
+ | * 散弾銃用の炸薬 |
| − | * Cannons with a blast shield (even though the TNT is submerged and does not make a crater upon detonation, the players still take damage). |
||
| − | * 散弾銃用の炸薬。 |
||
| − | * [[金床]]のキャノン。 |
||
| − | == |
+ | == 圧縮システム == |
=== TNTベースの圧縮 === |
=== TNTベースの圧縮 === |
||
| − | [[ファイル:CannonCondenser1.jpg|263px|thumb|right| |
+ | [[ファイル:CannonCondenser1.jpg|263px|thumb|right|圧縮付きのキャノンの例。]] |
| − | [[ファイル:Cannon comparison.png|263px|thumb|right| |
+ | [[ファイル:Cannon comparison.png|263px|thumb|right|2つの異なるキャノンの飛距離の比較。それぞれ1発の圧縮と圧縮なしの射撃。]] |
弾頭と炸薬の距離が7ブロック以上離れている場合、ほとんど意味がなくなる。これを解決するには、炸薬を圧縮する必要がある。 |
弾頭と炸薬の距離が7ブロック以上離れている場合、ほとんど意味がなくなる。これを解決するには、炸薬を圧縮する必要がある。 |
||
| − | 圧縮用炸薬をメインの炸薬より少し前に起爆させ、その爆風によってメインの炸薬を弾頭の方へ押し出す機構である。 |
+ | 圧縮用炸薬をメインの炸薬より少し前に起爆させ、その爆風によってメインの炸薬を弾頭の方へ押し出す機構である。これにより、弾頭と炸薬の距離が短くなるため、弾速が増す。 |
| − | 通称:爆縮システム |
+ | 通称: 爆縮システム |
=== ピストンベースの圧縮 === |
=== ピストンベースの圧縮 === |
||
| − | [[ピストン]]を使用して、炸薬を弾頭に近づける。複雑になるが制御しやすい。 |
+ | [[ピストン]]を使用して、炸薬を弾頭に近づける。複雑になるが制御しやすい。動作させるには、メインのチャージを開始し、TNTブロックをエンティティに変換する必要がする。TNTに着火した後、一連のピストンで全ての炸薬を押して、弾頭の後ろの単一のスペースに圧縮することが出来る。この機構を用いることで、同じ炸薬数でも格段に弾速が増す。[http://www.youtube.com/watch?v=zpGWNJf_QsA&t=3m24s] |
| − | TNTに着火した後、一連のピストンで全ての炸薬を押して、弾頭の後ろの単一のスペースに圧縮することが出来る。 |
||
| − | この機構を用いることで、同じ炸薬数でも格段に弾速が増す。[http://www.youtube.com/watch?v=zpGWNJf_QsA&t=3m24s] |
||
| + | 自爆を防ぐために、[[ピストン]]で[[水]]を堰き止めないようにしなければならない。 この際、[[ピストン]]の上から[[水]]をかける。 また、爆発する前にピストンを引っ込ませる必要がある。なぜなら、キャノンの自爆を招くからだ。ピストンが伸びていると水中に空間ができ、[[水]]による保護が損なわれてしまう。 |
||
| − | Care must be taken so that the pistons do not displace the water blocks protecting the cannon from TNT damage. To do this, one usually has to apply water a block above the area where the pistons would go into. It is also advised that the pistons should ''retract'' back into normal position before the main charge explodes, or your cannon might be destroyed. When the pistons extend, they create air spaces in the water no matter what, hence compromising the water's protection. |
||
| − | == Guide blocks == |
||
| + | == ガイドブック == |
||
| − | When a TNT charge is primed, it will usually shift slightly to one side. This can make a previously great cannon inaccurate. This is true with many cannons; but the solution is simple. If you add a guide block to the cannon, so that there is a wall on either side of the TNT when it is primed, it will not shift left or right, making an otherwise straight shot diagonal. If your design does not allow for this, you could just make the guide blocks one block higher, instead of being on either side of the TNT. This works because TNT will jump up, then go sideways in midair. Note that in most basic cannons, guide blocks should be transparent if the TNT cannon automatically primes the shot-otherwise, the redstone that ignites the charge will power the block next to the shot, and igniting the shot as well. If this explanation is unclear, look at this diagram: |
||
| − | {{BlockGrid|c=cobblestone|t=tnt|ctc}} |
||
| + | TNTに着火すると、片側に僅かに移動する。これにより、毎回精度が変動する。これは、ほとんどキャノンで起こりうる。しかし、解決策は簡単である。キャノンにガイドブロックを追加すると、TNTの着火時にTNTの両側に壁ができるが、TNTは左右に移動せず、他の点では真っ直ぐな射撃の対角線になる。設計でこれが許可されていない場合は、TNTの両側に設置する代わりに、ガイドブロックを1ブロックだけ高くすることができる。これは、TNTが飛んで空中で横に移動するのに機能する。ほとんどの基本的なキャノンでは、TNTキャノンが炸薬を自動的に着火する場合、ガイドブロックは透明でないといけない。そうでない場合、チャージを発火させるレッドストーンが炸薬の隣のブロックに電力を供給し、炸薬にも点火する。この説明が不明な場合は、次の図を参照: |
||
| − | In dry cannons, a guide block is almost a necessity because dry cannons tend to be inaccurate. However, dry cannon's guides are for directing the shot to be shot accurately, not to be primed accurately. However, guides can also decrease range if they are too long. |
||
| + | {{BlockGrid|c=Cobblestone|t=TNT|ctc}} |
||
| − | == Shot mounting blocks == |
||
| + | ドライキャノンでは、ガイドブロックを付けないと精度が落ちる傾向がある。ただし、ドライキャノンのガイドは、正確に着火されるのではなく、炸薬が正確に発射されるように指示するためのものである。ただし、ガイドが長すぎると、範囲が狭くなる場合がある。 |
||
| − | The shot mounting block for a cannon should be chosen according to how fast, far, and high you want the cannon to fire. Of course, these variables depend greatly on the position and amount of the charge and the timing of the shot, but the mounting block also can make a difference. For example, with a cannon with a charge of 5 and a delay of R4.3, the shot will take a mortar trajectory with a ladder more than with a fence post and pressure plate. |
||
| + | == 薬室内の取り付けブロック == |
||
| − | A few things: |
||
| − | * Even though the shot mounting blocks ladder and full block are both the same height and fire a shot at the same trajectory, the ladder will consistently fire farther than the full block because the ladder has less matter in between the shot and the charge than the full block. This situation is the same for all mounting blocks, the slab and fence post with pressure plate also follow the same rule. |
||
| − | * There is a trade off: although the fence post and pressure plate fire the farthest, they are also expensive, while the slab is cheap and easy to get, as well as coming in many forms. |
||
| − | * The maximum range for any cannon can be achieved by altering the mounting block. A TNT shot will be fired farthest if it leaves the cannon at a 30 degree angle. So, if you want to just have your cannon go the farthest it can, use the slab, fence and pressure plate, or trapdoor mounting blocks. However, when faced with fortifications or terrain obstacles, the best idea would be to have a mounting block like piston, ladder, or single block that makes the TNT arc over the said obstacle. But, then again, it ''is'' fun to blast your way through things... |
||
| − | * The following shot mounting blocks are tested and deemed safe. Feel free to experiment with mounting blocks, but keep in mind that some blocks, such as a lone pressure plate, will cause a mis fire of your cannon, and of course make it self-destruct. |
||
| + | 薬室内の取り付けブロックは、弾速、射程、高さに応じて選択する必要がある。当然、これらの変数は炸薬の位置と量、および弾頭のタイミングに大きく依存するが、取り付けブロックによる変化も考えられる。例えば、炸薬が5で遅延がR4.3のキャノンでは、[[はしご]]を使えば迫撃砲の弾道を取るが、[[フェンス]]や[[感圧板]]では、そうはならない。 |
||
| − | A rewrite for most of these mounting blocks is coming soon. |
||
| + | いくつかのこと : |
||
| − | ''Note: The pictures were taken with a resource pack.'' |
||
| + | * [[はしご]]とフルブロックは同じ高さで、同じ弾道になるが、[[はしご]]は弾頭と炸薬の距離が短くなるため、フルブロックよりも射程が長い。この現象は、全ての取り付けブロックに当てはまり、[[ハーフブロック]]や[[感圧板]]が乗った[[フェンス]]にも同じことが言える。 |
||
| + | * 折り合い: [[フェンス]]と[[感圧板]]の組み合わせは、射程が最長だが、[[ハーフブロック]]の方が経済的である。 |
||
| + | * 取り付けブロックを変更し、射角を30度に設定することで、最長射程を実現できる。 そのため、キャノンを出来るだけ遠くに移動させたい場合は、[[ハーフブロック]]、[[フェンス]]、[[感圧板]]、又は[[トラップドア]]を使用する。但し、地形や要塞などの障害物に出くわした時は、[[ピストン]]、[[はしご]]又は単一の[[ブロック]]を使用して、弾頭を障害物の上を弧を描くように発射することが最善の策だ。しかし、それでもまた、物事をやり遂げるのは「楽しい」... |
||
| + | * 次の薬室内の取り付けブロックがテストされ、安全であると確認されている。自由に試して見て欲しい。但し、単一の[[感圧板]]などの一部のブロックは、誤射を引き起こし、もちろん自爆する。 |
||
| + | 下記の一覧の大規模な修正が、間もなく行われる |
||
| − | === No mounting block === |
||
| + | {| class="wikitable" data-description="TNT mounting blocks" |
||
| − | [[ファイル:No mounting block.png|275px|thumb|right|No Mounting Block]] |
||
| + | ! |
||
| − | ''Pros: Highest velocity, simple, scalable'' |
||
| + | ! 長所 |
||
| + | ! 短所 |
||
| + | ! 説明 |
||
| + | ! 画像 |
||
| + | |- |
||
| + | ! 取り付けブロックなし |
||
| + | | 最速、シンプル、拡張可能 |
||
| + | | 小さいキャノンの射程不良、下向きの弾道、照準のみ |
||
| + | | 取り付けブロックを使用しない場合、弾頭はTNTと同じレベルで発射される。完全に水平、つまり0度になる。重力により、弾頭は素早く着弾し、水平に近い下向きの弾道を取る。 |
||
| + | 炸薬数が少ないと、範囲が極端に制限される可能性がある。射程を伸ばすには、炸薬数を増やすか、高所に建てる必要がある。炸薬が多いと弾速が増し、より遠くまで飛ばすことが出来る。 |
||
| − | ''Cons: poor range in smaller cannons, downward trajectory, line-of-sight only'' |
||
| + | 一般的には炸薬を70以上使用する。しかし、経済的には、取り付けブロックのないキャノンは、特定の範囲で読み込むのにより多くのTNTと時間がかかる。 |
||
| − | When no mounting block is used, the shot is launched from the same level as the TNT. It will fire out completely horizontal, or 0°. Gravity will quickly pull the shot to the ground, giving a very flat, downwards trajectory. |
||
| + | | [[ファイル:No mounting block.png|275px|thumb|center|取り付けブロックなし]] |
||
| + | |- |
||
| + | ! 単一の[[ブロック]] |
||
| + | | 大きな射角による曲射 |
||
| + | | 弾速が遅く、火力が低く、射程が短い |
||
| + | | [[丸石]]や[[黒曜石]]などの単一のフルブロックを弾頭の下に配置する。弾頭の位置が高くなるため、炸薬から上方向への爆風も受けることになる。 弾頭は大きな射角で発射される。これは、高い位置の敵や、障害物、地形の向こう側を攻撃するのに優れている。 |
||
| + | しかし、爆風の一部が取り付けブロックに吸収される為、多くの炸薬が必要となる。 又、エネルギーの一部が上方向に向く為、前方に飛びにくくなる。 |
||
| − | With small TNT charges, the range can be extremely limited. To increase the range, ever larger charges are needed or the cannon must be built higher above the ground. A larger charge means a higher velocity to the shot, pushing it farther away before it drops to the ground. |
||
| + | 代替案として[[はしご]]を使用することが挙げられる。 |
||
| − | Players have been known to use up to 70 TNT charges and beyond. But economically, a cannon without a mounting block will take more TNT and longer to load for a certain range. |
||
| + | |[[ファイル: Single solid mounting block.png|275px|thumb|center|単一のブロック]] |
||
| + | |- |
||
| + | ! [[ハーフブロック]] |
||
| + | | スムーズな弾道 (高過ぎず、低過ぎず)、平均的な速度、中小規模のキャノンにより効果的 |
||
| + | |電力がわずかに低下する。まっすぐなショットまたはロブショットのいずれにも最適ではなく、点滅の範囲制限 |
||
| + | |ハーフブロックは、単一のブロックとマウントなしの妥協点であり、一般的にどちらよりも効率的である。キャノンの爆発力の多くは前方に向けられるが、それでも射角を約30°に上げる上向きのベクトルがある。単一のブロックの場合と同様に、爆発エネルギーの一部はブロックによって吸収されるが、はるかに少なくなる。同じTNT負荷から、ハーフブロックの範囲は、単一ブロックまたはブロックなしよりも大きくなる。 |
||
| + | TNT炸薬が最初にハーフブロック上に設置されると、フルサイズのブロックのようにTNT炸薬がハングアップする。TNTが「着火」されると、落下してハーフブロックの真の高さに落ちる。 |
||
| − | === Single block === |
||
| + | ハーフブロックによって生成される射撃角度は、キャノンの射程を広げて高いターゲットを攻撃するには適しているが、高い壁や障害物を効果的に飛ぶには角度が小さすぎる。まっすぐな直接射撃の場合、ハーフブロックを搭載したキャノンは通常、一定の範囲内で地面に着地する。ただし、ゲーム内のTNTの点滅時間は限られているため、TNTをポイントまで拡大すると、ショットが高すぎて空中で爆発し、着地またはキャノンの最大範囲に到達する。これは、「点滅範囲の制限」と呼ばれる。すべてのキャノンは点滅範囲の制限によって制限されるが、より高い角度で発射するキャノンは、発射速度がより低く、弾薬がより高い高度に到達するため、特に点滅制限になりやすい。 |
||
| − | [[ファイル:Single solid mounting block.png|275px|thumb|right|Single solid mounting block]] |
||
| + | | [[ファイル:Half block mounting.png|275px|thumb|center|TNTが乗るハーフブロックとして使用される石のハーフブロック|代替文=]] |
||
| + | |- |
||
| + | ! rowspan=2 | [[トラップドア]] |
||
| + | |'''閉まっている場合''':平坦な軌道に最適であり、速度はブロックなしとほぼ同じで、範囲が非常に広いため、遠くのターゲットを破壊できる。 |
||
| + | | rowspan=2 |着火回路が誤ってトラップドアを作動させないようにする必要がある。非常に高速で大きすぎる正確な弾薬は、着火されたTNTが空中の近くの壁にぶつかると、落下してショットを逃すことになる。中高ターゲットを狙うことはできない |
||
| + | | rowspan=2 |ハーフブロックの発射角度が目的に対して高すぎる場合は、代わりに閉じたトラップドアを使用する。ハーフブロックと同様に、ショットをくぼみの上に持ち上げることにより、ショットに上向きの力を与える。ただし、トラップドアの高さはフルブロックの3/16である。発射角度は約15〜20°で、非常に長い範囲(180ブロック以上)でのストレートショットに非常に効果的である。 |
||
| + | 発砲時に前方速度はほとんど失われず、通常、弾薬は非常に高速で飛び出す。これは、低い発射角度と組み合わせることで、より大きな負荷を発射するキャノンは、ハーフブロックまたははしごの取り付けのように点滅範囲の問題の影響をあまり受けずに範囲を広げることができる。 |
||
| − | ''Pros: Higher firing angle, can lob shots'' |
||
| + | | rowspan=2 | [[ファイル:Trapdoor mounting.png|275px|thumb|center|TNTが乗るブロックとして使用されているトラップドア|代替文=]] |
||
| + | |- |
||
| + | |'''開いている場合''':射撃角度を大きくする際には開いている状態で使用でき、優れた位取りと、高いターゲットを破壊できる。 |
||
| + | |- |
||
| + | ! [[はしご]]、[[鉄格子]]、[[ガラス板]] |
||
| + | |小型および中型のキャノン、高い発射角、放物線軌道で効率的で、ロブショットと高高度に適している。 |
||
| + | |低速の水平速度、スケーリング不良、±120ブロックの制限された範囲。 |
||
| + | |側面に配置されたはしごは、高角度での発射やショットのロブに非常に効果的な取り付けブロックとして機能する。着火された弾薬は、はしごの端の厚さによって支えられ、はしごへの落下を防ぐ。はしごはフルサイズのブロックではないため、爆風からのエネルギーは一切吸収されず、弾薬は全力で推進される。はしごを上下に追加することで、異なる発射角度を実現できる。通常1つのはしごはハーフブロックよりもわずかに高い角度(約40°〜45°)で発射する。 2つのはしごは非常に放物線状の飛行を行い、ショットは約50°〜60°で飛び出す。 |
||
| + | 爆風エネルギーのかなりの部分がブロックの上方向に向けられるため、水平速度は一般にブロックなしまたはハーフブロックのキャノンよりもはるかに遅くなる。その代り、キャノンは地形や壁を越えて弾薬が飛び越えるすることに問題はない。より大きなチャージ負荷では、弾薬は非常に高い高度に達する可能性がある。 |
||
| − | ''Cons: Low velocity, reduced power and poor range for smaller cannons'' |
||
| + | ただしこれは、点滅の範囲制限がこの取り付けに固有の問題であることでもある。100ブロックの距離内で、地面と同じ高さの適切に構築されたキャノンは、ダメージを発生させるのに十分な低さで着弾することが期待できる。しかし、この弾薬を超えると、遅延回路で最大点滅時間で着火された弾薬でも、事前に空中で爆発する。したがって、弾薬を高く飛ばすだけであり、単にTNTを追加して範囲を広げることはできない。基本的な解決策は、キャノンを地面の下に、傾斜のあるピットに入れて弾薬が飛び出すようにすることである。弾薬の開始点が低いため、点滅の時間が切れると地面に近づくにつれて爆発する。150ブロックを超える範囲に到達するには、この解決法は実用的ではない。 |
||
| − | A single full size block such as cobblestone or obsidian is placed under the Shot. This has the effect of elevating the Shot above the water trough, so the blast force from the Charge is applied not just forward, but upwards. The shot is fired out at a high angle and trajectory. This is useful for hitting an elevated target, or one behind terrain or obstruction. |
||
| + | | [[ファイル:Ladder Mount.png|275px|thumb|center|TNTが乗っているはしご|代替文=]] |
||
| + | [[ファイル:Double Ladder Mount.png|275px|thumb|center|はしご2つの場合|代替文=]] |
||
| + | |- |
||
| + | ! [[フェンス]] |
||
| + | |小型および中型、低い射撃角度で効率的であり、洞窟や過去の張り出した基地防衛を通過するのに適す。速度が速く、広大で長距離のキャノンで非常に強力。 |
||
| + | |高価な材料、より大きなキャノンへの点滅範囲制限。コンデンサーを使用すると爆発によりTNTが高すぎて天井がなくなり、TNTがキャノンを破壊する可能性がある。 |
||
| + | |キャノンの端に置かれたフェンスはプレイヤーの視点からは1.5ブロックの高さしかないため、Minecraft1ブロックの高さであると処理する。したがって、チャージの負荷は実際よりも弾薬に近いと認識される。より多くのパワーと速度を獲得するため、少し上に飛び、攻撃角で下に下がるように見える。ただし、爆発によりTNTが上方に発射されるため、キャノンに天井がない場合TNTがキャノンを破壊する。 これにより、独特のスタイルのキャノン射撃が可能になり、Minecraftで最も便利な取り付けブロックの1つといわれている。 |
||
| + | キャノンで水をせき止める必要がある場合は、感圧版を使用できるが、発射速度はわずかに低下する。 |
||
| − | However, part of the blast force is absorbed by a solid mounting block, so the cannon will suffer similar problems of needing large charge sizes. Also, since some of the energy is expelled in the upwards direction, forward shot velocity is reduced greatly. |
||
| + | | |
||
| + | |- |
||
| + | ! [[ピストン]] |
||
| + | |調整可能、完全に拡張すると、フルブロックと同じ効果があるが、それよりも効率的で、より汎用性が高く、発砲砂または砂利と互換性がある。 |
||
| + | |高価で、弾薬はアーチ型キャノンで見られる点滅範囲の遅延制限を受け、モルタルMBとして使用されるため、洞窟や建物内での使用は推奨されず、誤って2つのTNTブロック(上に1つ 他の)大砲を破壊する、R4.7の遅延が必要である。 |
||
| + | | この取り付けブロックを使用する3つの最も一般的な方法 |
||
| + | # 弾薬を着火してから押し上げる |
||
| − | A better alternative to the single mounting block is using a [[ladder]] instead. |
||
| + | # 押し上げてから弾薬を着火する |
||
| + | # フルブロックMBのより効率的なバージョンとして使用するだけ |
||
| + | | [[ファイル:Piston TNT cannon.png|thumb|center|ピストンに乗っているTNT|代替文=]] |
||
| + | |- |
||
| + | ! colspan=5 | 珍しい取り付けブロック |
||
| + | |- |
||
| + | ! [[植木鉢]] |
||
| + | |ロブショットが可能 |
||
| + | |点滅の範囲制限、高価、低いターゲットを狙えない |
||
| + | | |
||
| + | | |
||
| + | |- |
||
| + | ! [[レッドストーンリピーター]] |
||
| + | |2番目に高い速度。 |
||
| + | |高価、9ブロックしか撃てないため、回路が偶発的に起動しないようにする必要がある。 |
||
| + | |このキャノンは、山岳バイオームでのみ使用される。キャノンが崖の上にあり、ターゲットがその下にある場合にのみ機能する。 |
||
| + | | |
||
| + | |- |
||
| + | ! [[日照センサー]] |
||
| + | |速すぎずに良い射撃を行うと、ロブショットができる。 |
||
| + | |センサーが昼間に回路を作動させないようにする。高価。 |
||
| + | |これは地上レベルのキャノンであり、どの種類のキャノンにも適しています(点滅の範囲に制限がある超大型のキャノンを除く)。 |
||
| + | | |
||
| + | |- |
||
| + | ! [[ベッド]] |
||
| + | |良い射撃、とても速い、中高角。 |
||
| + | |高価、より大きなキャノン |
||
| + | |これは、より大きな城を攻撃するのに適しているが、範囲も広い。最高の取り付けブロックの1つ。 |
||
| + | | |
||
| + | |- |
||
| + | ! [[ケーキ]] |
||
| + | |良い射撃、中角、広い範囲。 |
||
| + | |高価、取得するできない。 |
||
| + | |この取り付けブロックは、リソースがある場合に遠くのターゲットを攻撃するのに適す。足跡が小さいため、ハーフブロックを使用する場合よりもチャージTNTを弾薬に近づけることができるため、範囲が広がる。 |
||
| + | | |
||
| + | |- |
||
| + | ! [[醸造台]] |
||
| + | |高射角(はしごに類似)、並外れた射程、高速 |
||
| + | |高価で、レベルのターゲットに対して効果がない |
||
| + | |はしごよりもわずかに遅く(そして低い)TNTを撃つが、その違いは簡単にはわからない。また、反動ダメージを回復するため、射撃中に再生ポーションを抽出することができる。 |
||
| + | | |
||
| + | |- |
||
| + | ! [[エンチャントテーブル]] |
||
| + | |すべての距離を打つことができる高い耐爆風性。 |
||
| + | |とても 高価 |
||
| + | |エンチャントテーブルは、ハーフブロックによく似た弾薬を発射する。回転する本は軌跡に影響を与えない。 |
||
| + | | |
||
| + | |- |
||
| + | ! [[階段]] |
||
| + | |高射角 |
||
| + | |低速 |
||
| + | |逆階段は役に立たない。砲弾を撃つと、キャノンを爆破したり、近くを爆破したりする可能性が非常に高くなる。 |
||
| + | | |
||
| + | |} |
||
| + | == キャノンのチュートリアル == |
||
| − | === ハーフブロック === |
||
| + | === ディスペンサーベースのキャノン === |
||
| − | [[ファイル:Half block mounting.png|275px|thumb|right|Stone slab used as a half block mounting]] |
||
| + | {{Schematic|caption=ディスペンサーを用いたキャノンの例 |
||
| + | |Di-s|SB+rr-w4|SB+rr-w4|SB+rr-w4|SB+rr-w4|SB+rr-w4|SB+rr-w4|SB+rr-w4|SB+rr-w4|SB+rd-sw|- |
||
| + | |ts-u|wa|wa|wa|wa|wa|wa|wa|wa|SB+rd-ns|sb-w|- |
||
| + | |SB|Di-n+rd-ew|Di-n+rd-ew|Di-n+rd-ew|Di-n+rd-ew|Di-n+rd-ew|Di-n+rd-ew|Di-n+rd-ew|Di-n+rd-ew|SB+rd-nw|- |
||
| + | }} |
||
| + | [[レッドストーンアップデート]]以来、[[ディスペンサー]]は[[TNT]]を[[ドロップ]]せずに着火するようになった。この機能を利用してより優れたTNTキャノンを作ることができる。 |
||
| − | ''Pros: Smooth trajectory (not too high, not too low), average velocity, more efficient for small and medium cannons'' |
||
| + | 右側は[[ディスペンサー]]で[[TNT]]を吐き出す。 [[ボタン]]を押すと列になっている[[ディスペンサー]]が最初に起動する。 [[レッドストーンリピーター]]の遅延を33[[ティック]]に設定した場合、左側の[[ディスペンサー]]は右側から出た[[TNT]]が起爆する直前に[[TNT]]を吐き出すので、長射程となる。 左側の[[ディスペンサー]]は他の[[ディスペンサー]]よりも高く設置し、水は、キャノンの前方へ向けて流さなくてはならない。 [[ディスペンサー]]は[[TNT]]を吐き出す時に、着火時の「弾み」を生まない。 |
||
| − | ''Cons: Slightly reduced power, not best for either straight '''or''' lob shots, fuse range limit*'' |
||
| − | |||
| − | A slab is the compromise between a single block and no mounting, and generally more efficient than either. More of a cannon's blast force is directed forward, but there is still an upward vector that raises the angle of fire to roughly 30°. As with a single block, some of the blast energy is absorbed by the block, but much less. From the same TNT load, the half block has greater range than a single block or no block. |
||
| − | |||
| − | When the TNT shot is initially placed over a half block, it will hang over it as if it was a full size block. Once the TNT has been "primed", it will fall down and sit on the true height of the slab. |
||
| − | |||
| − | The firing angle produced by a half block is good for extending the range of a cannon and hitting elevated targets, but its too low for effective lobbing over high walls and obstacles. For straight direct firing, shots fired with a half block mounting generally land level on the ground within a certain range. However, due to the limited fuse time of TNT in the game, scaling up the TNT charges up to a point will result in the shot flying too high and exploding in the air before it lands or reach the cannon's maximum range. This will be refer to as the "fuse range limit". All cannons are limited by the fuse range limit, but cannons firing at higher angles are especially prone to the fuse limit, as the shot velocity is lower and shots reach higher altitudes. |
||
| − | |||
| − | === トラップドア === |
||
| − | [[ファイル:Trapdoor mounting.png|275px|thumb|right|Trapdoor used as a mounting block]] |
||
| − | |||
| − | ''Pros: (closed) Optimized for flat trajectory, velocity almost the same as no-block, have a very large range meaning it can destroy far targets, (opened) can be used in open position for higher firing angle, good scaling, can destroy higher targets |
||
| − | |||
| − | ''Cons: Be sure that priming circuit doesn't activate the trapdoor by accident. Very high speeds and oversized accurate shots could mean that if the primed TNT hits a nearby wall in the air, it will fall down and miss the shot. It cannot aim at medium or high elevated targets |
||
| − | |||
| − | If the firing angle of the half block is too high for your purpose, a closed [[trapdoor]] can be used instead. Like the half block, it provides some upward force to the shot by elevating it above the trough. A trapdoor's height, however, is {{frac|3|16}}th of a full block. Firing angle is roughly 15-20°, making it extremely effective for straight shots at very long range (180+ blocks). |
||
| − | |||
| − | Little forward velocity is lost when firing, and shot typically fly out at very high speeds. This combine with the low firing angle means cannons firing larger loads can extend their range without encountering too much fuse range problems as with the half block or ladder mounting. |
||
| − | |||
| − | === Ladder / iron bars / glass pane === |
||
| − | |||
| − | [[ファイル:Ladder Mount.png|275px|thumb|right|Ladder mounting block]] |
||
| − | [[ファイル:Double Ladder Mount.png|275px|thumb|right|Shot mounting with two ladders]] |
||
| − | |||
| − | ''Pros: Efficient with small and medium cannons, high firing angle, parabolic trajectory, good for lobbing shots and high altitude'' |
||
| − | |||
| − | ''Cons: Low horizontal speed, poor scaling, limited range at ±120 blocks'' |
||
| − | |||
| − | A ladder placed on the side can serve as a very effective mounting block for firing at high angles and lobbing shots. A primed shot will be supported by the edge thickness of the ladder, preventing it from falling into the trough. Because a ladder is not a full size block, none of the energy from the blast is absorbed, and the shot is propelled out at full force. By adding ladders above each other, different firing angles can be achieved. Typically, a single ladder will give an angle just higher than a half block, roughly 40°-45°. Two ladders will give an extremely parabolic flight, shots fly out at about 50°-60°. |
||
| − | |||
| − | A good portion of the blast energy is directed upwards on the block, so horizontal speeds are generally much slower than a no-mount or half block mount cannon. In return, the cannon has no problem lobbing shots over terrain and walls. At larger charge loads, shots can reach very high altitudes. |
||
| − | |||
| − | However, this also means the fuse range limit is an inherent problem with this mounting. Within a 100 block distance, well built cannons level with the ground can expect to land shots low enough to cause damage. But beyond this shots explode midair way beforehand, even with a shot primed at maximum fuse time with a delay circuit. Hence, one can't simply add more TNT to increase the range, as it will only make the shot fly higher. A basic solution is to put the cannon below ground, in a pit with a slanted slope to allow the shot to fly out. Since the shot had a lower starting point, it will explode closer to the ground once its fuse time runs out. To reach ranges beyond 150 blocks, this solution becomes impractical. |
||
| − | |||
| − | === Fence === |
||
| − | |||
| − | ''Pros: Efficient with small and medium cannons, low firing angle, good for shooting through caves and past overhanging base defenses. High velocity, extremely powerful in spread cannons and long range cannons.'' |
||
| − | |||
| − | ''Cons: Expensive materials, fuse range limit to bigger cannons. If used a condenser, then the explosion will send the TNT too high and with no ceiling, the TNT can destroy the cannon.'' |
||
| − | |||
| − | A fence placed at the end of the cannon tricks ''Minecraft'' to think that it is one block high, since it is only one and a half block high for the player's perspective. Therefore, the charge would be recognized as closer to the shot than it actually is. Since it gains more power and velocity, it appears to fly up a bit, then go down in an attack angle. However, the explosion launches the TNT upwards meaning if the cannon has no ceiling, the TNT can well destroy the cannon. This gives it a distinctive style of cannon shooting, and it is considered one of the most useful mounting blocks in ''Minecraft''. |
||
| − | |||
| − | if the cannon needs the water blocked a pressure plate may be used, but slightly decreases the launch velocity. |
||
| − | |||
| − | === Piston === |
||
| − | |||
| − | [[ファイル:TNT cannon.png|200px|thumb|A TNT cannon with piston mounting.]] |
||
| − | |||
| − | ''Pros: Adjustable, when fully extended it has the same effects of a full block but is more efficient than it and is more versatile, compatible with firing sand or gravel.'' |
||
| − | |||
| − | ''Cons: Expensive, the shot has been subject to the fuse range delay limit found in arcing cannons, is used as a mortar MB so usage inside caves or buildings is not recommended and will result in short range shots, accidentally placing two TNT blocks (one on top of the other) will destroy the cannon, requires a R4.7 delay.'' |
||
| − | |||
| − | The three most common ways to use this mounting block are |
||
| − | # Prime the shot then push it up |
||
| − | # Push it up and then prime the shot |
||
| − | # Just use it as a more efficient version of the full block MB. |
||
| − | |||
| − | == Rarely used mounting block == |
||
| − | |||
| − | === Flower pot === |
||
| − | |||
| − | ''Pros: Can lob shots'' |
||
| − | |||
| − | ''Cons: Fuse range limit, expensive, cannot aim at lower targets'' |
||
| − | |||
| − | === Redstone repeater === |
||
| − | |||
| − | ''Pros: Second highest velocity'' |
||
| − | |||
| − | ''Cons: Can only shoot 9 blocks, expensive, make sure the circuit doesn't activate it by accident'' |
||
| − | |||
| − | This cannon is only used in an extreme hills biome. It only works if the cannon is on a cliff and the target is below it. It is the second worst cannon. |
||
| − | |||
| − | === Daylight sensor === |
||
| − | |||
| − | ''Pros: Good shooting, not too high velocity, can lob shots'' |
||
| − | |||
| − | ''Cons: Make sure the sensor doesn't activate the circuit by accident by daylight, expensive'' |
||
| − | |||
| − | This is a cannon for ground levels and it is good on any type of cannon (except of super large cannons which has a fuse range limit.) |
||
| − | |||
| − | === Bed === |
||
| − | |||
| − | ''Pros: Good shooting, really fast, medium-high angle'' |
||
| − | |||
| − | ''Cons: Expensive, bigger cannon'' |
||
| − | |||
| − | This is good for attacking bigger castles, but has also a big range. One of the best mounting blocks. |
||
| − | |||
| − | === Cake === |
||
| − | |||
| − | ''Pros: Good shooting, medium angle, big range'' |
||
| − | |||
| − | ''Cons: Expensive, cannot be retrieved'' |
||
| − | |||
| − | This mounting block is good for attacking far targets if you have resources. It has smaller footprint which means that charge TNT can be closer to the shot than when using slabs, thus increasing the range. |
||
| − | |||
| − | == Cannon tutorials == |
||
| − | |||
| − | === Dispenser-based cannons === |
||
| − | |||
| − | Since the Redstone Update, redstone dispensers will dispense ignited TNT instead of the item. This feature can be used to make a new form of TNT cannons. |
||
| − | |||
| − | Example: |
||
| − | {{Schematic|caption=First layer |
||
| − | |AB|AB|AB|AB|AB|AB|AB|AB|AB|AB|- |
||
| − | |ts-u|wa|wa|wa|wa|wa|wa|wa|wa|AB|sb-w|- |
||
| − | |AB|Di-n|Di-n|Di-n|Di-n|Di-n|Di-n|Di-n|Di-n|AB|- |
||
| − | }} |
||
| − | {{Schematic|caption=Second layer |
||
| − | |Di-s|rr-w4|rr-w4|rr-w4|rr-w4|rr-w4|rr-w4|rr-w4|rr-w4|rd-sw|- |
||
| − | |air|air|air|air|air|air|air|air|air|rd-ns|- |
||
| − | |rd-ew|rd-ew|rd-ew|rd-ew|rd-ew|rd-ew|rd-ew|rd-ew|rd-ew|rd-nw| |
||
| − | }} |
||
{{-}} |
{{-}} |
||
| + | Mumbo Jumboによって設計されたこのTNTキャノンは、最も小さいキャノンの1つである。 |
||
| − | This cannon would have dispensers that release TNT into the water. Redstone would run on top of the dispensers. A 33-tick delay would keep the shot in the dispenser until the last possible moment. Another dispenser would place the TNT shot right before the charge detonates, giving the shot the most amount of airborne time possible. Dispensers dispense TNT without the characteristic "hop" of ignited TNT, which effectively guarantees the TNT will land in a much shorter radius than a conventional TNT cannon. |
||
| + | {{Schematic|caption=1段目 |
||
| − | One of the smallest TNT cannons is this design by Mumbo Jumbo: |
||
| − | |||
| − | {{Schematic|caption=First layer |
||
|air|rd|Di-s|air|- |
|air|rd|Di-s|air|- |
||
|wb-e|Di-e|wa|ts|- |
|wb-e|Di-e|wa|ts|- |
||
|air|rd|Di-n|air |
|air|rd|Di-n|air |
||
}} |
}} |
||
| − | {{Schematic|caption= |
+ | {{Schematic|caption=2段目 |
|air|air|air|glass|- |
|air|air|air|glass|- |
||
|air|rt-!|Di-e|air|- |
|air|rt-!|Di-e|air|- |
||
|air|air|air|glass|- |
|air|air|air|glass|- |
||
}} |
}} |
||
| − | {{Schematic|caption= |
+ | {{Schematic|caption=側面図 |
|air|rt-$!|Di-$e|glass|- |
|air|rt-$!|Di-$e|glass|- |
||
|wb-e|Di-$e+rd-$|Di-$n|slab |
|wb-e|Di-$e+rd-$|Di-$n|slab |
||
}} |
}} |
||
| + | 水の下に、上向きに[[ディスペンサー]]を設置する手もある。また、[[ハーフブロック]]の代わりに[[感圧板]]を乗せた[[フェンス]]を置くことも可能である。 |
||
| − | You can easily modify it to have another dispenser under the water facing up, and you can use a fence post with a pressure plate on top instead of a slab. |
||
| + | ''長所 : ''絶対的な最短時間でリロードできる。 [[プレイヤー]]に求められるのは、自爆しないように監視することだけである。 このキャノンを発射するのには全く技術を必要としない。 このキャノンは城の防衛に適している。 さらに[[レッドストーンコンパレーター]]を使用することで、照準可能なキャノンを作ることが可能。ディスペンサーベースのTNTキャノンは、近くの他のキャノンを吹き飛ばす事は無い。 |
||
| − | ''Pros:'' The time taken to reload TNT is at its absolute minimum. All a player has to do is to make sure the next shot is placed ''after'' the first shot is fired to make sure you don't destroy your cannon. This cannon requires little skill at all to fire; the hardest part will be placing the cannon a proper distance away to make sure you don't over/under-shoot. Such precision makes this cannon good for castle defense. Furthermore, through use of comparators, it is possible to make an easily aim-able dispenser-based cannon, and dispenser-based cannons do not blow themselves up if hit with another TNT cannon. |
||
| + | ''短所 : '' [[ディスペンサー]]と[[TNT]]は高コストである。このタイプのキャノンは、手動のキャノンほど強力にならない。[[ディスペンサー]]に[[TNT]]が装填されたままになっている場合、簡単に盗み取ることができる。(これには従来型の自動キャノンも該当する)。水を備えたキャノンでも、自動で連発し続けていると誤爆する可能性がある。 |
||
| − | ''Cons:'' Dispensers and TNT are expensive. This type of cannon can never be quite as hardy as manual cannons, since dispensers can be blown up with TNT. Furthermore, if the cannon is left loaded and unattended, it is trivial to steal the TNT from its magazine. (This is also true of conventional auto-cannons.) Dispenser-based cannons with a one-block-wide water pool have also been known to blow themselves up, particularly if left firing automatically and unattended. |
||
| + | この設計で、自動キャノンを簡単に作ることができる。[[ボタン]]を[[レッドストーン]]に置き換え、[[レッドストーン]]を[[クロック回路]]に繋げる。[[クロック回路]]の周期を、4秒未満に設定しないよう注意する。装填の間隔が短すぎると完全に発射が完了する前に装填してしまい、キャノン全体が爆破されることもある。 |
||
| − | An automatic cannon can easily be made with this design. Substitute the button for redstone and hook the redstone up to a clock. Be careful not to set the clock under 4 seconds, the same time as it would take the TNT to explode. If the TNT is reloaded too quickly, the timing can cause the shot to detonate before the propellant does, destroying the entire cannon. |
||
| − | === |
+ | === キャノンのリロード === |
| − | ==== |
+ | ==== 伝統的な手法 ==== |
| + | キャノンのリロードは、初心者にとって最も複雑な設計の一つである。但し、細心の注意を払う限り、サイズに応じて約15分~20分で作製できる。リロードは[[ディスペンサー]]が追加された時に廃止された。 |
||
| − | Reloading cannons are one of the most complex designs for beginners. However, as long as close attention is payed, for a first time build, it can be created in about 15–20 minutes depending on the size. Reloading cannons became obsolete when dispensers were added (except in the console editions). |
||
| + | '''良い点:''' 簡単にリロードをカスタマイズできる。 標準的なキャノンは数回リロードしなければならないが、このキャノンは数秒の間隔で数回撃つことが可能。シンプルなデザインで、最大12発のTNTを保存することが出来る。要塞戦争サーバーでプレイしている場合、このキャノンは敵の要塞を繰り返し破壊するのに使える。 |
||
| − | '''The Good:''' Reloading TNT cannons can be customized just as easily as any other cannon (using fences, iron bars, glass panes, etc.). They can be shot several times with only a few seconds' interval in opposition to having to reload it several times like you'd have to do with a standard TNT cannon. Using the simple design, this TNT cannon can have up to 12 rounds in the magazine. If playing a fortress war server, this cannon can fire repeated shots which will demolish the enemies' buildings before they have time to stuff their ammunition into their puny and inferior weapons. |
||
| + | '''悪い点:''' このタイプのキャノンはかさばり、魅力に欠ける。 [[サバイバルモード]]では、再生不可能な資源([[砂]]や[[砂利]]など)が必要。さらに、撃ち尽くす度に、退屈なリロード作業を行わなければならない。標準的なキャノンは、多少損壊しても簡単に修理できる。しかしこのタイプのキャノンはマガジン内の[[TNT]]が爆発し、配線も破壊されることになる。 |
||
| − | '''The Bad:''' Unfortunately, cannons of this variety are bulky and often unattractive. They require sand or gravel which are nonrenewable resources in survival mode. Added to that, it is tedious to reload the cannons whenever the magazines run out of ammo, however occasional that may be. With standard TNT cannons, if the 1-round magazine is destroyed, it is usually easily replaceable. This is not the case with the reloading kind, as the entire magazine will explode, destroying the weapon and all the redstone wiring with it—often killing you in the process. '''This type of cannon has also become redundant''' with the recent updates allowing automatic cannons utilizing dispensers to reload the tnt, which is easier and more compact to make. |
||
| + | '''このタイプのキャノンも不必要なものとなった''' |
||
| + | アップデートにより[[ディスペンサー]]を使用して[[TNT]]をリロードすることが出来るようになり、より簡単でコンパクトになった。 |
||
<gallery mode="packed"> |
<gallery mode="packed"> |
||
| + | Reloading TNT Cannon Step1.png|'''ステップ 1 ''' 枠組みをつくる。 設計から始めるが、このようにいくつかの変更を行う。(枠組み) |
||
| − | Reloading TNT Cannon Step1.png|'''Step 1.''' Make the framework. Begin with a standard design, but make a few modifications so that it looks like this. (Framework) |
||
| + | Reloading TNT Cannon Step3.png|次に、水を注ぐ。 誤って何かを設置しないように、水源の上にブロックを置く。 |
||
| − | Reloading TNT Cannon Step3.png|Then, you should get out a bucket of water and pour it down the slot like you would with any other design. Make sure to place a block hovering over the source block so you won't accidentally place something in it. |
||
| − | Reloading TNT Cannon Step4.png| |
+ | Reloading TNT Cannon Step4.png|配線に取り掛かろう。 |
| − | Reloading TNT Cannon Step5.png| |
+ | Reloading TNT Cannon Step5.png|...これ! |
| + | Reloading TNT Cannon Step6.png|'''ステップ 2 ''' マガジンをつくる。 これが、TNTを薬室に押し込んで装填する場所である。 最大12発分を保存できるが、今回は7発分のものをつくる。ここで、TNTを薬室へ押し出す為のピストンを追加する必要がある。 |
||
| − | Reloading TNT Cannon Step6.png|'''Step 2.''' Make the magazine. This is where the TNT is going to be pushed and loaded into the firing chamber. It can store up to 12 rounds, but this one will be made with 7. Now we need to add pistons that will push the TNT towards the chamber, so place this following |
||
Reloading TNT Cannon Step8.png |
Reloading TNT Cannon Step8.png |
||
| − | Reloading TNT Cannon Step9.png| |
+ | Reloading TNT Cannon Step9.png|作る過程でこのようになるはずだ。 |
| − | Reloading TNT Cannon Step10.png|''' |
+ | Reloading TNT Cannon Step10.png|'''ステップ 3 ''' 薬室を作製。 薬室とマガジンの配線がTNTに干渉しないように注意する。 |
| − | Reloading TNT Cannon Step11.png| |
+ | Reloading TNT Cannon Step11.png|この風変わりなデザインが薬室の上に来るようにする |
| − | Reloading TNT Cannon Step12.png| |
+ | Reloading TNT Cannon Step12.png|ここでピストンを取り付けて、所定の位置までTNTを押し出せるようにする。 |
| + | Reloading TNT Cannon Step13.png|空撮... |
||
| + | Reloading TNT Cannon Step14.png|'''ステップ 4 ''' 薬室とマガジンの配線を接続する。 これを枠組みに追加する。 |
||
| − | Reloading TNT Cannon Step13.png|An aerial view... |
||
| − | Reloading TNT Cannon |
+ | Reloading TNT Cannon Step15.png|そして配線。 |
| − | Reloading TNT Cannon |
+ | Reloading TNT Cannon Step16.png|'''ステップ 5 ''' トリガーを作成する。この場所へ行く。 |
| − | Reloading TNT Cannon |
+ | Reloading TNT Cannon Step17.png|次に、レッドストーンダストをリピーターに置き換える。 |
| − | Reloading TNT Cannon |
+ | Reloading TNT Cannon Step18.png|ほぼ完成だ!後は点火装置を配置するだけだ。 |
| + | Reloading TNT Cannon Step21.png|'''ステップ 6 ''' 微修正と点検。 私は意図的にいくつか問題点を用意した。 まず、配線の1部がバレルの邪魔になり、範囲に深刻なダメージを与える。 これについては後で説明する。 もう1つは、動力が途切れてしまっているので、リピーターを移動させなければならない点だ。 '''ステップ 7 ''' マガジンの装填。 マガジンをリロードする度に行う必要がある為、この部分には細心の注意を払わなければならない。 TNTをマガジンに入れ、サイドプッシュピストンに対して... |
||
| − | Reloading TNT Cannon Step18.png|We're almost done! Just place the igniter, now. |
||
| + | Reloading TNT Cannon Step22.png|...薬室の右上端まで(下向きのピストンの下ではなくそのすぐ後ろ) |
||
| − | Reloading TNT Cannon Step21.png|'''Step 6.''' Touch up & check for problems. I purposefully planted a few problems. First, some of the wiring is in the way of the barrel which will severely damage the range. We'll get to that later. More importantly, we need to move one of the repeaters ahead because it isn't providing enough power from where it is. '''Step 7.''' Load the magazine. Pay close attention to this part as you will have to do it every time you reload the magazine. Place the TNT into the magazine, from against the side-pushing pistons... |
||
| + | Reloading TNT Cannon Step23.png|次に、砂をマガジンに入れる。 これも毎回行う必要がある。 左向きのピストンに押されるTNTの上に8個置く。 |
||
| + | Reloading TNT Cannon Step24.png|この場所から見るとこんな風に見えるだろう。 |
||
| − | Reloading TNT Cannon Step22.png|…to the top-right edge of the chamber (NOT underneath the down-facing pistons, but right behind that area). |
||
| + | Reloading TNT Cannon Step25.png|'''ステップ 8''' おしまい。 よし、よし、私は薬室の配線に問題があるので修正することにした。 |
||
| − | Reloading TNT Cannon Step23.png|Now we need to put sand inside the magazine. You'll have to do this every time, as well. Put 8 stacks on top of the TNT pushed against the left-facing pistons. |
||
| + | Reloading TNT Cannon Step26.png|これが修正方法である。 比較的簡単である。 邪魔になるブロックがもう無いことを確認する。 |
||
| − | Reloading TNT Cannon Step24.png|And there you go! This is what you should see. |
||
| + | Reloading TNT Cannon Step28.png|これが問題を修正した結果である。 |
||
| − | Reloading TNT Cannon Step25.png|'''Step 8.''' Finish up. Yes, yes, I promised to fix the wiring in the way of the chamber. Here's the problem. |
||
| + | Reloading TNT Cannon Step27.png|さらに最高のパフォーマンスを実現する為に、取り付けブロックに板ガラスを採用。 |
||
| − | Reloading TNT Cannon Step26.png|This is how you fix it. It's relatively simple. Make sure there're no more blocks in the way and you should get this when you fire. |
||
| − | Reloading TNT Cannon |
+ | Reloading TNT Cannon Step29.png|さらにキャノンを覆って敵に破壊されないようにする。 |
| + | Reloading TNT Cannon Step30.png|装填と点検のために、マガジンに出入り出来るようにしておく。 |
||
| − | Reloading TNT Cannon Step27.png|You may also want to put in a mount (as mentioned in a previous tutorial) to maximize performance! Here's a [[glass pane]] mount. |
||
| + | Reloading TNT Cannon Step31.png|追加できるもうひとつの要素は、このピストンである。下向きのピストンを引き離すので発射時に邪魔にならない。そして...このチュートリアルはこれで終わりです! 試射を行い、ニーズに合った取り付けブロックを模索する。 盲目的にテストする前に、弾薬をマガジンから抜いておくこと。 |
||
| − | Reloading TNT Cannon Step29.png|Additionally, consider covering the hull of the cannon to prevent opposing TNT cannons from blowing yours up! |
||
| − | |||
| − | Reloading TNT Cannon Step30.png|Whatever you do, just make sure there's a door that leads to the magazine and that the sand-chamber is accessible from the top so you can reload it! |
||
| − | |||
| − | Reloading TNT Cannon Step31.png|One more thing you can add is this piston. It will pull away the down-facing charge piston so that it isn't in the way when it's firing. And… that about wraps this tutorial up! Experiment with the cannon and test to see what mounts fit your needs. Make sure to pull the ammunition out of the magazine before you test blindly—I can imagine it wouldn't be much fun to watch something that took this long to build fly to pieces! |
||
</gallery> |
</gallery> |
||
| − | ==== |
+ | ==== ディスペンサーでのリロード ==== |
| + | [[トロッコ]]や[[ホッパー]]を使用して、全ての[[ディスペンサー]]に自動で[[TNT]]を分配するように設計されたキャノン。このキャノンにも問題がある。主に、炸薬の威力が強すぎると近くの[[トロッコ]]が破壊される可能性があり、[[レッドストーン回路]]と[[ホッパー]]の設計が大きすぎて実用的でない場合がある。 |
||
| + | Chaosriderがデザインした 112.OR1.2R4.1M6 Reroading WOLF は[[トロッコ]]と[[ホッパー]]を半効率的な方法で使用する : |
||
| − | In order to avoid having to manually place TNT into every dispenser of a cannon, some more modern cannons have been designed to use a minecart or hopper system in order to distribute a large stack of TNT from one location such as a chest into all of a cannon's dispensers. There are issues to using such systems, primarily that nearby minecarts may break if the cannon's charge is too powerful, and the necessary redstone circuitry and hopper designs may be deemed too large or complex to be practical. |
||
| − | |||
| − | The Chaosrider design for the 112.0R1.2R4.1M6 Reloading WOLF uses minecarts and hoppers in a compact and semi-efficient manner: |
||
{{yt|IsumHooxXvQ}} |
{{yt|IsumHooxXvQ}} |
||
| − | === |
+ | === 近・中距離砲 === |
| − | |||
| − | ==== Cannon ==== |
||
| − | |||
| − | You will need: 14 building blocks, 4 [[dispenser]]s, 4 [[redstone dust]], 6 [[redstone repeater]]s, 1 bucket of water, 1 [[button]], 1 [[fence]], 1 [[pressure plate]] and at least 4 [[TNT]]. |
||
| + | ==== キャノン ==== |
||
| − | # Build a U-shaped frame using building blocks and dispensers, 1 block above the ground. It should be 6 blocks long and 3 blocks wide and the dispensers should be facing towards the center of the U shape. |
||
| − | # Add 3 blocks to the front of the U-shape. These will help guide the shell. Now add a final dispenser, facing towards the column of blocks. |
||
| − | # Add 3 blocks in the center of the U-shape, one block lower than it. |
||
| − | # Place a fence post and a pressure plate in front of the cannon, then add water running towards the pressure plate. |
||
| − | # Put redstone dust over the 2 dispensers (you will have to hold down shift key to do this) then over the furthest dispenser, put a block on top of it and then put a button on top of that block. |
||
| − | # Finally, add Redstone repeaters to the remaining spaces and put redstone dust on the conners. Every redstone repeater has a 4-tick delay except the Redstone repeater pointing to the upper dispenser. |
||
| − | # Finally, fill all 4 dispensers with TNT and give it a try! |
||
| + | 必要なもの : [[ブロック]]×14、[[ディスペンサー]]×4、[[レッドストーン]]×4、[[レッドストーンリピーター]]×6、[[水入りバケツ]]×1、[[ボタン]]×1、[[フェンス]]×1、[[感圧板]]×1、少なくとも4個の[[TNT]]。 |
||
| − | <!-- Please insert a diagram here --> |
||
| + | # ブロックとディスペンサーを使用して、高さ1ブロックのU字型フレームを構築する。長さ6ブロック、幅3ブロックで、ディスペンサーはU字の内側に向ける。 |
||
| − | ==== Super Quick Raid Cannon ==== |
||
| + | # U字型の全面にブロックを3つ追加する。これは弾頭のガイドに役立つ。次に、ブロックの列に面した最後のディスペンサーを追加する。 |
||
| − | ''Pros: Very simple'' |
||
| + | # U字型の中央にブロックを3つ追加し、1ブロック下にする。 |
||
| + | # フェンスと感圧板をキャノンの前に置き、水を感圧板に向かって流す。 |
||
| + | # 2つのディスペンサーの上にレッドストーンを置き(スニークしながら)、最も遠いディスペンサーの上にブロックを置き、そのブロックの上にボタンを置く。 |
||
| + | # 最後に、残りのスペースにレッドストーンリピーターを追加し、角にレッドストーンを置く。レッドストーンリピーターは遅延を4ティックに設定する。 |
||
| + | # 最後に、全てのディスペンサーにTNTを入れて試してみてください! |
||
| − | ''Cons: No water means terrain damage. Can damage you a lot. Requires a bow'' |
||
| + | <!-- ここに図を挿入 --> |
||
| − | This cannon only requires a flame bow, 2 arrows, and 8 TNT (though you'll want to use either water or good armor). This was made by reddit user Zecon 365 [http://www.reddit.com/r/Minecraft/comments/1i22pm/instant_cannon_with_only_a_flame_bow_8_tnt_and_2/ here] More designs can be found [http://imgur.com/a/21RKY#0 here] |
||
| + | ==== 速射砲 ==== |
||
| − | {{yt|4ADJWPDe6X0}} |
||
| + | ''長所 : とてもシンプル。'' |
||
| + | ''短所 : 水が無いと損壊する。弓が必要。'' |
||
| − | ==== "The Pulverizer" - An Ultra Rapid Automatic Slime Cannon ==== |
||
| + | このキャノンは、[[フレイム]]のエンチャントを施した[[弓]]、二本の[[矢]]、8個の[[TNT]]のみを必要とする(但し、水又は優れた装甲を使用する必要がある)。これはradditユーザーZecon 365 によって作製された。[http://www.reddit.com/r/Minecraft/comments/1i22pm/instant_cannon_with_only_a_flame_bow_8_tnt_and_2/ here] |
||
| − | A simple and compact cannon that can cause massive destruction. |
||
| − | It utilizes an extremely quick timer to dispense and propel the primed TNT with the help of a slime block. |
||
| + | ==== 「粉砕機」超高速自動スライムキャノン ==== |
||
| − | {{yt|Od3UD4bGS50}} |
||
| + | 大きな破壊力をもつシンプルでコンパクトなキャノン。 |
||
| − | ==== Vertical TNT cannon ==== |
||
| + | [[スライムブロック]]を使って[[TNT]]を打ち出す為に、非常に高速な[[クロック回路]]を使用する。 |
||
| + | ==== 垂直TNTキャノン ==== |
||
| − | This is a simple TNT cannon to rebuild. It is very efficient and shoots you very high in the air. |
||
| − | {{CollapsedVideo|UKyqOa8UALQ|Vertical TNT cannon}} |
||
| + | 再構築するには単純なTNTキャノン。非常に効率的で、空中で非常に高く撃てる。 |
||
| − | ==== Downwards TNT Cannon ==== |
||
| + | {{CollapsedVideo|UKyqOa8UALQ|垂直TNTキャノン}} |
||
| + | ==== 下向きTNTキャノン ==== |
||
| − | This cannon has very few uses, but can be used instead of a gravity fed TNT dropper. |
||
| + | 用途はほとんどないが、重力供給式のTNTドロッパーの代わりに使用できる。 |
||
| − | http://www.youtube.com/watch?v=nLgScSMejto |
||
| − | ==== 3x9 |
+ | ==== 3x9 感圧版 ==== |
| + | ''長所:建築、理解、使用が簡単'' |
||
| − | ''Pros: easy to build, understand, and use'' |
||
| + | ''短所:Mobが誤って使用する場合がある'' |
||
| − | ''Cons: any mob can accidentally use'' |
||
| + | 水、レッドストーン、ブロック、TNT、感圧板が必要。9x3の長方形を作成し、一方の3の中央を壊し、さらに2つのブロックを穴の両側に、ブロックの上にまっすぐに置く。反対側に水を注ぎ、水源を除くすべての場所と、最も高いブロックの間にTNTを置く。高いところの片側に階段を作り、階段にレッドストーンを置き、1ブロック先に感圧板を追加する。高いところに到達するまで、枠に沿ってレッドストーンを置く。階段のそばの3つのレッドストーンを遠くの隅に置き、別の感圧板を置く。それを踏んで、3秒または4秒のカウントを待ってから、もう一方の感圧板を踏む。高いものは、約50〜60ブロックまで飛び出す。 |
||
| − | This cannon requires water, redstone, any block, TNT, and pressure plates. Make a 9x3 rectangle, break the middle of a 3 on one side, and put 2 more blocks on both sides of the hole, straight up on the blocks. Pour water into the other side, and place TNT everywhere but source, and between the highest blocks. Make stairs down one side of the high areas, place redstone on the stairs, one block away, then add a pressure plate. Place redstone along the frame until you get to the high points. Put three redstone past the far corner by the stairs, and place another pressure plate. Step on that, wait a count of 3 or 4 secs, then go step on the other plate. The high TNT will fly out up to about 50-60 blocks. |
||
| + | 注:水源は、破壊を防ぐため低TNTを中和する。 |
||
| − | Note: The water source neutralizes the lower TNT to prevent destruction. |
||
| − | ==== |
+ | ==== ワンボタン防御用キャノン ==== |
| + | ===== 遅延のために使用されるリピーター ===== |
||
| − | ===== Repeater used as delay ===== |
||
| + | 自動遅延のある単純なキャノン。主に、他より大きな原型のキャノンを壊したり、地上部隊や砲兵に対する壁に取り付けられた防御として使用される。 |
||
| − | It is a simple cannon that has an automatic delay. Used mostly for guinea pigging other, larger, prototypical cannons or as wall mounted defense against ground- based troops or artillery. |
||
| − | 114.0R4.4MB2 - |
+ | 114.0R4.4MB2 - 命名システムは上記の通り |
<gallery> |
<gallery> |
||
| + | ファイル:Cannon1.jpg|最初にキャノンの基礎をつくる |
||
| − | Cannon1.jpg|First build the base of the cannon |
||
| + | ファイル:Cannon2.jpg|片方に水を入れる |
||
| − | Cannon2.jpg|Then fill it with water on one side |
||
| + | ファイル:Cannon3.jpg|写真のようにブロックを2つ設置する |
||
| − | Cannon3.jpg|Build two blocks like on the picture |
||
| − | Cannon4.jpg| |
+ | ファイル:Cannon4.jpg|ボタンを付ける |
| + | ファイル:Cannon5.jpg|側面にレッドストーンを引く |
||
| − | Cannon5.jpg|Place the redstone wires on one side |
||
| + | ファイル:Cannon6.jpg|もう一方には、レッドストーントーチと最大遅延のリピータを4つ設置する。 |
||
| − | Cannon6.jpg|On the other side, place a redstone torch and four repeaters on highest delay |
||
| + | ファイル:Cannon7.jpg|正面にブロックを置き横にトーチを付ける |
||
| − | Cannon7.jpg|At the front place another block with a torch on the side |
||
| + | ファイル:Cannon8.jpg|炸薬をこのように充填し、 |
||
| − | Cannon8.jpg|load the cannon like this... |
||
| − | Cannon9.jpg| |
+ | ファイル:Cannon9.jpg|終了。 |
</gallery> |
</gallery> |
||
| − | ===== |
+ | ===== 遅延のために使用されるトロッコ ===== |
| + | スイッチをオンにすると、まず炸薬回路がオンになり、次にキャノンの周りにトロッコが送られ、ディテクターレールがオンになって砲撃が開始される。レッドストーンは節約できるが、大量の鉄が必要(ただし、廃坑からレールを手に入れると、この設計でコストを節約できる)。 |
||
| − | Once you activate the switch, first it activates the charge wiring, then sends a minecart around the cannon that triggers a detector rail, which primes the shot. Saves redstone, but takes a lot of iron (However, if you get rails from abandoned mineshafts this design can even save you resources!). |
||
| − | {{CollapsedVideo|wA5bsZGGqqk| |
+ | {{CollapsedVideo|wA5bsZGGqqk|トロッコ遅延}} |
| + | ===== 遅延のために使用されるディスペンサー ===== |
||
| − | ===== Dispenser used as delay ===== |
||
| + | スイッチをオンにすると、まず炸薬回路がオンになり、次にディスペンサーからアイテムが発射される。アイテムはフェンスの感圧板からゆっくりと落ちて燃える。レッドストーンを節約でき、サバイバルでキャノンを作る際にリピーターを必要としない。全体として、上記の設計やリピーターを遅延として使用する通常の自動遅延キャノンよりもコストがかからない。 |
||
| − | Once you activate the switch, first it activates the charge wiring, then shoots an item out of a dispenser that will slowly fall down through a pressure plate on a fence and burn. Saves redstone, and requires no repeaters for those survival cannon engineers, Over all, it's cheaper than the design above and normal automatic delay cannons with repeaters used as a delay. |
||
| − | {{CollapsedVideo|42qvgVsB9to| |
+ | {{CollapsedVideo|42qvgVsB9to|ディスペンサー遅延}} |
| + | ==== プレイヤー(または他のエンティティ)発射用キャノン ==== |
||
| − | ==== Human (or other entity) launching cannon ==== |
||
| + | 他の対象や地図の領域に[[エンティティ]]を放つのに使用できる。ただし、人間以外のものである場合、キャノンの中にエンティティを入れるのは少し難しい場合がある。 |
||
| − | Once this cannon is set up, then it can be used in order to launch [[entities]] onto other objects or areas of the map. It can be a little difficult however to get the entity inside the cannon, if it's something other than a human. |
||
| − | {{CollapsedVideo|i3moNcatKC8| |
+ | {{CollapsedVideo|i3moNcatKC8|人間キャノン}} |
| − | ==== |
+ | ==== エンダーキャノン ==== |
| + | 簡単に構築でき、非常に強力(実質的に無限)でありながら柔軟である。弾薬が展開されるのが愉快である。唯一の欠点は、起動しているエンダーポータルが必要であり、最大限の弾薬にはクリエイティブからサバイバルにする必要がある。着火されたTNTの爆発タイマーがエンドポータルを通過すると0にリセットされるという原則に基づいて動作する。つまり、潜在的に無限の量のTNTを、単純に8ブロックのスペースに凝縮することで、炸薬として使用できる。''Minecraft''は、最後まで爆発しないため、コンピューター自体が制限機能になる。 |
||
| − | This type of cannon is easily constructed, very powerful (practically infinite) yet flexible with its charge and hilarious to watch unfold. The only downsides are that it requires an active ender portal and you will need to be in creative to survive maximum charge. |
||
| − | It operates on the principle that the fuse timer on primed TNT is reset to 0 when it passes through an end portal. This means that a potentially infinite amount of TNT can be used as a charge, simply by condensing it into 8 blocks of space. ''Minecraft'' will not detonate them until you are in the end, thus making the computer itself the limiting function. |
||
| − | ==== |
+ | ==== 垂直ランチャー ==== |
| + | しばしば垂直ランチャーと呼ばれるこの大砲は、「花火機関砲」とも呼ばれ、TNTブロックを垂直方向に発射するのに使用でき、空中で爆発する。 |
||
| − | This cannon, often called vertical launcher, other times called "Fireworks cannon" can be used to launch TNT blocks vertically, so that they can explode whilst midair. |
||
| − | {{CollapsedVideo|xIZxG9nXeF8| |
+ | {{CollapsedVideo|xIZxG9nXeF8|垂直ランチャー}} |
| − | === |
+ | === 長距離砲 === |
| + | 長距離大砲の場合、複数列のTNTを備えたキャノンを使用して充填するのが最善であり、キャノンの高さに応じて、取り付けブロックで遊ぶのに役立つ。複数の弾薬TNTをキャノンに追加し、TNTをキャノンのどこに配置するかを試してみると、キャノンの経路にあるものはすべて効果的に破壊できる。 |
||
| − | For long range cannons it is best to use a cannon with multiple rows of TNT for the charge, and depending on the elevation of your cannon, playing around with mounting blocks helps. |
||
| − | If you add multiple shot TNT to your cannon, and play around with where you place the TNT in your cannon, then you can effectively destroy anything in the cannons path. |
||
| + | '''[https://giant.gfycat.com/BelovedAntiqueBernesemountaindog.webm 3X3 TNT トロッコキャノン.]''' |
||
| − | === Automatic cannons === |
||
| + | https://www.reddit.com/r/Minecraft/comments/7w4qsr/3x3_tnt_cannon_with_adjustable_range/dtxfx1b/ |
||
| − | + | === 自動キャノン === |
|
| + | |||
| − | A simple design using a bug with TNT minecarts, using multiple minecarts to simultaneously explode causing projectiles to be launched into the air. This cannon uses less TNT than traditional methods previous of 1.5 and launches projectiles much further. |
||
| + | ==== レールキャノン デザイン ==== |
||
| + | TNTトロッコのバグを使用したシンプルなデザイン。複数のトロッコを使用して同時に爆発させ、弾薬を空中に発射する。このキャノンは、1.5より前の従来の方法よりも少ないTNTを使用し、弾薬をさらに発射する。 |
||
L0: |
L0: |
||
| − | {{BlockGrid|r= |
+ | {{BlockGrid|r=Redstone Dust|s=Stone|p=Powered rail|d=Detector rail|g=Repeater|t=TNT |
|sss |
|sss |
||
|sgs |
|sgs |
||
| 591行目: | 561行目: | ||
L1: |
L1: |
||
| − | {{BlockGrid|r= |
+ | {{BlockGrid|r=Redstone Dust|s=Stone|p=Powered rail|d=Detector rail|g=Repeater|t=TNT|a=Air |
| − | |ata |
+ | |ata |
| − | |aaa |
+ | |aaa |
| − | |aaa |
+ | |aaa |
| − | |aaa |
+ | |aaa |
| − | |aaa |
+ | |aaa |
}} |
}} |
||
| + | ==== ディスペンサーベース ==== |
||
| + | L0:固体基礎、3X9、通常1層下に埋め込まれる |
||
| − | ==== Dispenser-based ==== |
||
| − | |||
| − | L0: |
||
| − | Solid base, 3X9, normally buried one layer down |
||
L1: |
L1: |
||
| − | {{BlockGrid|o= |
+ | {{BlockGrid|o=Obsidian|w=Water |
|ooo |
|ooo |
||
|owo |
|owo |
||
| 618行目: | 586行目: | ||
L2: |
L2: |
||
| − | {{BlockGrid|o= |
+ | {{BlockGrid|o=Obsidian|d=Dispenser|b=Buttons|a=Air |
|aba |
|aba |
||
|ooo |
|ooo |
||
| 631行目: | 599行目: | ||
L3: |
L3: |
||
| − | {{BlockGrid|o= |
+ | {{BlockGrid|o=Obsidian|w=Redstone Dust|r=Redstone repeater+on|a=Air |
|www |
|www |
||
|raw |
|raw |
||
| 642行目: | 610行目: | ||
|aaa}} |
|aaa}} |
||
| + | * 全てのリピーターは最大遅延に設定する必要がある。 |
||
| − | * Remember that all repeaters must be set to their longest setting. |
||
| + | * ここでは不発の場合に発生する可能性があるダメージを減らすため黒曜石が使用されたが、他の強力な固体ブロックは自由に使用してよい。 |
||
| − | * Note that obsidian was used here to reduce the possible damage in case of misfires, but feel free to use any other strong, solid block. |
||
| − | * |
+ | * 改良された完全自動のショットガンスタイルのキャノンのチュートリアルとモデルは[http://www.youtube.com/watch?feature=player_embedded&v=feEyb9NSO38] |
| + | * 全てのディスペンサーが正しい向きを向いている事を確認し、後ろの最初の水ブロックのみが水源ブロックであることを確認する。 |
||
| − | * Make sure all the dispensers face into the barrel of the gun and remember that only the first water block at the back is a source block. |
||
| + | * また、ディスペンサーの背面にホッパーを取り付けるとチェストなどからTNTを簡単に補充できる。 |
||
| − | * Also by using pipes of hoppers attached to the backs of the dispensers, one can more easily distribute stacks of TNT from a central point, such as a chest. |
||
| + | * デザインを改善するかのようにいつものように気楽に。ハッピーハンティング! |
||
| − | * Feel free as always to improve the design. Happy hunting! |
||
| − | === |
+ | === 特殊なキャノン === |
| − | ==== |
+ | ==== 爆撃キャノン ==== |
| + | Minecraft 1.15時点で、[[ディスペンサー]]は点火されたTNTを発射するため、下向きのディスペンサーは下にある物にTNTを降らせる可能性がある。 |
||
| − | This cannon consists of a narrow platform over your target with a long row of dispensers filled with TNT facing downwards. From there you can apply redstone to the dispensers to rain TNT on to your target with devastating effect. |
||
| + | ''長所:報復されずに敵基地を爆撃できる。TNTキャノンをまっすぐに発砲することはできないが、岩盤まで簡単に達することができる。基地の上に水がある場合は、砂を落とせばよい。'' |
||
| − | ''Pros: This is a great way to bomb enemy bases without much retaliation; most cannons cannot fire straight up. It can easily blow its way to bedrock.'' |
||
| + | ''短所:基地の上に防護ブロックがあるファクションサーバーでは役に立たない。非常に大量のTNTが消費される。下向きのTNTキャノンよりも射程が低い。'' |
||
| − | ''Cons: Very resource-heavy; a lot of TNT is required, and to have parallel droppers requires a lot of repeaters, which then cost a lot in smelting for the stone, or a silk touch pick. A big problem is that enemy players can get up to your platform and raid the droppers, or set a trap of their own. Enemy players can shoot a bow and potentially knock guards off the platform.'' |
||
| + | このトラップは非常に単純である。高い所に移動し、床を建築し、ディスペンサーを下に置き、クロック回路を設定し、敵の基地が破壊されるのを見るだけである。十分な高さまでブロックの柱を積み上げるだけである。高くし過ぎるとTNTが空中で爆発し、無駄になる。ターゲットの上に直接構築する。ディスペンサーを設置し、TNTで満たす。[[レッドストーン回路|クロック回路]]を設定してディスペンサーをオンにするが、その際に速度を早く設定しすぎるとTNTの衝撃波が上向きに発射され、キャノンが破壊される。ディスペンサーは後で採掘できる。降りる問題については、水を使用すればよいが、[[エンダーパール]]が便利である。 |
||
| − | Here are the steps: |
||
| + | ==== 耐水キャノン ==== |
||
| − | First, you get up to where the main platform will be. (15-40 blocks are recommended. Don’t go too high up, the TNT will explode in midair, or too low, it will blow itself up.) Then the main platform, which should be at least three blocks wide. Don't worry about using cheap materials such as dirt; no TNT should be detonating in range of it. Now, place dispensers facing downwards, or with it facing off your platform. Then, you place redstone connecting the dispensers with a button. Then, you fill each dispenser with a good amount of TNT. When you are ready, just hit the button, or just let a redstone clock do the work for you. If you are using a clock, don't make it to fast, have it around ten ticks, because the waves of TNT will detonate each other, launching themselves up to blow up the whole contraption, easily killing any players on the platform. |
||
| + | 砂とTNTを融合し、水で覆われたブロックを爆破する。水はTNT大砲の敵であるが、これは水を回避する。 |
||
| − | ==== Anti-water defense cannon ==== |
||
| + | {{CollapsedVideo|iSHDHlCBMVk|耐水キャノン}} |
||
| + | ==== 照準可能なTガン ==== |
||
| − | It fuses sand and TNT together to blow up blocks covered with water. Water is the enemy of TNT cannons, and this one works around it. |
||
| − | {{CollapsedVideo|iSHDHlCBMVk|Anti-water defense cannon}} |
||
| + | T字型のキャノン。動作方法:TNTで満たされた2つの小さなくぼみの間の取り付けブロックの上に弾薬を垂直に落とし、弾薬の水平発射速度を変更する。メインのくぼみをいっぱいにしないことで、範囲を調整できる。敵のキャノンを破壊して城に入るのに最適である。 |
||
| − | ==== Aim-able T gun ==== |
||
| + | {{LoadPage|Tutorials/TNT cannons/t-gun|シンプルなTガンチュートリアル|h5}} |
||
| − | This cannon is shaped like a T; the way it works is that it drops the shot in vertically on top of a mounting blocks between 2 smaller troughs that can be filled with TNT to change the shot's horizontal launch angle. You can adjust the range by not filling the main trough all the way. Great for putting in a castle to destroy enemy artillery! |
||
| + | ==== 矢のキャノン ==== |
||
| − | {{LoadPage|Tutorials/TNT cannons/t-gun|Simple T-Gun Tutorial|h5}} |
||
| + | 矢のキャノンは、技術的には広い範囲と効果範囲を持つ[[ディスペンサー]]のものと同じ機能をする。作成する一般的な方法:通常のキャノンの取り付けブロックがある場所にピストンを伸ばす。これは、正確に9個のリピーターにひっかけられ、反転されピストンが伸びたままになる。残りは、通常のキャノンのように配線された単純な炸薬のくぼみである。次に、弓を使用してピストンヘッドに矢を設置し、炸薬のくぼみをロードして、ボタンを押す。すると、TNTが爆発する直前にピストンが収縮して矢が落ち、TNTがオフになり、矢が長距離に発射される。このキャノンは、ブロックが壊れたくない一般的な中距離の場面で一般的に使用される。 |
||
| − | ==== Arrow cannon ==== |
||
| + | 他のデザイン: |
||
| − | An arrow cannon technically does the same job as a [[dispenser]] just with greater range and area-of-effect. The general way to make these is to have a piston extended over where the mounting block on a normal cannon would be. This would be hooked to a repeater string exactly nine repeaters long, then inverted to keep the piston extended. The rest is simply the charge trough, wired up like a normal cannon. Then use a bow to deposit arrows on the piston head, load the charge trough, and press the button. What happens is: right before the TNT explodes, the piston retracts making the arrows fall. Then the TNT goes off, launching the arrows long distances. This cannon is commonly used in generally mid-range scenarios where damage to blocks is unwanted. |
||
| + | [[ファイル:Arrow Cannon Design (Sledgehammer).png|alt=Arrow Cannon|thumb|このキャノンは、砂を矢の取り付けブロックとして使用する。リピーターの遅延に注意。]] |
||
| + | [[ファイル:TNT Cannon Design.png|alt=Top view.|thumb]] |
||
| + | 右図のキャノンは、遅延を使用して全面上部の砂を砕き、矢を加速させる。右下の図は上面図である。 |
||
| − | ==== |
+ | ==== 砂のキャノン ==== |
| + | 砂のキャノンは無害なTNTキャノンの一種である。概念は同じだが、弾薬として砂を使用する。また、キャノンのTNTが爆発するにつれて砂が落下し、砂が撃たれる。砂を積み上げて「砂ショットガンキャノン」を作ることができる。これは異なる距離で複数の砂ブロックを発射できる。通常、キャノンは一方向にのみ発射され、破壊的ではない。クリエイティブのマルチプレイヤープロットサーバーのプレイヤーのプロットに砂を投げ、ホストを怒らせるのに使用できる。砂のキャノンは、マルチプレイヤーサーバーの荒らしにもよく使用される。被害者が主張する土地の改修を行っている間、荒らしは捕まらないようにできるだけ早く砂の大砲を建設し、被害者がそうすることを望んで建設をしている間に被害者の家の頂上に砂のブロックをいくつか発射する。屋根のブロックを壊し、その上に砂を落とす。 |
||
| − | Sand cannons are a variation of the TNT cannon that is harmless. The concept is the same, but uses sand as a projectile. Also, the sand must be falling as the TNT in the cannon explodes, shooting the sand, otherwise, nothing happens. It is possible to pile the sand up to make a "sand shotgun cannon", which can fire multiple sand blocks at different distances. Note that the sand cannon generally only fires in one direction and is not destructive. It can be used for pelting sand at people's plots in creative multiplayer plots servers, and in turn, making moderators mad. Sand cannons are also commonly used by griefers on multiplayer servers. While the victim is doing renovations on their claimed land, griefers may build a sand cannon as quick as possible as to not being caught, and fire several blocks of sand to the top of the victim's house while they are doing construction in hopes that they will break a block on their roof and have sand fall on top of them. |
||
| + | 砂はTNTとは異なる速度で落下するため、砂を使用するTNTサンド変数キャノンを作成し、砂を使用してTNTを発射する場所を決定することはできない。ただし、照準可能なキャノンを使用している場合、同じ水平角で砂を発射する。 |
||
| − | Sand falls at a different speed than TNT does. As a result, it isn't possible to make a TNT-sand variable cannon that uses sand to determine where the cannon will launch its TNT to. However, it will fire the sand at the same horizontal angle if using an aimable cannon. |
||
| + | 砂のキャノンを構築するには、ピストンを使用してTNT炸薬の前で砂を押し出すか、反転器に取り付けられた粘着ピストンを使用して、砂の下のブロックを取り外す。 |
||
| − | To build a sand cannon, use a piston to push the sand off in front of the TNT charge, or a sticky piston attached to an inverter to remove a block holding the sand up. |
||
| + | 注:使用できるのは[[砂]]だけではない。落下する物はすべて使用できる: |
||
| − | NOTE: [[Sand]] is not the only thing that can be used. Anything that falls can be used, and this includes: |
||
| − | * |
+ | *[[砂利]] |
| − | * |
+ | *[[金床]] |
| − | * |
+ | *[[ドラゴンの卵]] |
| + | *[[コンクリートパウダー]] |
||
| − | Note that anvils and dragon eggs will not be pushed by pistons, so only the second method described above for building will work for said blocks. |
||
| + | 金床とドラゴンの卵はピストンで押せないため、上記のブロックを構築する二番目の方法だけが機能する。 |
||
| − | === Dry cannons === |
||
| + | === ドライキャノン === |
||
| − | A dry cannon uses TNT to launch TNT (or even the user on [[creative]] mode). Dry cannons are simple, easy to build and effective but require lots of [[obsidian]] or other blast-resistant materials. |
||
| + | ドライキャノンは、TNTを使用してTNT(または[[クリエイティブ]]モードのプレイヤーも)を飛ばす。ドライキャノンはシンプルで組み立てやすく、効果的だが、多くの[[黒曜石]]またはその他の耐爆性材料が必要である。 |
||
| − | The main difference between a dry cannon and other designs is the lack of [[water]] and the use of a '''wadding block'''. |
||
| + | ドライキャノンの他との主な違いは、[[水]]が無いことと'''低密度ブロック'''を使用するということである。 |
||
| − | * The charge is a large amount of [[TNT]] that propels the shot. All of these TNT blocks must be ignited simultaneously. |
||
| − | * The wadding block can be any type of block (except obsidian, bedrock and any other blast-resistant blocks) and provides a buffer between the charge and the shot. [[Sand]], [[snow]], [[wool]] and other soft blocks seem to produce the best effects. |
||
| − | * The shot is a block of [[TNT]] or the user if you are on creative mode and drop into position on time. |
||
| + | * 弾薬を推進するのは大量の炸薬[[TNT]]である。これらのTNTはすべて同時に点火する必要がある。 |
||
| − | ==== Vertical cannon ==== |
||
| + | * 低密度ブロックは、任意の種類のブロック(黒曜石、岩盤、その他の耐爆性ブロックを除く)にすることができ、炸薬と弾薬の間の緩衝器の役割をする。[[砂]], [[雪]], [[羊毛]]など柔らかいブロックが最高の効果を生み出す。 |
||
| + | * 弾薬は[[TNT]]または、ユーザーがクリエイティブモードであり時間通りに位置に落ちる場合はユーザーでも良い。 |
||
| + | ==== 縦型キャノン ==== |
||
| − | : This design is a vertical cannon but can be turned horizontally as well. |
||
| − | : The cannon is built entirely of [[obsidian]]. |
||
| − | # Start by building a 5x5x4 rectangular prism, leaving a 3x3x2 chamber inside. |
||
| − | # Make a hole in the top center of the prism. |
||
| − | # Place one piece of obsidian on the center block at the bottom of the chamber. This is the mounting block. |
||
| − | # Load bottom layer of chamber with [[TNT]]. This is the charge. |
||
| − | # Place the wadding on top of the mounting block. |
||
| − | # Place the shot on the wadding. |
||
| − | # Provide a [[redstone circuit]] so all the charge blocks are activated simultaneously. |
||
| − | # Stand back and throw the switch! |
||
| + | : このデザインは垂直方向のキャノンだが、水平方向にも回転できる。 |
||
| − | ==== Horizontal cannon ==== |
||
| + | : キャノンは完全に[[黒曜石]]で作られている。 |
||
| + | # 5×5×4の直方体をつくり、内部に3×3×2の空間を残す。 |
||
| + | # 直方体の上部中央に穴をあける。 |
||
| + | # 中の底の中央のブロックに黒曜石を1つ置く。これが取り付けブロックとなる。 |
||
| + | # 中の最下層に炸薬である[[TNT]]を詰める。 |
||
| + | # 低密度ブロックを取り付けブロックの上に置く。 |
||
| + | # 低密度ブロックの上に弾薬を置く。 |
||
| + | # 全ての炸薬ブロックが同時に起動するように[[レッドストーン回路]]を組む。 |
||
| + | # 後ろに立ち、スイッチを押す! |
||
| + | ==== 水平キャノン ==== |
||
| − | Make a long tube of obsidian (works best with 3x3x6 or 3x3x7) with a hollow middle. Then, put two blocks of obsidian on the top. Hollow it out. Fill with TNT, and put an non-blast resistant block in the last space on the front. Cover the top with redstone, and place a button on the back. Optionally, make a platform to stand on when you trigger it. You should also make it a little ways off the ground. See diagram below, in which the orange stands for the wadding (shown in cutaway side view): |
||
| + | 真ん中が空洞の長い黒曜石の筒(3x3x6または3x3x7で最適に動作する)を作成する。次に、上部に黒曜石を2つ置く。くり抜く。TNTを満たし、前面の最後のスペースに耐爆性ブロックを置く。上部をレッドストーンで覆い、背面にボタンを設置する。必要に応じて、起動した際に立つ床を作成する。また、地面から少し離れたところに設置する必要がある。以下の図を参照。オレンジは低密度ブロックを表す(側面の断面図で表示): |
||
| − | {{BlockGrid|O=obsidian|T=tnt|R=redstone-wire|B=button|W=orange-wool|A=air|G=dirt|S=stone |
||
| + | |||
| + | {{BlockGrid|O=Obsidian|T=TNT|R=Redstone Dust|B=Buttons|W=Orange wool|A=Air|G=Dirt|S=Stone |
||
|AAAAAARRA |
|AAAAAARRA |
||
|BRRRRROOO |
|BRRRRROOO |
||
| 731行目: | 704行目: | ||
|OAAAAAAAA |
|OAAAAAAAA |
||
|GGGGGGGGGG}} |
|GGGGGGGGGG}} |
||
| + | ターゲットでTNTがいくつか起動するが、高価で非常に長い距離飛ばない。だが大きなキャノンでは、各弾薬で大量の土地を細断処理できる。大きなキャノンを持っている場合は、レッドストーンが吹き飛ばされることがあるため、レッドストーンを手元に置いておくと良い。村の防衛に適す(大砲が近づきすぎるとモブが爆発する!)。 各弾薬に大量のTNTが必要なため、クリエイティブモードに最適。 |
||
| + | === TNTカタパルト === |
||
| − | It will launch several blocks of TNT at your target, however it is expensive and does not have a very long range, but with a big cannon, you can shred a large amount of land with each shot. Occasionally the redstone will be blasted off if you have a large cannon, so it is good to keep some redstone on hand. Good for the defense of a village (blast mobs with a row of cannons when they come too close!). Best for creative mode due to the large amount of TNT needed for each shot. |
||
| + | 1.8で導入されたスライムブロックは、エンティティを特定の高さに跳ね返すことができる。また、ピストンに押されると、他のブロックを一緒に押すことができる。これらの機械は、この概念を利用してTNTカタパルトを作成する。 |
||
| + | 長所 |
||
| − | === TNT catapults === |
||
| + | * 低コスト |
||
| − | Slime blocks, introduced in 1.8, can bounce entities to certain heights. They can also push other blocks with them when pushed by pistons. These machines make use of this concept to make TNT catapults. |
||
| + | * 長距離であり、弧を描いて発射する |
||
| + | * 他のキャノンよりも使うTNTがはるかに少ない |
||
| + | *非常に速く発射できる |
||
| − | '' |
+ | ''短所'' |
| + | * 必要なスライムブロックとピストンの入手が難しい場合がある |
||
| − | * They are very cheap to build. |
||
| + | * カタパルトのターゲットは固定され、範囲が限られる |
||
| − | * They are decently long ranged and fire in an arc. |
||
| − | * They use much less TNT than other cannons of their skill. |
||
| − | * They can be fired extremely rapidly. |
||
| − | ''Cons'' |
||
| − | * It can be hard to obtain the pistons and slime blocks needed. |
||
| − | * The catapult has a fixed target and limited range. |
||
| − | ==== NiceMarkMC's |
+ | ==== NiceMarkMC'sデザイン ==== |
{{yt|9M3HZ4XBMKQ}} |
{{yt|9M3HZ4XBMKQ}} |
||
| − | ==== Morzeysminecraft's |
+ | ==== Morzeysminecraft'sデザイン ==== |
http://www.planetminecraft.com/project/the-missile-silo-facility-360-degree-tnt-cannon-aimable-and-awesome/ |
http://www.planetminecraft.com/project/the-missile-silo-facility-360-degree-tnt-cannon-aimable-and-awesome/ |
||
| − | == 動画 == |
||
| + | == 参考動画 == |
||
| − | * [http://www.youtube.com/watch?v=TqzMMmsZESY Mortar] - High angle shot using a ladder mounting block. |
||
| + | |||
| − | * [http://www.youtube.com/watch?v=dqKUjZLZlZw Compact] - The shot is primed by hand, which must now be done with [[flint and steel]]. |
||
| + | * シンプルなダブルレバーキャノン{{yt|x0l2q8qdh5Q}} |
||
| − | * [http://www.youtube.com/watch?v=JeV0XB-w_yM Super large cannon] - Firing other [[entities]]. |
||
| + | * シンプルなダブルレバーキャノンとエンドでの剣の[[防御]]エフェクト {{yt|YM7FJW6znjs}} |
||
| + | * [http://www.youtube.com/watch?v=TqzMMmsZESY Mortar] - [[はしご]]を用いた高射砲 |
||
| + | * [http://www.youtube.com/watch?v=dqKUjZLZlZw Compact] - 弾頭は手で着火出来るが、[[火打石と打ち金]]を使用する必要がある |
||
| + | * [http://www.youtube.com/watch?v=JeV0XB-w_yM Super large cannon] - 他の[[エンティティ]]を発射 |
||
| + | |||
== トリビア == |
== トリビア == |
||
| − | * TNTキャノンの発射は |
+ | * TNTキャノンの発射は''Minecraft''で最もランダムなイベントの1つである。これらは、数十(または数百)の異なるベクトルを決定するために数千の異なるサンプルポイントが取られ、それらが加算されて弾頭の基本軌道を形成するためである。ただし、いくつかのキャノン、特に垂直迫撃砲を99%正確にすることができる(炸薬はバレルに戻り、特定の高さで爆発する)。 |
| − | * あなたが本当に怠け者でオペレーター権限を持っている(またはシングルプレイ |
+ | * あなたが本当に怠け者でオペレーター権限を持っている(または[[コマンド]]を使用するシングルプレイ)場合は、コマンドまたは[[コマンドブロック]]を使用するといい。コマンド {{cmd|summon minecraft:tnt ~ ~2 ~ {Fuse:12,Motion:[1.0,0.0,0.0]}}} は、あなたの頭の真上から東へ向けて[[TNT]]を発射する。 |
| 766行目: | 743行目: | ||
{{デフォルトソート:ちゆうとりある TNTきやのん}} |
{{デフォルトソート:ちゆうとりある TNTきやのん}} |
||
| − | [[de |
+ | [[de:technik:TNT-Kanone (Redstone)]] |
[[en:Tutorials/TNT cannons]] |
[[en:Tutorials/TNT cannons]] |
||
| − | [[es:Tutoriales/Cañones de |
+ | [[es:Tutoriales/Cañones de dinamita]] |
| − | [[fr:Tutoriels/Canons |
+ | [[fr:Tutoriels/Canons à TNT]] |
[[ru:Пушка]] |
[[ru:Пушка]] |
||
[[zh:教程/TNT大炮]] |
[[zh:教程/TNT大炮]] |
||
2021年2月22日 (月) 10:00時点における最新版
TNTキャノン(英:TNT cannon)は、TNTあるいは爆発を引き起こすエンティティの爆風によってTNTやTNT付きトロッコを発射させる装置である。
概要
ここではTNT炸薬でTNT弾頭を発射する旧式のキャノンについて解説している。Java Edition 1.8以上ではスライムブロックでTNTを打ち上げるTNTキャノンを作ることも可能である。
構成
- 本体
- 配線
- 着火用
- 圧縮用
- 発射用
- その他
- 着火用
- 爆発物
- 炸薬用
- 弾頭用
- 爆発耐性に優れた外装
- その他ブロック
基本概念
- TNTキャノンはTNTが水中で爆発した場合、ブロックを破壊しないという仕様を基に作動する。通常、TNT等の着火にはレッドストーンが用いられる(まず炸薬に着火し、信号を遅延させて弾頭に着火する)。
- プレイヤー、Mob、TNT、矢、砂や砂利、金床など、ほとんどのエンティティを弾頭として使用できる。
- 射撃の際は弾頭が水に着弾しないようにすることを推奨する(耐水弾を使用していない場合)。
- 炸薬とは、弾頭を発射するためのTNTである。
- テストの際は、着弾点に水を設置しよう。でなければ景観が破壊され、Mobもダメージを受けるだろう。
- 適正に射撃するために(そしてキャノンの自爆を避けるために)弾頭に着火する前に炸薬に着火する必要がある。炸薬は水に漬けられている為キャノンは破壊されないが、弾頭は水に漬けられていない為、ブロックを破壊しMobにダメージを与えるだろう。
- 別の箇所で説明している通り、レッドストーンは爆縮用炸薬を除く全ての炸薬を同時に着火するために使用する。
- 射程を最大まで伸ばすには、射角を約30度に設定し、炸薬と弾頭の距離をできるだけ近づけて炸薬の爆風を最大限に弾頭へ伝える必要がある。
- さらに射程を伸ばしたい場合は、高い位置にTNTキャノンを作ると良い。
- 矢、砂や砂利、金床、またはMobを弾頭として使用する場合はピストンで落とす必要がある。
キャノンの名前
命名の一般的な方法は二種類ある。「一般名称」はTNTキャノンの性能を示し、「技術名称」はレッドストーンの遅延などを示す。 しかしこれらは欧米の命名方法であり、日本での一般的な名前は現実の兵器に似せて命名する。場合によっては、キャノンの種類が名前になる場合がある。 ここでは欧米の命名方法について解説する。
一般名称
一般名称はTNTキャノンの性能を示す。これは二種類のTNTキャノンの性能を比較するときに便利であり、名前を見るだけで基本的な性能を知ることができる。
ダメージ量、コスト、弾頭数、有効射程とニックネームを下のテンプレートに当てはめて名付ける。
<ダメージ量>.<作成難度>:<弾頭数>.<有効射程> <ニックネーム>
例: 40.86:8.104 榴弾砲
- ダメージ量
ダメージ量はキャノンがどれだけ「良い」かを示し、値が大きいほど優れている。
精度値は精度から算出される。これは、弾頭の爆発からその位置までの距離の平均である。
画像では、精度は青い線の長さの平均である。赤い点は爆発の位置の平均であり、青い線の終点である。他は爆発線。精度値の式は (45-A)*2ここで、Aが精度である。
パワー値は弾頭数に10を掛けたものである。
速度はキャノンの前面から爆発の中心までの距離の平均である。速度値の式はS/5である。Sが速度。
損傷値はこの式を用いて算出する: (((45 - A)*2) + (P*10) + (S/5)) / 3
- 人間工学値
人間工学値はキャノンの建設がどれだけ難しいかを示し、値が大きいほど簡単に 建設出来ることを意味する。これは、構築値、レッドストーン値およびTNT値の平均である。
構築値は、火、水、空気、TNTを除く、キャノンのブロック数の推定値である。算出には (1000 - B)/10 を用いる。Bが構築値であると仮定する。
レッドストーン値はレッドストーンの複雑さの1~10の推定値から10を引いたものである。 (10-R)*10 Rが推定値。
TNT値は (50 - T) * 2 で、Tはキャノンをフル稼働させる為に必要なTNTの数を表す。
EVを計算する方程式の全体は ((1000 - B)/10 + ((10 - R)*10) + ((50 - T)*2)) / 3 である。
- その他
弾頭数、有効射程、ニックネームは一目瞭然だが、より明確にするために、EVのTNT値と同じであるTA、キャノンの前面から最も遠い場所での爆発までの距離であるMRを追加する。
下品でないことや、他のキャノンのニックネームと被らないことを前提に、どんなニックネームを名付けてもよい。
これが 40.86:8.104 Basic Canonの名前の由来である。
ダメージ値 = (((45 - 0)*2) + (1*10) + (104/5)) / 3 = 40
人間工学値 = ((1000 - 50)/10 + ((10 - 2)*10) + ((50 - 8)*2)) / 3 = 86
40.80:8.104 Basic
技術的名称
技術的名称は、機能、用途、操作方法を示す。TNTキャノンの技術のすべての革新を予測することは不可能だが、ほとんどのキャノンはこれらの標準を技術的名称に使用することで利益を得られる。
- 技術的名称の最初の数字は、炸薬用の垂直列の数である。例のキャノンでは1。
- 次の数は、弾頭数である。繰り返すが例のキャノンでは1。
- 次の数は炸薬数である。
- 爆縮システム搭載の場合、炸薬数を書き込んだ後、小数点を書き、爆縮用炸薬数を書き込む。搭載していない場合は0を書き込む。
- その後、リピーター数と設定されている遅延をリストする。例えば、4ティック(最大遅延)のレッドストーンリピーターが10個ある場合、R4.10と表記する。レッドストーンリピーターがない場合は手動でMを作成する。
- 取り付けブロックはコードで指定する。ブロックなしの場合は0または1、フルブロックは2、ハーフブロックは3、はしご、ガラス板、鉄格子は4、トラップドアは5、フェンス、感圧板は6、ピストンは7。
- キャノンが特殊な射撃(垂直射撃など)を行う場合、または広角射撃を行う場合は取り付けブロックコードを書き込んだ後にそれを書き足す。
- そして、キャノンのニックネームはもちろんここに来る。
上記のTNTキャノンは「114.0R4.4M2」という名前になる。
建設に必要な材料
サバイバルモード
概要で説明した通り、TNTキャノンは多くの部品から成り立っている。ここでは建設に必要なものを示す。
1. 本体
- 丸石など一般的なブロックを使用する。
- マルチプレイで、別のキャノンへ向けて射撃する際は爆発耐性の高いブロックを使用する(TNTキャノンへの防御については以下を参照)。
- もうひとつの要項は可視性である。黒曜石で本体を作る際は、レッドストーンダストが見えにくく、これが致命的なミスへ繋がる可能性がある。一方、森などで待ち伏せを想定している場合は、オレンジの羊毛やラピスラズリブロックなど、目立つブロックの使用は避ける。
2. 配線
- 炸薬に着火する配線と弾頭に着火する配線の、主要な2つの配線がある。
- レッドストーンリピーターがない場合、ボタンなどの2つの動力源を手動で操作する。手動で操作する場合、弾頭用のドロッパーに接続する回路と、炸薬に着火する回路だけでいい。ただし、自爆を防ぐためにそれぞれのボタンを押すタイミングを計らなければならない。
- レッドストーンリピーターを使う場合は別の話になる。炸薬に着火してから弾頭に着火するまでの時間は40ティック(最大遅延のレッドストーンリピーター×10)である。1つの動力源だけを使用し、操作も手動より簡単である。
3. 取り付けブロック
- 取り付けブロック(以下で説明)は特殊なブロックのみである。
4. 耐爆カバー
クリエイティブモード
クリエイティブモードでは、戦争用にTNTキャノンを建設する理由はないが、テストと開発に適している。
派閥
派閥では、TNTキャノンでの襲撃が基地に入る最も一般的な方法である。主に2つの方法がある。これは水のある黒曜石でのみ動作する。最初の(有効になっているサーバー上で)ものは外にエアバーすることである。爆発が黒曜石に到達するよう、キャノンの発射には遅延が必要だが、着火されたTNTは水の中にあってはいけない。これらのキャノンは他の壁では機能しない。他の方法は、以下で説明するハイブリッドキャノンを使用する方法である。基本的なハイブリッドは、最も一般的に使用される襲撃砲の1つである。
制限およびそれらを解除する方法
TNTキャノンのエンジニアリングにおける5つの制限は以下の通り:
- 何をしてもTNTは着火されてから約4秒間、8回点滅する。これを回避するにはTNTをより速く飛ばす必要があるが、これによって制限が2になる。
- エンティティが脱出速度で飛行するとMinecraftがクラッシュする可能性がある。Minecraftのクラッシュを引き起こす可能性のあるもうひとつのことは、大量の炸薬が同時に爆発することである。割り当てられた1.5GBのRAMで、TNTの最大数は約500である。これを回避する方法は、Minecraftに許可されているRAMを増やすことだが、低スペックのコンピューターには推奨できない。
- TNTの爆発範囲は7ブロックなので、大きなキャノンを作るだけでは無駄である。弾頭と炸薬の距離が9ブロックを超えると、無駄な爆発が発生する。これは垂直機構を追加するか、圧縮システムを採用するか、または両方を組み合わせる事で回避できる。
- 着火されたTNTは水流に流される。これは状況に応じて、いい場合も悪い場合もある。水源にすることで回避出来る。
- 垂直機構を強化し過ぎると弾速が速くなり過ぎて、ゲームがクラッシュする。キャノンの威力を落とすか、半垂直にすることで回避できる。
キャノンのサイズと特別な機能

大規模なキャノンの例
キャノンのサイズのデフォルトの定義は、弾頭数または射程距離である。小規模なキャノンについて話している場合は、キャノンのサイズ(例えばそれが占めるスペース)で、大量破壊兵器について話している場合は、弾頭数であるかもしれない。しかし、多くの場合は炸薬数である。
112.0MM3 などの小型のキャノンは、射程が非常に狭い。対人用。
116.0R4.6M2 などの中型のキャノンは、最初のラインシージャー(その後の射撃のための目安)として設定し、物資や壁などのターゲットへ向けて、矢のカバーを付けて設定するか、ターゲットとして設定することを目的としている。射手キャノン。
119.0R4.10M3 などの大型のキャノンは、遠くからの攻撃、国境からの長距離迫撃砲、対キャノン防御、2番目のラインシージャー、その他の多くの用途に使用する。
119.3R4.10M6 などの狙撃用キャノンはテント砲撃のためのものであり、キャノンが砲撃しているのを見ることができない場合に、敵の陣営やそのような他の範囲外の任務を設定する。
そして、187.0MM6 広角砲などの大規模なデモキャノンは、あらゆる防御システムを完全に破壊するために使用される。
次のような機能をキャノンに追加できる:
- 複数の弾頭 [1]
- 半自動/全自動の発射とリロード[2] [3]
- 爆縮用炸薬(メインの炸薬とは別のTNTで、炸薬を弾頭の方へ押し出して弾速を増加させる)
- 安全装置 爆発からプレイヤーやモブを保護する耐爆シールド
- 調整可能な弾頭用遅延
- 砂、砂利、金床などの代替弾頭矢 [4]
- ドライキャノン: 爆発耐性の高いブロックでキャノンを建設して、設計、管理を簡略化し、有効射程を伸ばしたキャノン。建設についての詳細は、以下を参照。
- 上方向や斜め方向など特殊な方向へ発射するキャノン
- 調整可能な射程、弾頭、方位(照準可能なキャノン)
- 散弾、大量破壊砲
- 散弾銃用の炸薬
圧縮システム
TNTベースの圧縮

圧縮付きのキャノンの例。
2つの異なるキャノンの飛距離の比較。それぞれ1発の圧縮と圧縮なしの射撃。
弾頭と炸薬の距離が7ブロック以上離れている場合、ほとんど意味がなくなる。これを解決するには、炸薬を圧縮する必要がある。
圧縮用炸薬をメインの炸薬より少し前に起爆させ、その爆風によってメインの炸薬を弾頭の方へ押し出す機構である。これにより、弾頭と炸薬の距離が短くなるため、弾速が増す。 通称: 爆縮システム
ピストンベースの圧縮
ピストンを使用して、炸薬を弾頭に近づける。複雑になるが制御しやすい。動作させるには、メインのチャージを開始し、TNTブロックをエンティティに変換する必要がする。TNTに着火した後、一連のピストンで全ての炸薬を押して、弾頭の後ろの単一のスペースに圧縮することが出来る。この機構を用いることで、同じ炸薬数でも格段に弾速が増す。[5]
自爆を防ぐために、ピストンで水を堰き止めないようにしなければならない。 この際、ピストンの上から水をかける。 また、爆発する前にピストンを引っ込ませる必要がある。なぜなら、キャノンの自爆を招くからだ。ピストンが伸びていると水中に空間ができ、水による保護が損なわれてしまう。
ガイドブック
TNTに着火すると、片側に僅かに移動する。これにより、毎回精度が変動する。これは、ほとんどキャノンで起こりうる。しかし、解決策は簡単である。キャノンにガイドブロックを追加すると、TNTの着火時にTNTの両側に壁ができるが、TNTは左右に移動せず、他の点では真っ直ぐな射撃の対角線になる。設計でこれが許可されていない場合は、TNTの両側に設置する代わりに、ガイドブロックを1ブロックだけ高くすることができる。これは、TNTが飛んで空中で横に移動するのに機能する。ほとんどの基本的なキャノンでは、TNTキャノンが炸薬を自動的に着火する場合、ガイドブロックは透明でないといけない。そうでない場合、チャージを発火させるレッドストーンが炸薬の隣のブロックに電力を供給し、炸薬にも点火する。この説明が不明な場合は、次の図を参照:
ドライキャノンでは、ガイドブロックを付けないと精度が落ちる傾向がある。ただし、ドライキャノンのガイドは、正確に着火されるのではなく、炸薬が正確に発射されるように指示するためのものである。ただし、ガイドが長すぎると、範囲が狭くなる場合がある。
薬室内の取り付けブロック
薬室内の取り付けブロックは、弾速、射程、高さに応じて選択する必要がある。当然、これらの変数は炸薬の位置と量、および弾頭のタイミングに大きく依存するが、取り付けブロックによる変化も考えられる。例えば、炸薬が5で遅延がR4.3のキャノンでは、はしごを使えば迫撃砲の弾道を取るが、フェンスや感圧板では、そうはならない。
いくつかのこと :
- はしごとフルブロックは同じ高さで、同じ弾道になるが、はしごは弾頭と炸薬の距離が短くなるため、フルブロックよりも射程が長い。この現象は、全ての取り付けブロックに当てはまり、ハーフブロックや感圧板が乗ったフェンスにも同じことが言える。
- 折り合い: フェンスと感圧板の組み合わせは、射程が最長だが、ハーフブロックの方が経済的である。
- 取り付けブロックを変更し、射角を30度に設定することで、最長射程を実現できる。 そのため、キャノンを出来るだけ遠くに移動させたい場合は、ハーフブロック、フェンス、感圧板、又はトラップドアを使用する。但し、地形や要塞などの障害物に出くわした時は、ピストン、はしご又は単一のブロックを使用して、弾頭を障害物の上を弧を描くように発射することが最善の策だ。しかし、それでもまた、物事をやり遂げるのは「楽しい」...
- 次の薬室内の取り付けブロックがテストされ、安全であると確認されている。自由に試して見て欲しい。但し、単一の感圧板などの一部のブロックは、誤射を引き起こし、もちろん自爆する。
下記の一覧の大規模な修正が、間もなく行われる
| 長所 | 短所 | 説明 | 画像 | |
|---|---|---|---|---|
| 取り付けブロックなし | 最速、シンプル、拡張可能 | 小さいキャノンの射程不良、下向きの弾道、照準のみ | 取り付けブロックを使用しない場合、弾頭はTNTと同じレベルで発射される。完全に水平、つまり0度になる。重力により、弾頭は素早く着弾し、水平に近い下向きの弾道を取る。
炸薬数が少ないと、範囲が極端に制限される可能性がある。射程を伸ばすには、炸薬数を増やすか、高所に建てる必要がある。炸薬が多いと弾速が増し、より遠くまで飛ばすことが出来る。 一般的には炸薬を70以上使用する。しかし、経済的には、取り付けブロックのないキャノンは、特定の範囲で読み込むのにより多くのTNTと時間がかかる。 |
|
| 単一のブロック | 大きな射角による曲射 | 弾速が遅く、火力が低く、射程が短い | 丸石や黒曜石などの単一のフルブロックを弾頭の下に配置する。弾頭の位置が高くなるため、炸薬から上方向への爆風も受けることになる。 弾頭は大きな射角で発射される。これは、高い位置の敵や、障害物、地形の向こう側を攻撃するのに優れている。
しかし、爆風の一部が取り付けブロックに吸収される為、多くの炸薬が必要となる。 又、エネルギーの一部が上方向に向く為、前方に飛びにくくなる。 代替案としてはしごを使用することが挙げられる。 |
|
| ハーフブロック | スムーズな弾道 (高過ぎず、低過ぎず)、平均的な速度、中小規模のキャノンにより効果的 | 電力がわずかに低下する。まっすぐなショットまたはロブショットのいずれにも最適ではなく、点滅の範囲制限 | ハーフブロックは、単一のブロックとマウントなしの妥協点であり、一般的にどちらよりも効率的である。キャノンの爆発力の多くは前方に向けられるが、それでも射角を約30°に上げる上向きのベクトルがある。単一のブロックの場合と同様に、爆発エネルギーの一部はブロックによって吸収されるが、はるかに少なくなる。同じTNT負荷から、ハーフブロックの範囲は、単一ブロックまたはブロックなしよりも大きくなる。
TNT炸薬が最初にハーフブロック上に設置されると、フルサイズのブロックのようにTNT炸薬がハングアップする。TNTが「着火」されると、落下してハーフブロックの真の高さに落ちる。 ハーフブロックによって生成される射撃角度は、キャノンの射程を広げて高いターゲットを攻撃するには適しているが、高い壁や障害物を効果的に飛ぶには角度が小さすぎる。まっすぐな直接射撃の場合、ハーフブロックを搭載したキャノンは通常、一定の範囲内で地面に着地する。ただし、ゲーム内のTNTの点滅時間は限られているため、TNTをポイントまで拡大すると、ショットが高すぎて空中で爆発し、着地またはキャノンの最大範囲に到達する。これは、「点滅範囲の制限」と呼ばれる。すべてのキャノンは点滅範囲の制限によって制限されるが、より高い角度で発射するキャノンは、発射速度がより低く、弾薬がより高い高度に到達するため、特に点滅制限になりやすい。 |
|
| トラップドア | 閉まっている場合:平坦な軌道に最適であり、速度はブロックなしとほぼ同じで、範囲が非常に広いため、遠くのターゲットを破壊できる。 | 着火回路が誤ってトラップドアを作動させないようにする必要がある。非常に高速で大きすぎる正確な弾薬は、着火されたTNTが空中の近くの壁にぶつかると、落下してショットを逃すことになる。中高ターゲットを狙うことはできない | ハーフブロックの発射角度が目的に対して高すぎる場合は、代わりに閉じたトラップドアを使用する。ハーフブロックと同様に、ショットをくぼみの上に持ち上げることにより、ショットに上向きの力を与える。ただし、トラップドアの高さはフルブロックの3/16である。発射角度は約15〜20°で、非常に長い範囲(180ブロック以上)でのストレートショットに非常に効果的である。
発砲時に前方速度はほとんど失われず、通常、弾薬は非常に高速で飛び出す。これは、低い発射角度と組み合わせることで、より大きな負荷を発射するキャノンは、ハーフブロックまたははしごの取り付けのように点滅範囲の問題の影響をあまり受けずに範囲を広げることができる。 |
|
| 開いている場合:射撃角度を大きくする際には開いている状態で使用でき、優れた位取りと、高いターゲットを破壊できる。 | ||||
| はしご、鉄格子、ガラス板 | 小型および中型のキャノン、高い発射角、放物線軌道で効率的で、ロブショットと高高度に適している。 | 低速の水平速度、スケーリング不良、±120ブロックの制限された範囲。 | 側面に配置されたはしごは、高角度での発射やショットのロブに非常に効果的な取り付けブロックとして機能する。着火された弾薬は、はしごの端の厚さによって支えられ、はしごへの落下を防ぐ。はしごはフルサイズのブロックではないため、爆風からのエネルギーは一切吸収されず、弾薬は全力で推進される。はしごを上下に追加することで、異なる発射角度を実現できる。通常1つのはしごはハーフブロックよりもわずかに高い角度(約40°〜45°)で発射する。 2つのはしごは非常に放物線状の飛行を行い、ショットは約50°〜60°で飛び出す。
爆風エネルギーのかなりの部分がブロックの上方向に向けられるため、水平速度は一般にブロックなしまたはハーフブロックのキャノンよりもはるかに遅くなる。その代り、キャノンは地形や壁を越えて弾薬が飛び越えるすることに問題はない。より大きなチャージ負荷では、弾薬は非常に高い高度に達する可能性がある。 ただしこれは、点滅の範囲制限がこの取り付けに固有の問題であることでもある。100ブロックの距離内で、地面と同じ高さの適切に構築されたキャノンは、ダメージを発生させるのに十分な低さで着弾することが期待できる。しかし、この弾薬を超えると、遅延回路で最大点滅時間で着火された弾薬でも、事前に空中で爆発する。したがって、弾薬を高く飛ばすだけであり、単にTNTを追加して範囲を広げることはできない。基本的な解決策は、キャノンを地面の下に、傾斜のあるピットに入れて弾薬が飛び出すようにすることである。弾薬の開始点が低いため、点滅の時間が切れると地面に近づくにつれて爆発する。150ブロックを超える範囲に到達するには、この解決法は実用的ではない。 |
|
| フェンス | 小型および中型、低い射撃角度で効率的であり、洞窟や過去の張り出した基地防衛を通過するのに適す。速度が速く、広大で長距離のキャノンで非常に強力。 | 高価な材料、より大きなキャノンへの点滅範囲制限。コンデンサーを使用すると爆発によりTNTが高すぎて天井がなくなり、TNTがキャノンを破壊する可能性がある。 | キャノンの端に置かれたフェンスはプレイヤーの視点からは1.5ブロックの高さしかないため、Minecraft1ブロックの高さであると処理する。したがって、チャージの負荷は実際よりも弾薬に近いと認識される。より多くのパワーと速度を獲得するため、少し上に飛び、攻撃角で下に下がるように見える。ただし、爆発によりTNTが上方に発射されるため、キャノンに天井がない場合TNTがキャノンを破壊する。 これにより、独特のスタイルのキャノン射撃が可能になり、Minecraftで最も便利な取り付けブロックの1つといわれている。
キャノンで水をせき止める必要がある場合は、感圧版を使用できるが、発射速度はわずかに低下する。 |
|
| ピストン | 調整可能、完全に拡張すると、フルブロックと同じ効果があるが、それよりも効率的で、より汎用性が高く、発砲砂または砂利と互換性がある。 | 高価で、弾薬はアーチ型キャノンで見られる点滅範囲の遅延制限を受け、モルタルMBとして使用されるため、洞窟や建物内での使用は推奨されず、誤って2つのTNTブロック(上に1つ 他の)大砲を破壊する、R4.7の遅延が必要である。 | この取り付けブロックを使用する3つの最も一般的な方法
|
|
| 珍しい取り付けブロック | ||||
| 植木鉢 | ロブショットが可能 | 点滅の範囲制限、高価、低いターゲットを狙えない | ||
| レッドストーンリピーター | 2番目に高い速度。 | 高価、9ブロックしか撃てないため、回路が偶発的に起動しないようにする必要がある。 | このキャノンは、山岳バイオームでのみ使用される。キャノンが崖の上にあり、ターゲットがその下にある場合にのみ機能する。 | |
| 日照センサー | 速すぎずに良い射撃を行うと、ロブショットができる。 | センサーが昼間に回路を作動させないようにする。高価。 | これは地上レベルのキャノンであり、どの種類のキャノンにも適しています(点滅の範囲に制限がある超大型のキャノンを除く)。 | |
| ベッド | 良い射撃、とても速い、中高角。 | 高価、より大きなキャノン | これは、より大きな城を攻撃するのに適しているが、範囲も広い。最高の取り付けブロックの1つ。 | |
| ケーキ | 良い射撃、中角、広い範囲。 | 高価、取得するできない。 | この取り付けブロックは、リソースがある場合に遠くのターゲットを攻撃するのに適す。足跡が小さいため、ハーフブロックを使用する場合よりもチャージTNTを弾薬に近づけることができるため、範囲が広がる。 | |
| 醸造台 | 高射角(はしごに類似)、並外れた射程、高速 | 高価で、レベルのターゲットに対して効果がない | はしごよりもわずかに遅く(そして低い)TNTを撃つが、その違いは簡単にはわからない。また、反動ダメージを回復するため、射撃中に再生ポーションを抽出することができる。 | |
| エンチャントテーブル | すべての距離を打つことができる高い耐爆風性。 | とても 高価 | エンチャントテーブルは、ハーフブロックによく似た弾薬を発射する。回転する本は軌跡に影響を与えない。 | |
| 階段 | 高射角 | 低速 | 逆階段は役に立たない。砲弾を撃つと、キャノンを爆破したり、近くを爆破したりする可能性が非常に高くなる。 | |


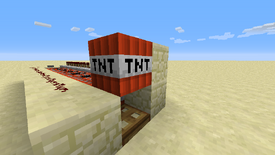
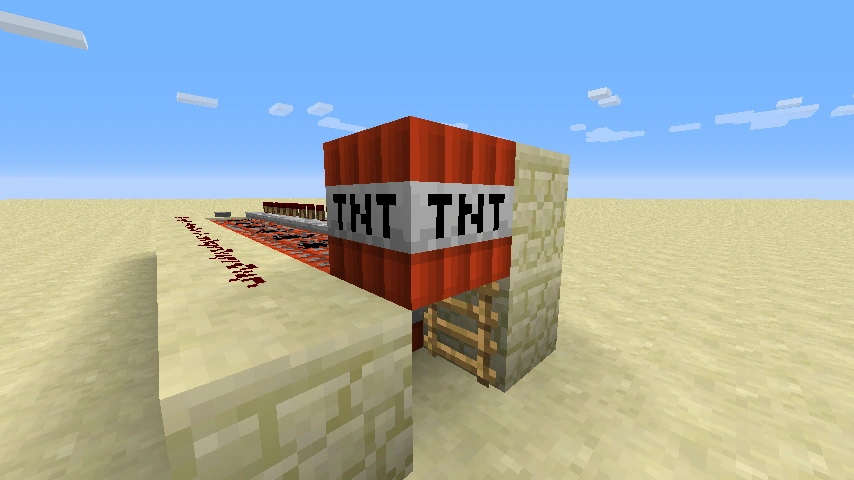

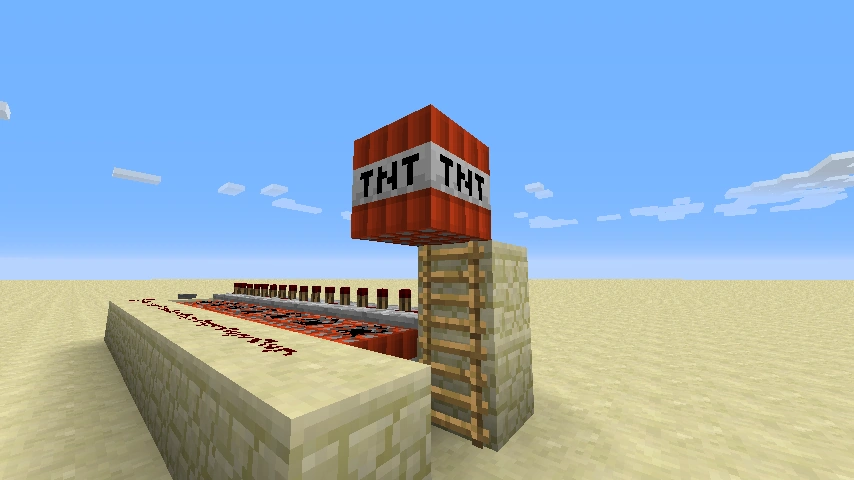


キャノンのチュートリアル
ディスペンサーベースのキャノン
レッドストーンアップデート以来、ディスペンサーはTNTをドロップせずに着火するようになった。この機能を利用してより優れたTNTキャノンを作ることができる。
右側はディスペンサーでTNTを吐き出す。 ボタンを押すと列になっているディスペンサーが最初に起動する。 レッドストーンリピーターの遅延を33ティックに設定した場合、左側のディスペンサーは右側から出たTNTが起爆する直前にTNTを吐き出すので、長射程となる。 左側のディスペンサーは他のディスペンサーよりも高く設置し、水は、キャノンの前方へ向けて流さなくてはならない。 ディスペンサーはTNTを吐き出す時に、着火時の「弾み」を生まない。
Mumbo Jumboによって設計されたこのTNTキャノンは、最も小さいキャノンの1つである。
水の下に、上向きにディスペンサーを設置する手もある。また、ハーフブロックの代わりに感圧板を乗せたフェンスを置くことも可能である。
長所 : 絶対的な最短時間でリロードできる。 プレイヤーに求められるのは、自爆しないように監視することだけである。 このキャノンを発射するのには全く技術を必要としない。 このキャノンは城の防衛に適している。 さらにレッドストーンコンパレーターを使用することで、照準可能なキャノンを作ることが可能。ディスペンサーベースのTNTキャノンは、近くの他のキャノンを吹き飛ばす事は無い。
短所 : ディスペンサーとTNTは高コストである。このタイプのキャノンは、手動のキャノンほど強力にならない。ディスペンサーにTNTが装填されたままになっている場合、簡単に盗み取ることができる。(これには従来型の自動キャノンも該当する)。水を備えたキャノンでも、自動で連発し続けていると誤爆する可能性がある。
この設計で、自動キャノンを簡単に作ることができる。ボタンをレッドストーンに置き換え、レッドストーンをクロック回路に繋げる。クロック回路の周期を、4秒未満に設定しないよう注意する。装填の間隔が短すぎると完全に発射が完了する前に装填してしまい、キャノン全体が爆破されることもある。
キャノンのリロード
伝統的な手法
キャノンのリロードは、初心者にとって最も複雑な設計の一つである。但し、細心の注意を払う限り、サイズに応じて約15分~20分で作製できる。リロードはディスペンサーが追加された時に廃止された。
良い点: 簡単にリロードをカスタマイズできる。 標準的なキャノンは数回リロードしなければならないが、このキャノンは数秒の間隔で数回撃つことが可能。シンプルなデザインで、最大12発のTNTを保存することが出来る。要塞戦争サーバーでプレイしている場合、このキャノンは敵の要塞を繰り返し破壊するのに使える。
悪い点: このタイプのキャノンはかさばり、魅力に欠ける。 サバイバルモードでは、再生不可能な資源(砂や砂利など)が必要。さらに、撃ち尽くす度に、退屈なリロード作業を行わなければならない。標準的なキャノンは、多少損壊しても簡単に修理できる。しかしこのタイプのキャノンはマガジン内のTNTが爆発し、配線も破壊されることになる。
このタイプのキャノンも不必要なものとなった
アップデートによりディスペンサーを使用してTNTをリロードすることが出来るようになり、より簡単でコンパクトになった。
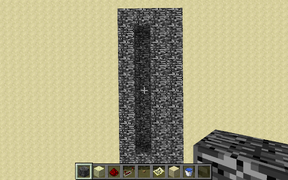
ステップ 1 枠組みをつくる。 設計から始めるが、このようにいくつかの変更を行う。(枠組み)
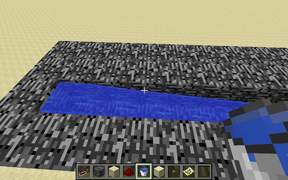
次に、水を注ぐ。 誤って何かを設置しないように、水源の上にブロックを置く。

配線に取り掛かろう。

...これ!
ステップ 2 マガジンをつくる。 これが、TNTを薬室に押し込んで装填する場所である。 最大12発分を保存できるが、今回は7発分のものをつくる。ここで、TNTを薬室へ押し出す為のピストンを追加する必要がある。
作る過程でこのようになるはずだ。
ステップ 3 薬室を作製。 薬室とマガジンの配線がTNTに干渉しないように注意する。
この風変わりなデザインが薬室の上に来るようにする
ここでピストンを取り付けて、所定の位置までTNTを押し出せるようにする。
空撮...
ステップ 4 薬室とマガジンの配線を接続する。 これを枠組みに追加する。
そして配線。
ステップ 5 トリガーを作成する。この場所へ行く。
次に、レッドストーンダストをリピーターに置き換える。
ほぼ完成だ!後は点火装置を配置するだけだ。
ステップ 6 微修正と点検。 私は意図的にいくつか問題点を用意した。 まず、配線の1部がバレルの邪魔になり、範囲に深刻なダメージを与える。 これについては後で説明する。 もう1つは、動力が途切れてしまっているので、リピーターを移動させなければならない点だ。 ステップ 7 マガジンの装填。 マガジンをリロードする度に行う必要がある為、この部分には細心の注意を払わなければならない。 TNTをマガジンに入れ、サイドプッシュピストンに対して...
...薬室の右上端まで(下向きのピストンの下ではなくそのすぐ後ろ)
次に、砂をマガジンに入れる。 これも毎回行う必要がある。 左向きのピストンに押されるTNTの上に8個置く。
この場所から見るとこんな風に見えるだろう。
ステップ 8 おしまい。 よし、よし、私は薬室の配線に問題があるので修正することにした。
これが修正方法である。 比較的簡単である。 邪魔になるブロックがもう無いことを確認する。
これが問題を修正した結果である。
さらに最高のパフォーマンスを実現する為に、取り付けブロックに板ガラスを採用。
さらにキャノンを覆って敵に破壊されないようにする。
装填と点検のために、マガジンに出入り出来るようにしておく。
追加できるもうひとつの要素は、このピストンである。下向きのピストンを引き離すので発射時に邪魔にならない。そして...このチュートリアルはこれで終わりです! 試射を行い、ニーズに合った取り付けブロックを模索する。 盲目的にテストする前に、弾薬をマガジンから抜いておくこと。
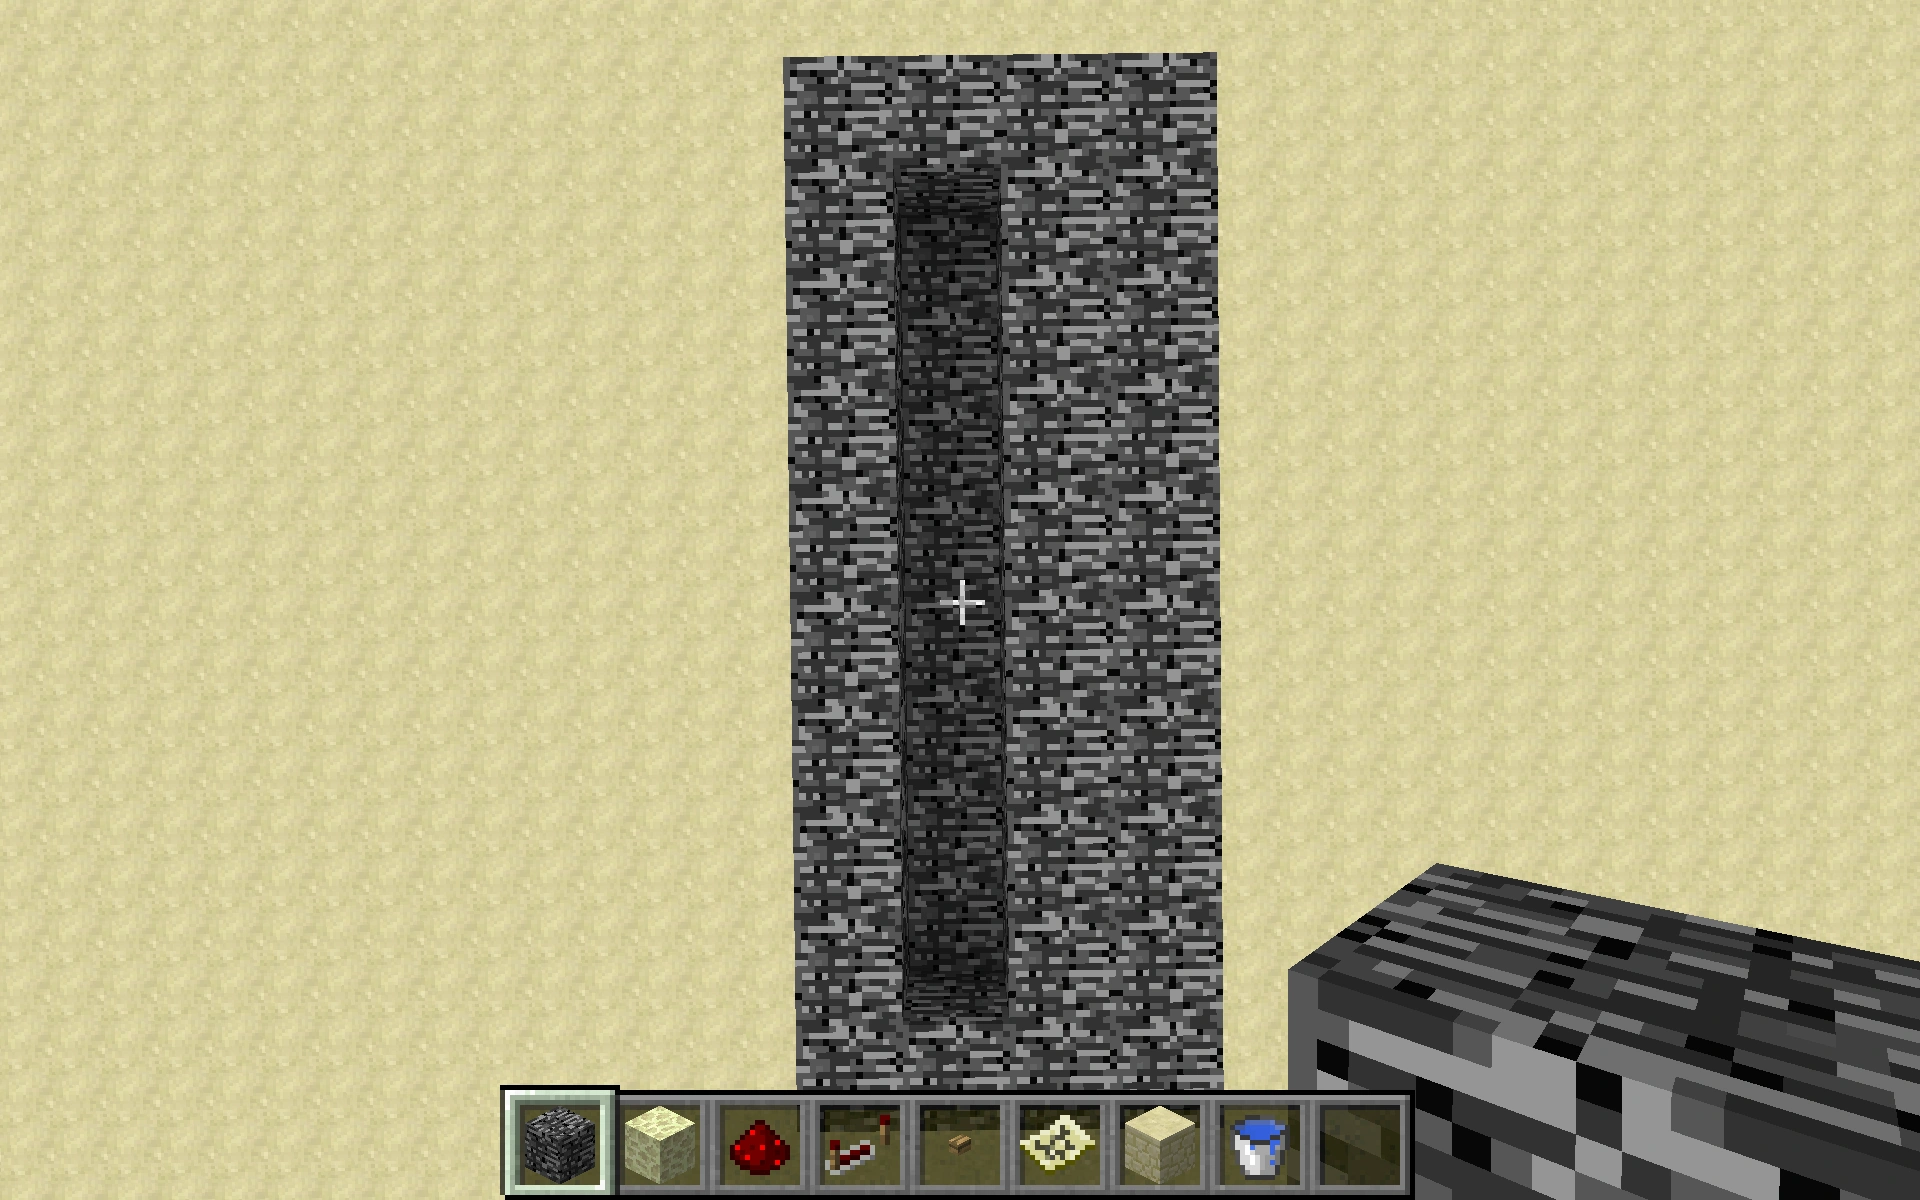
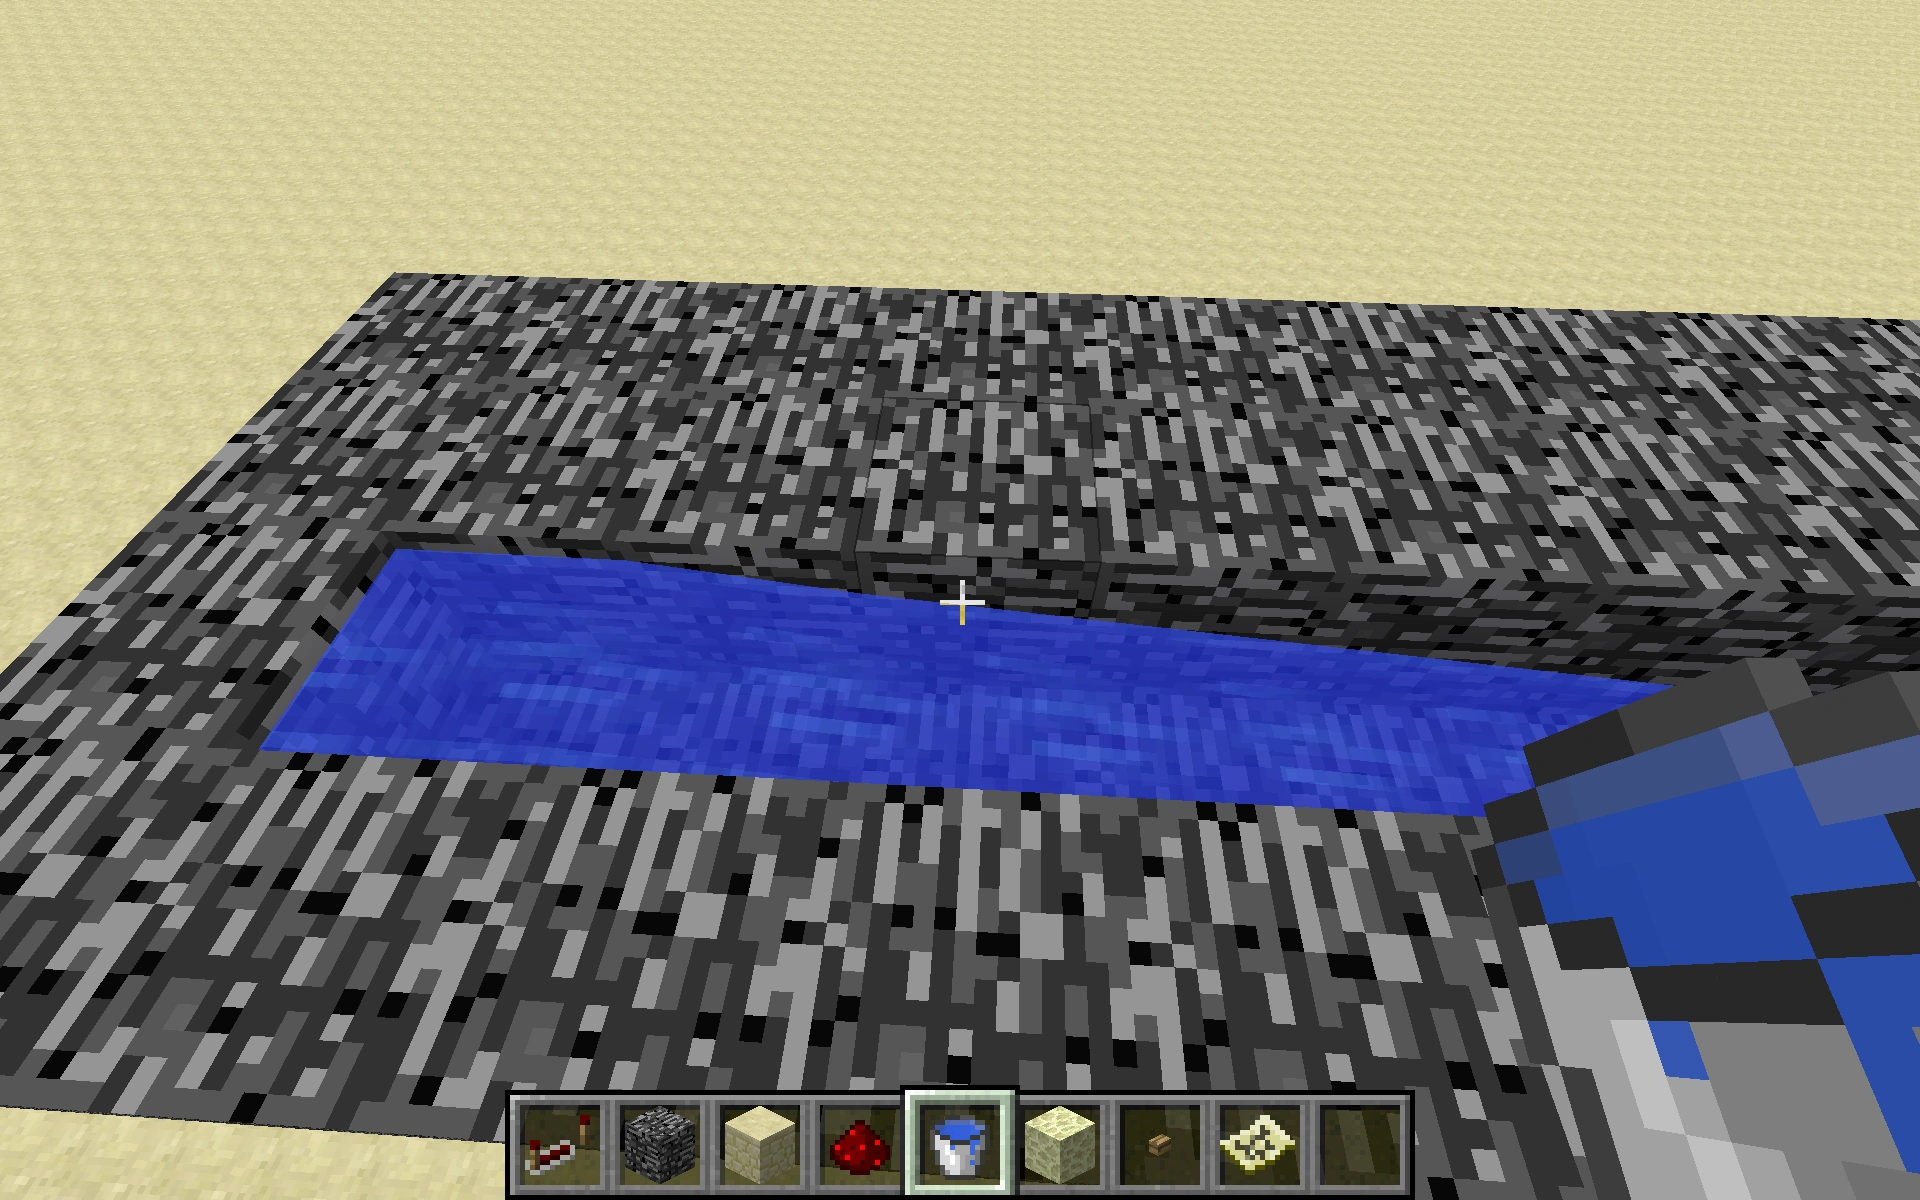
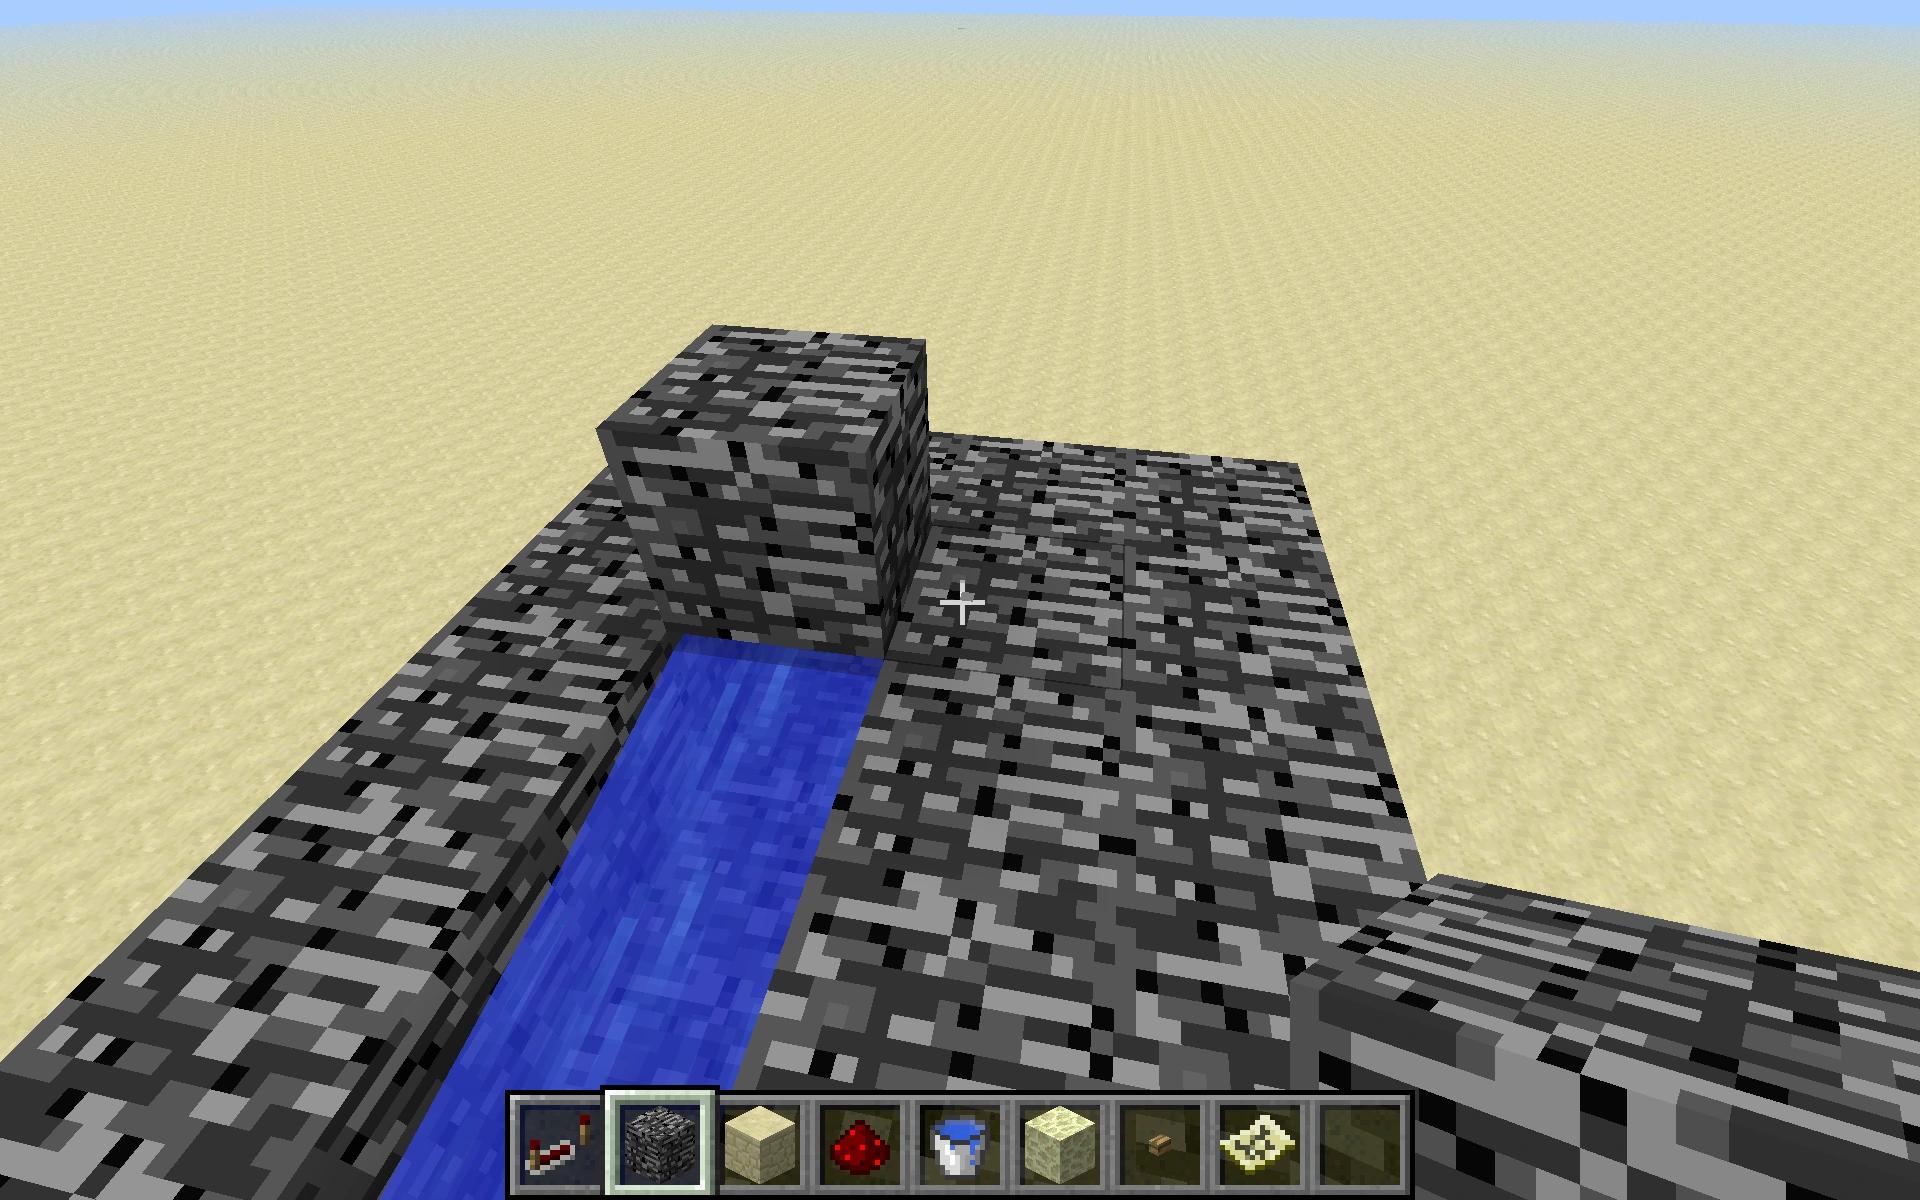
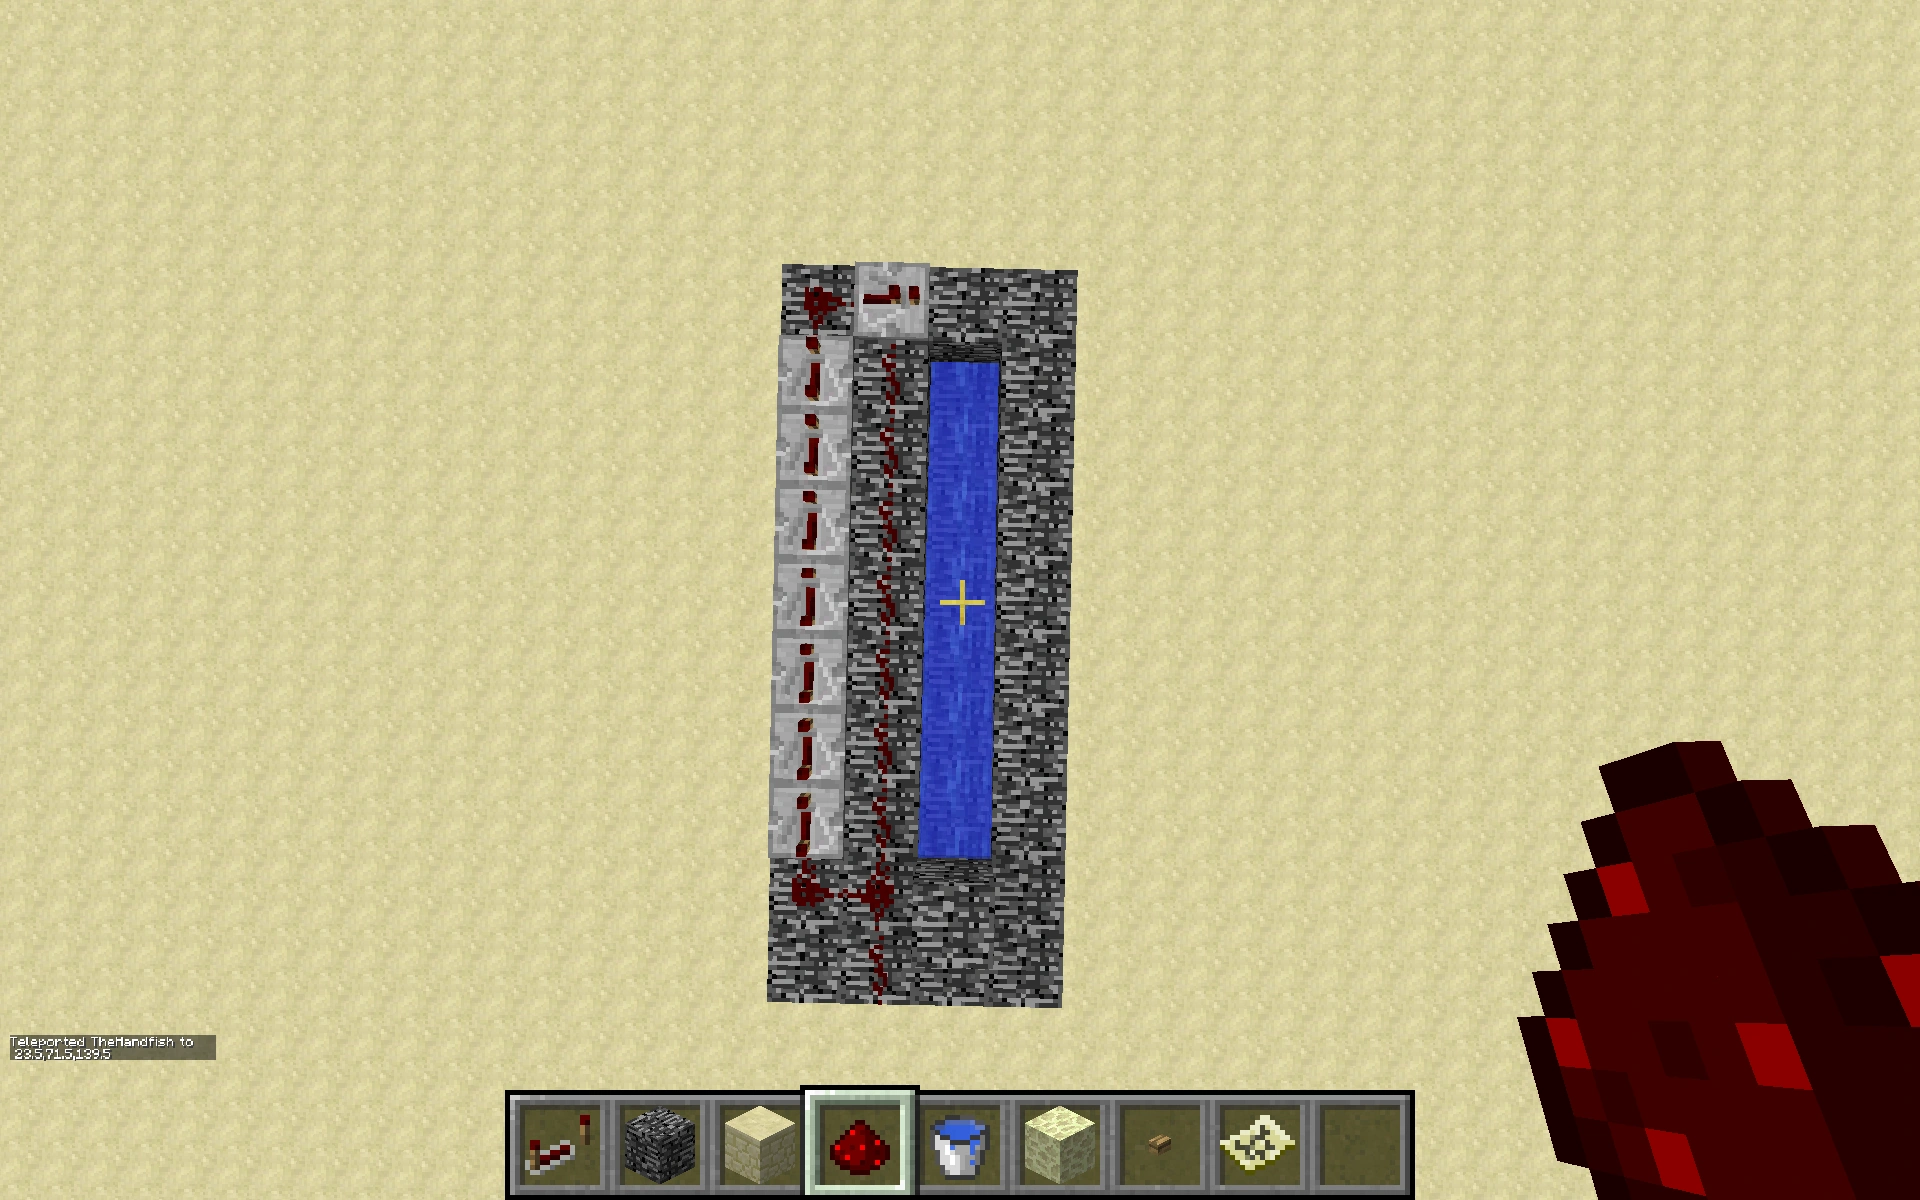
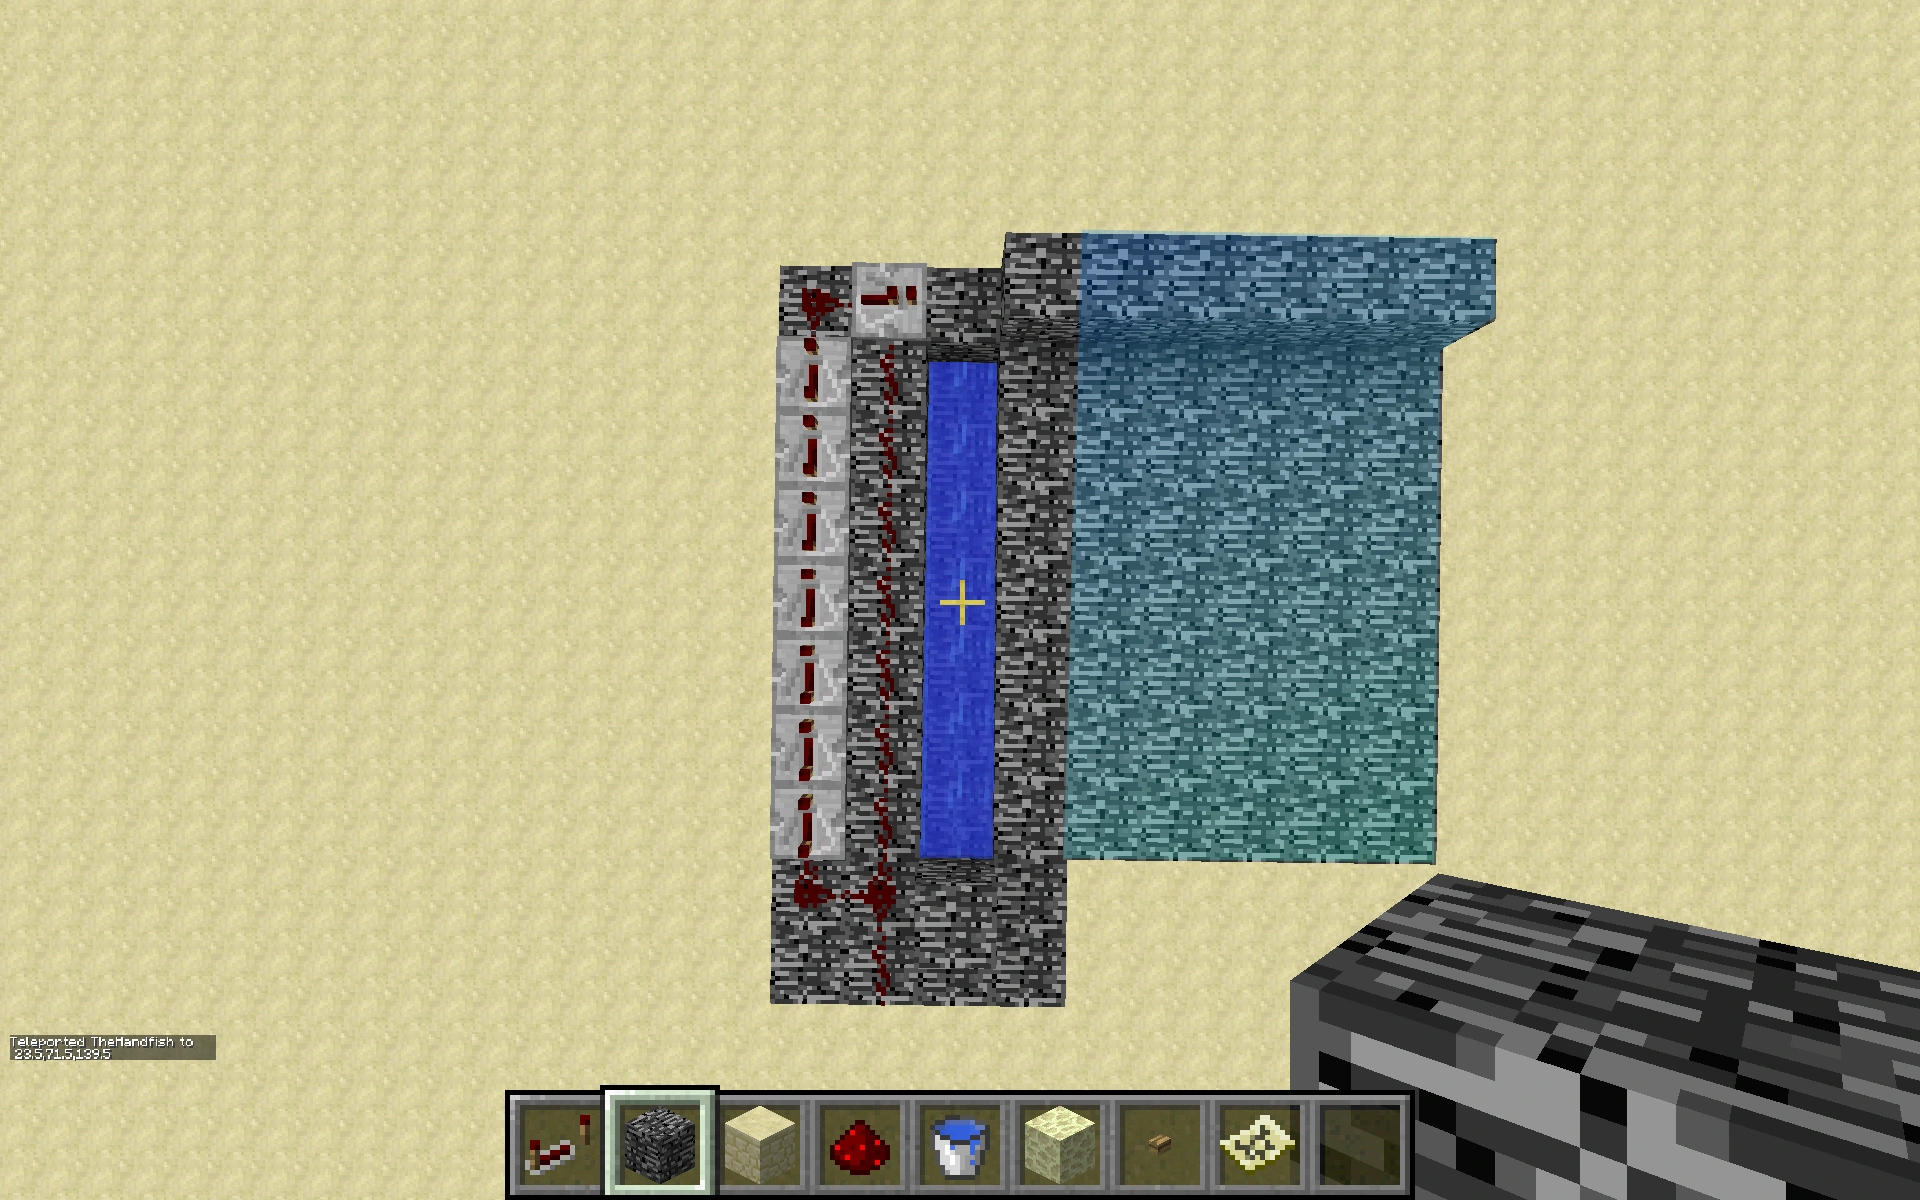
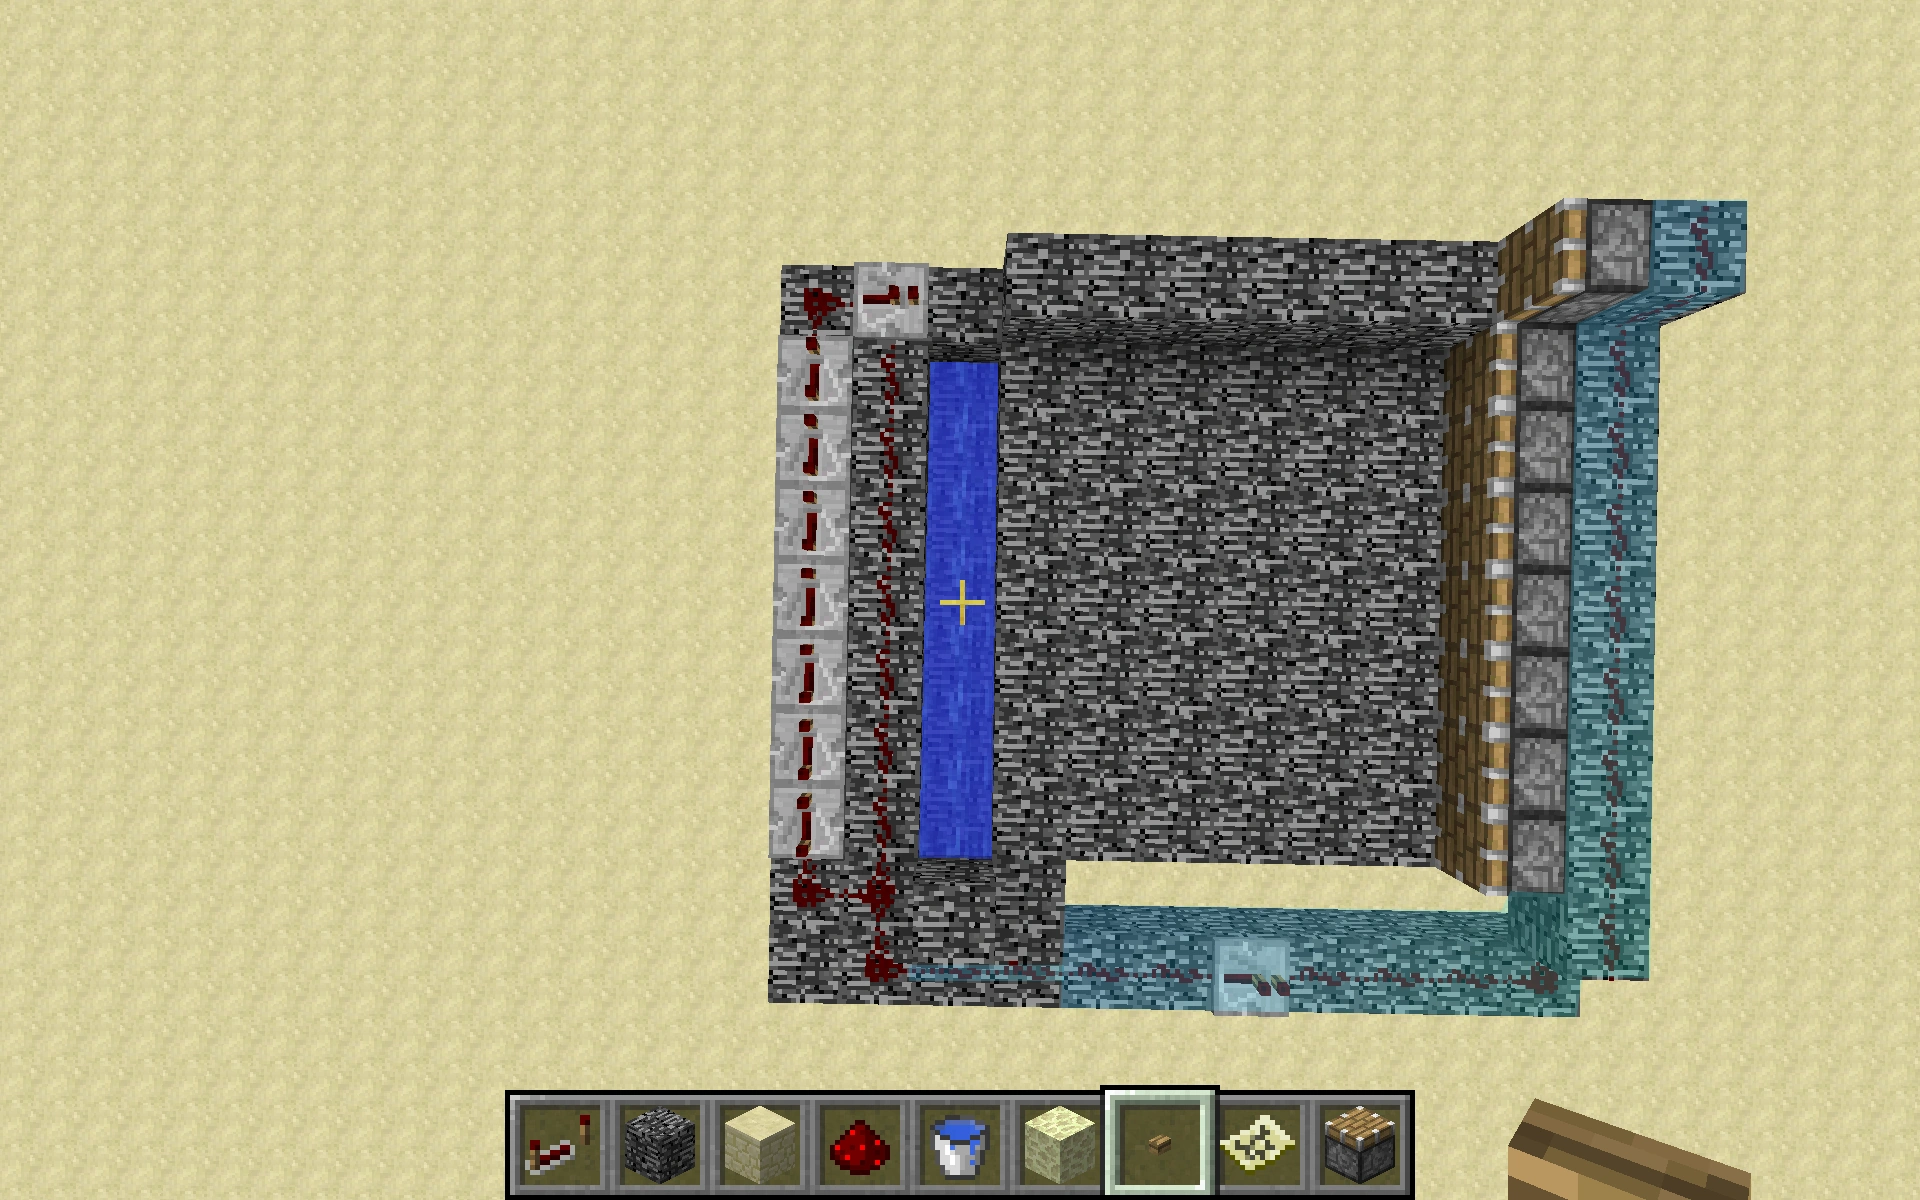
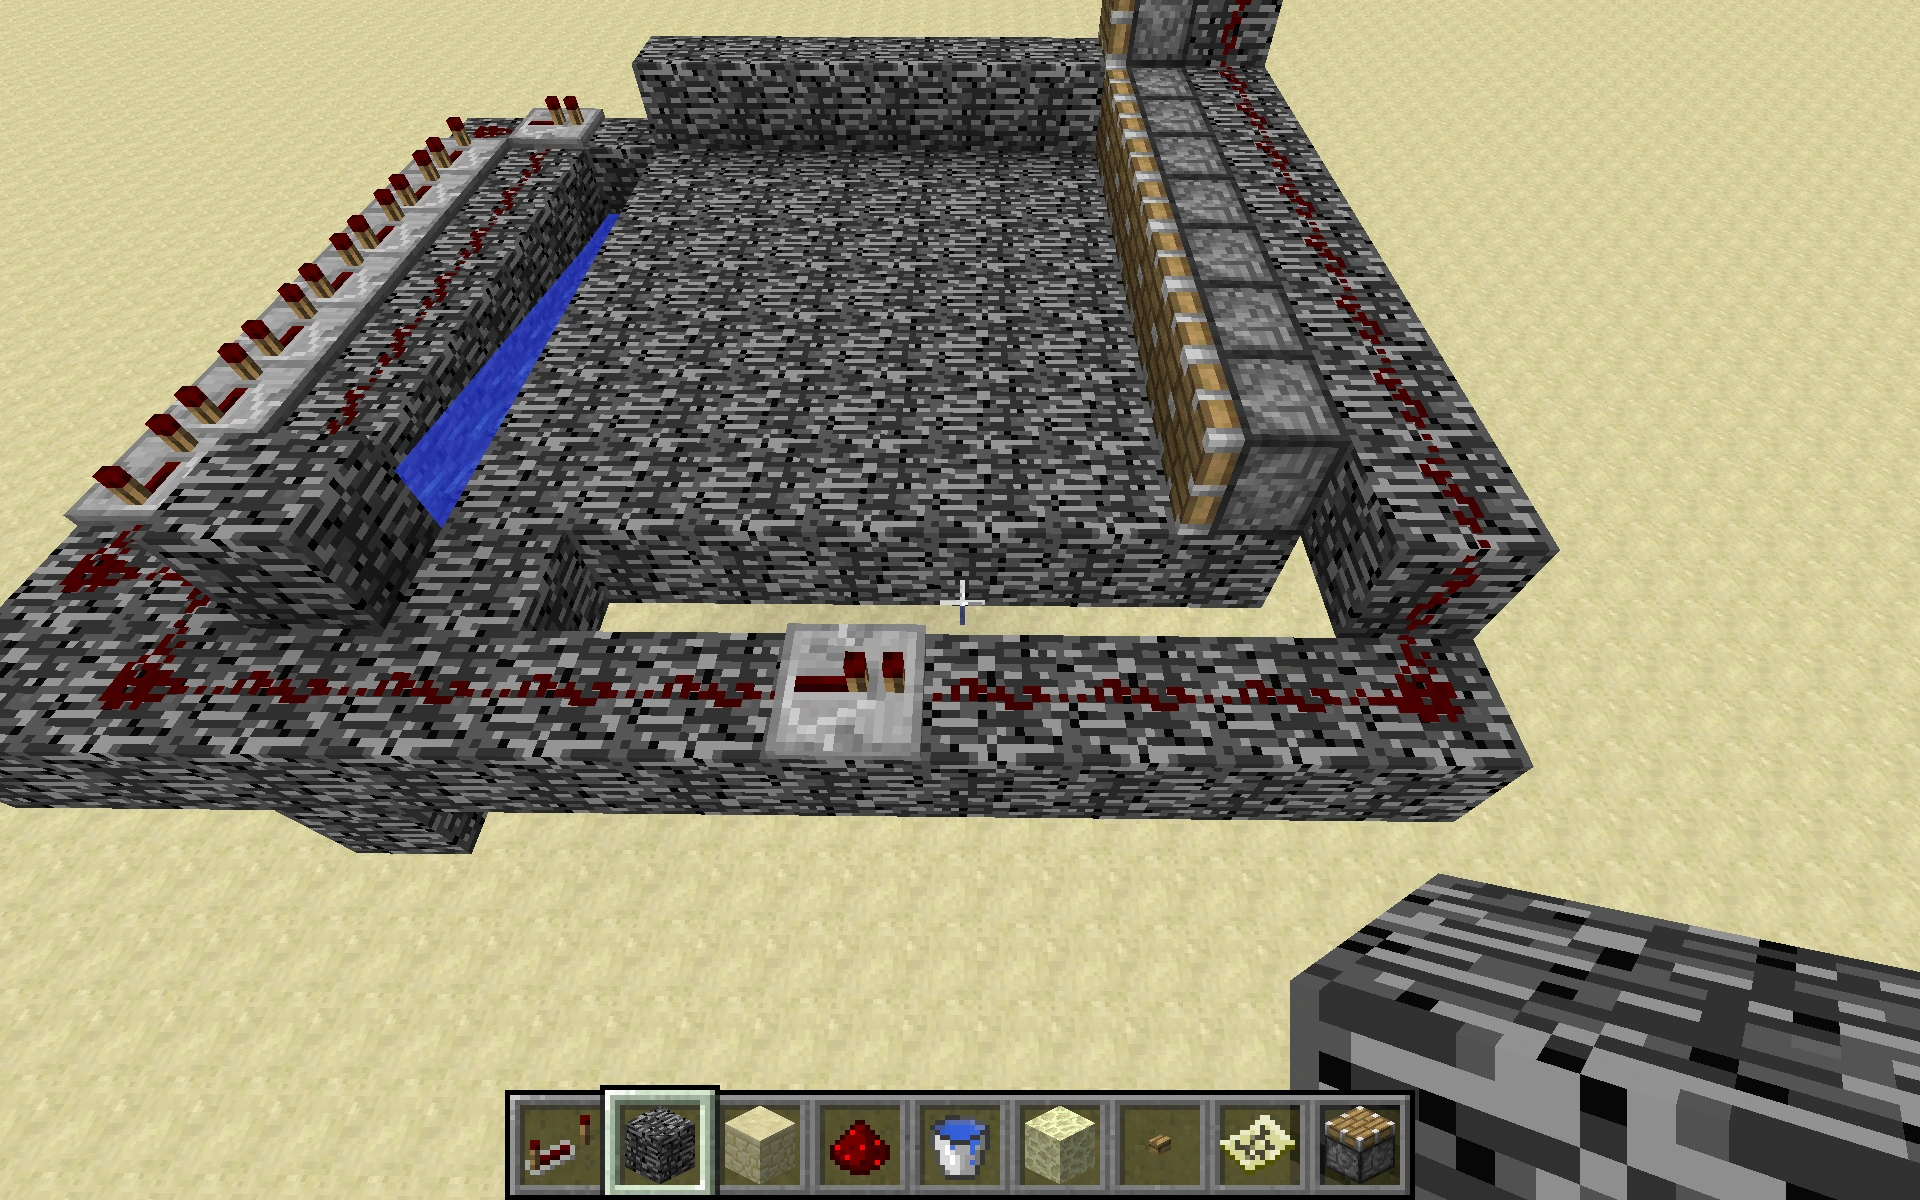
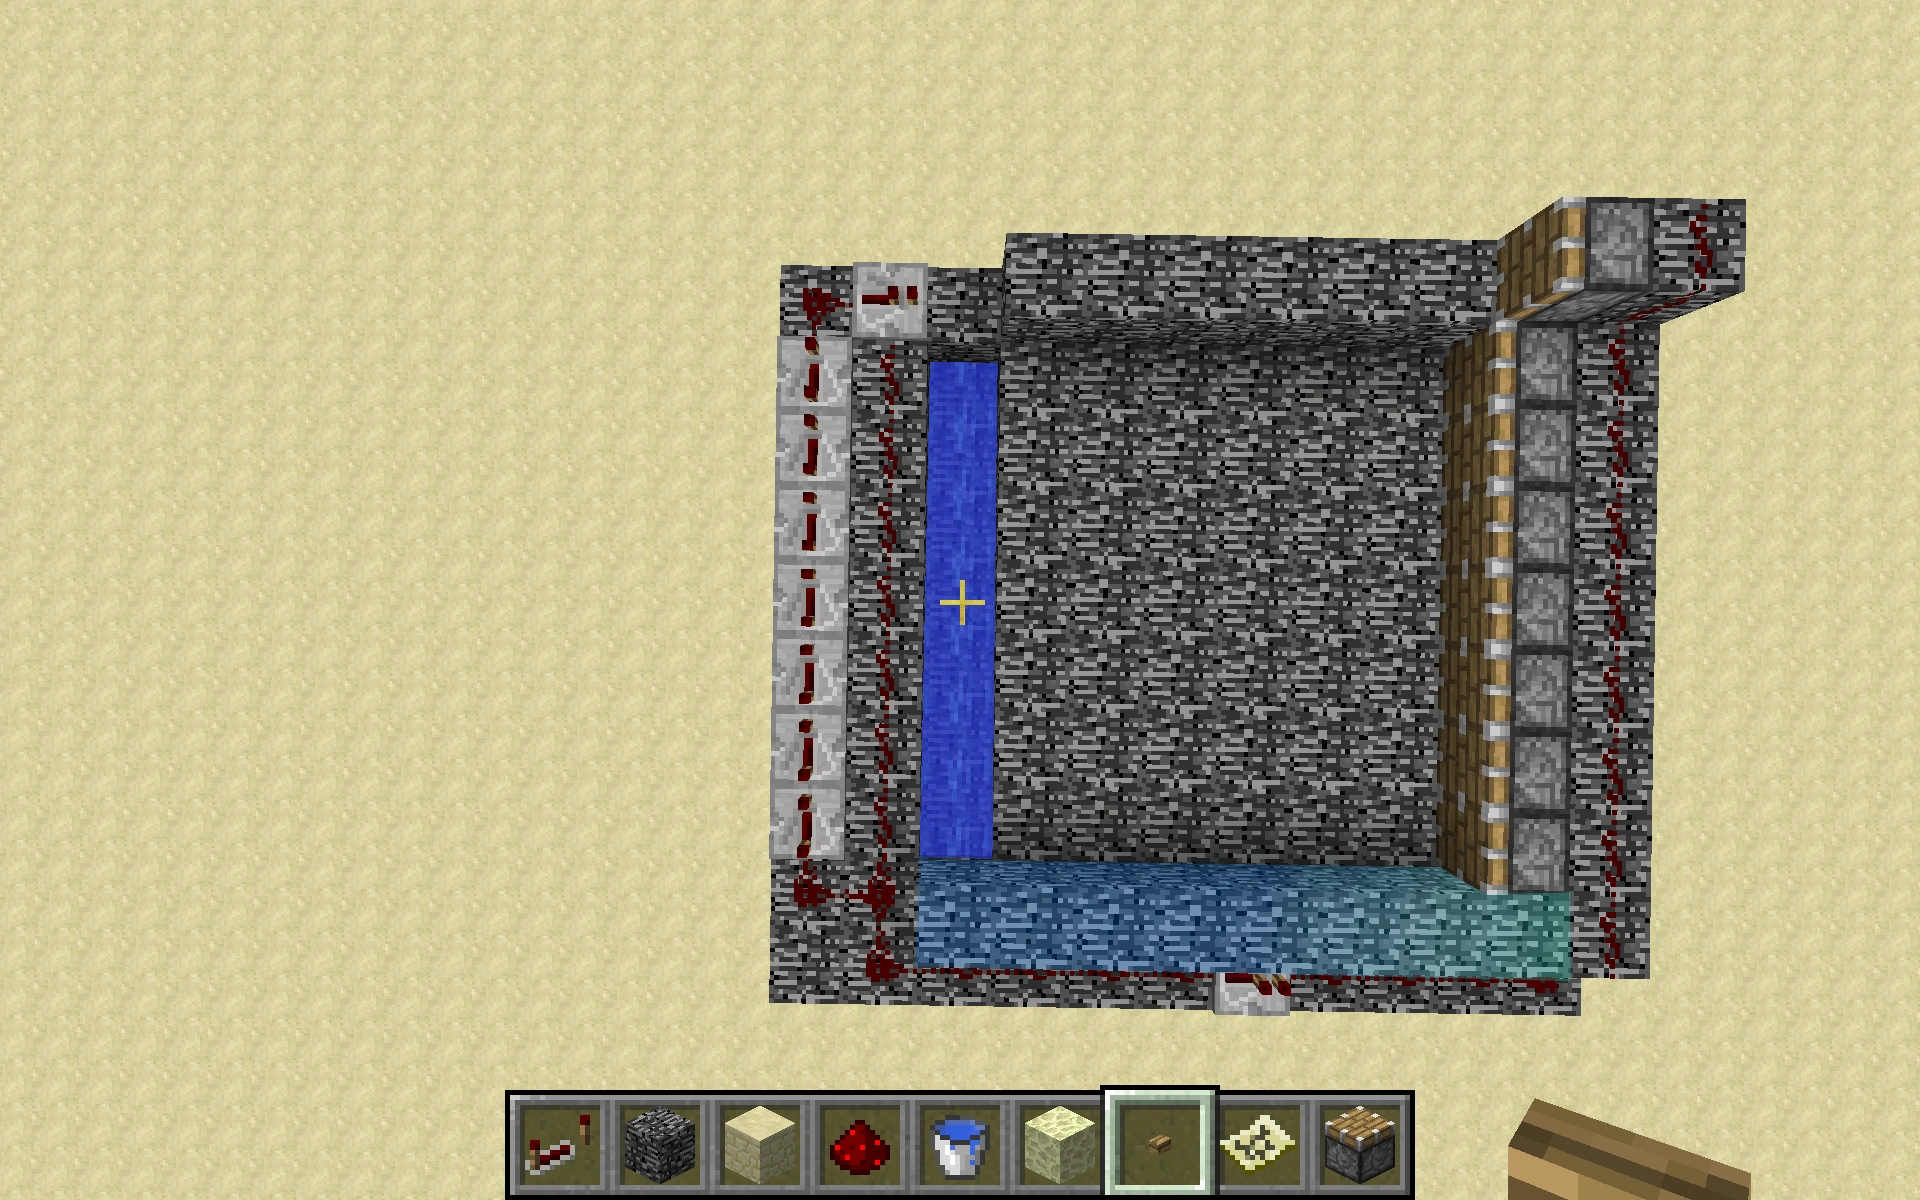
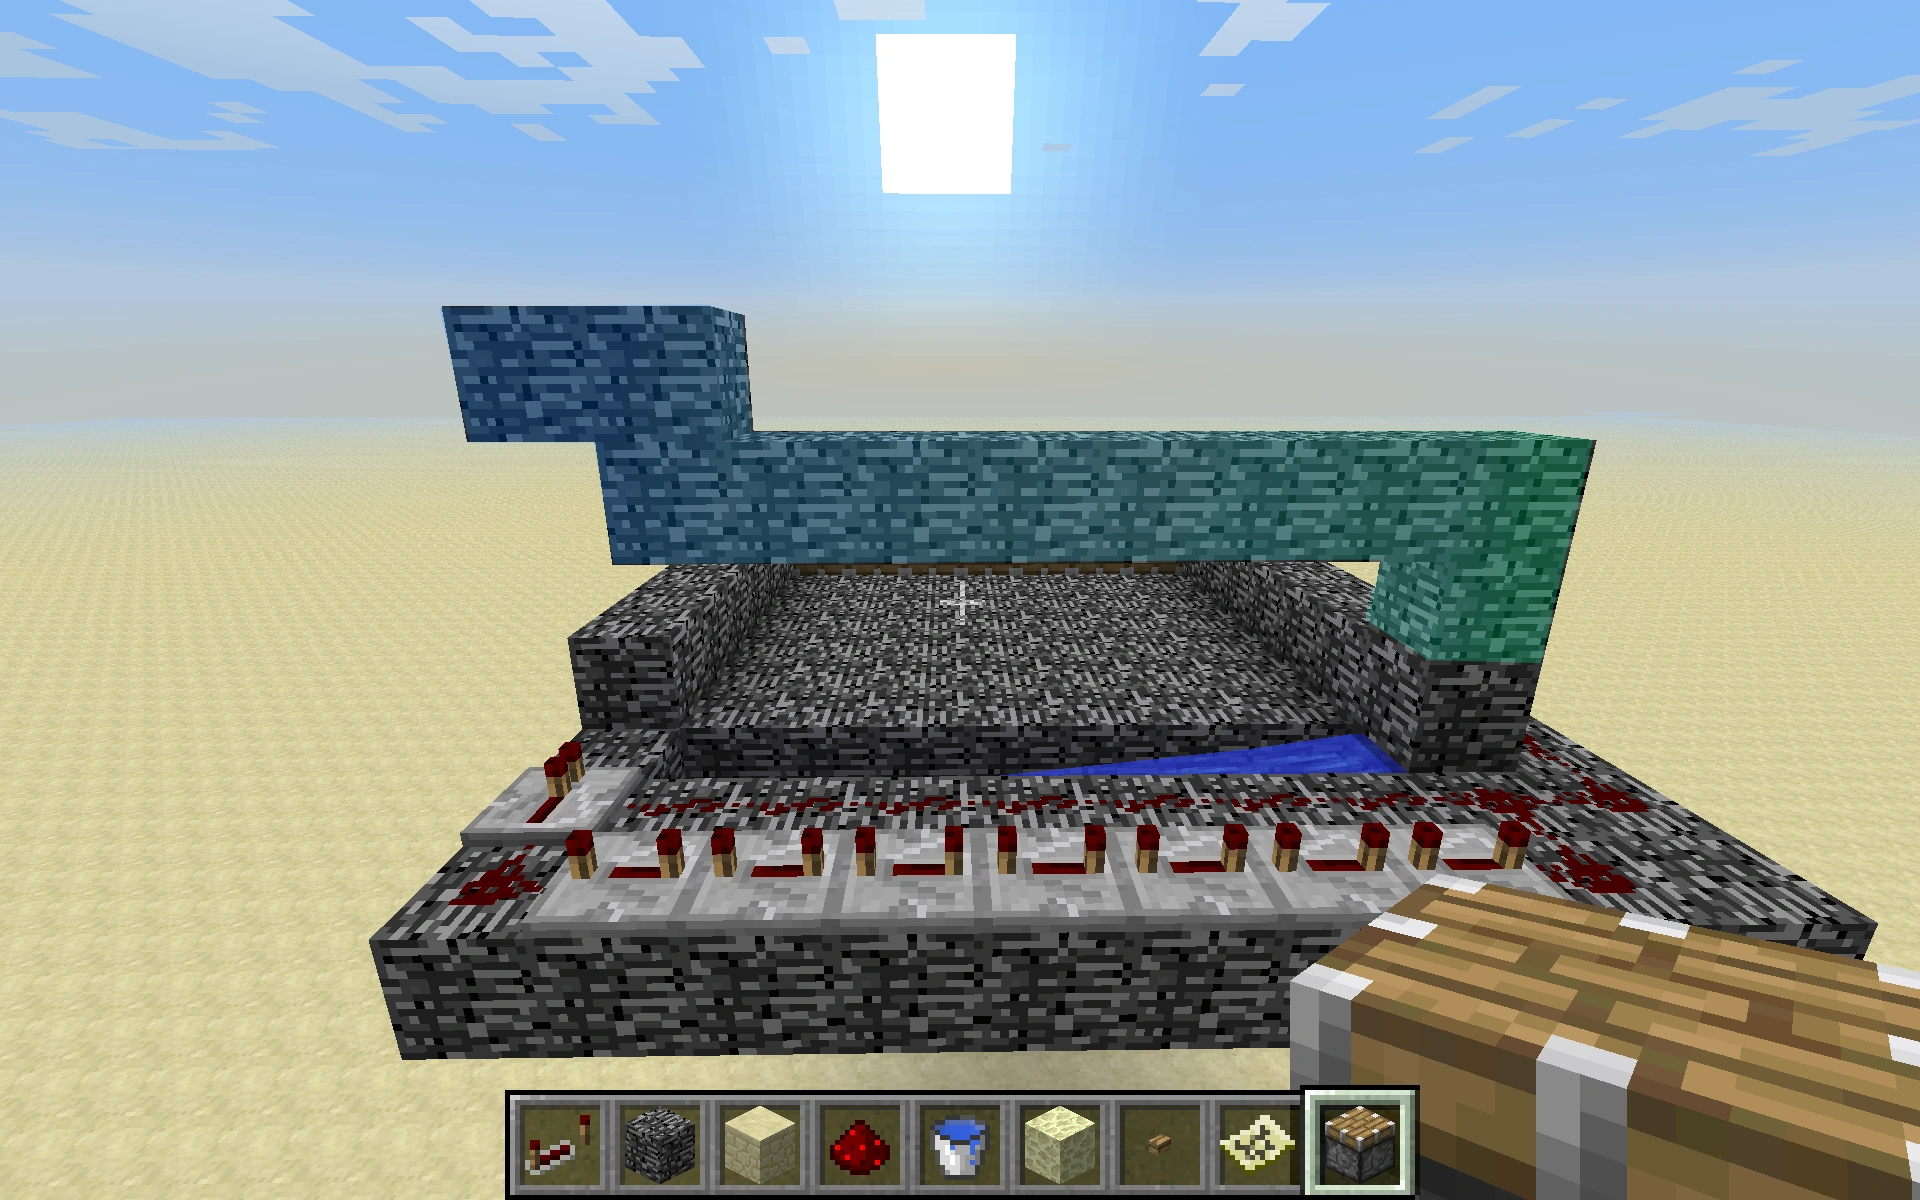
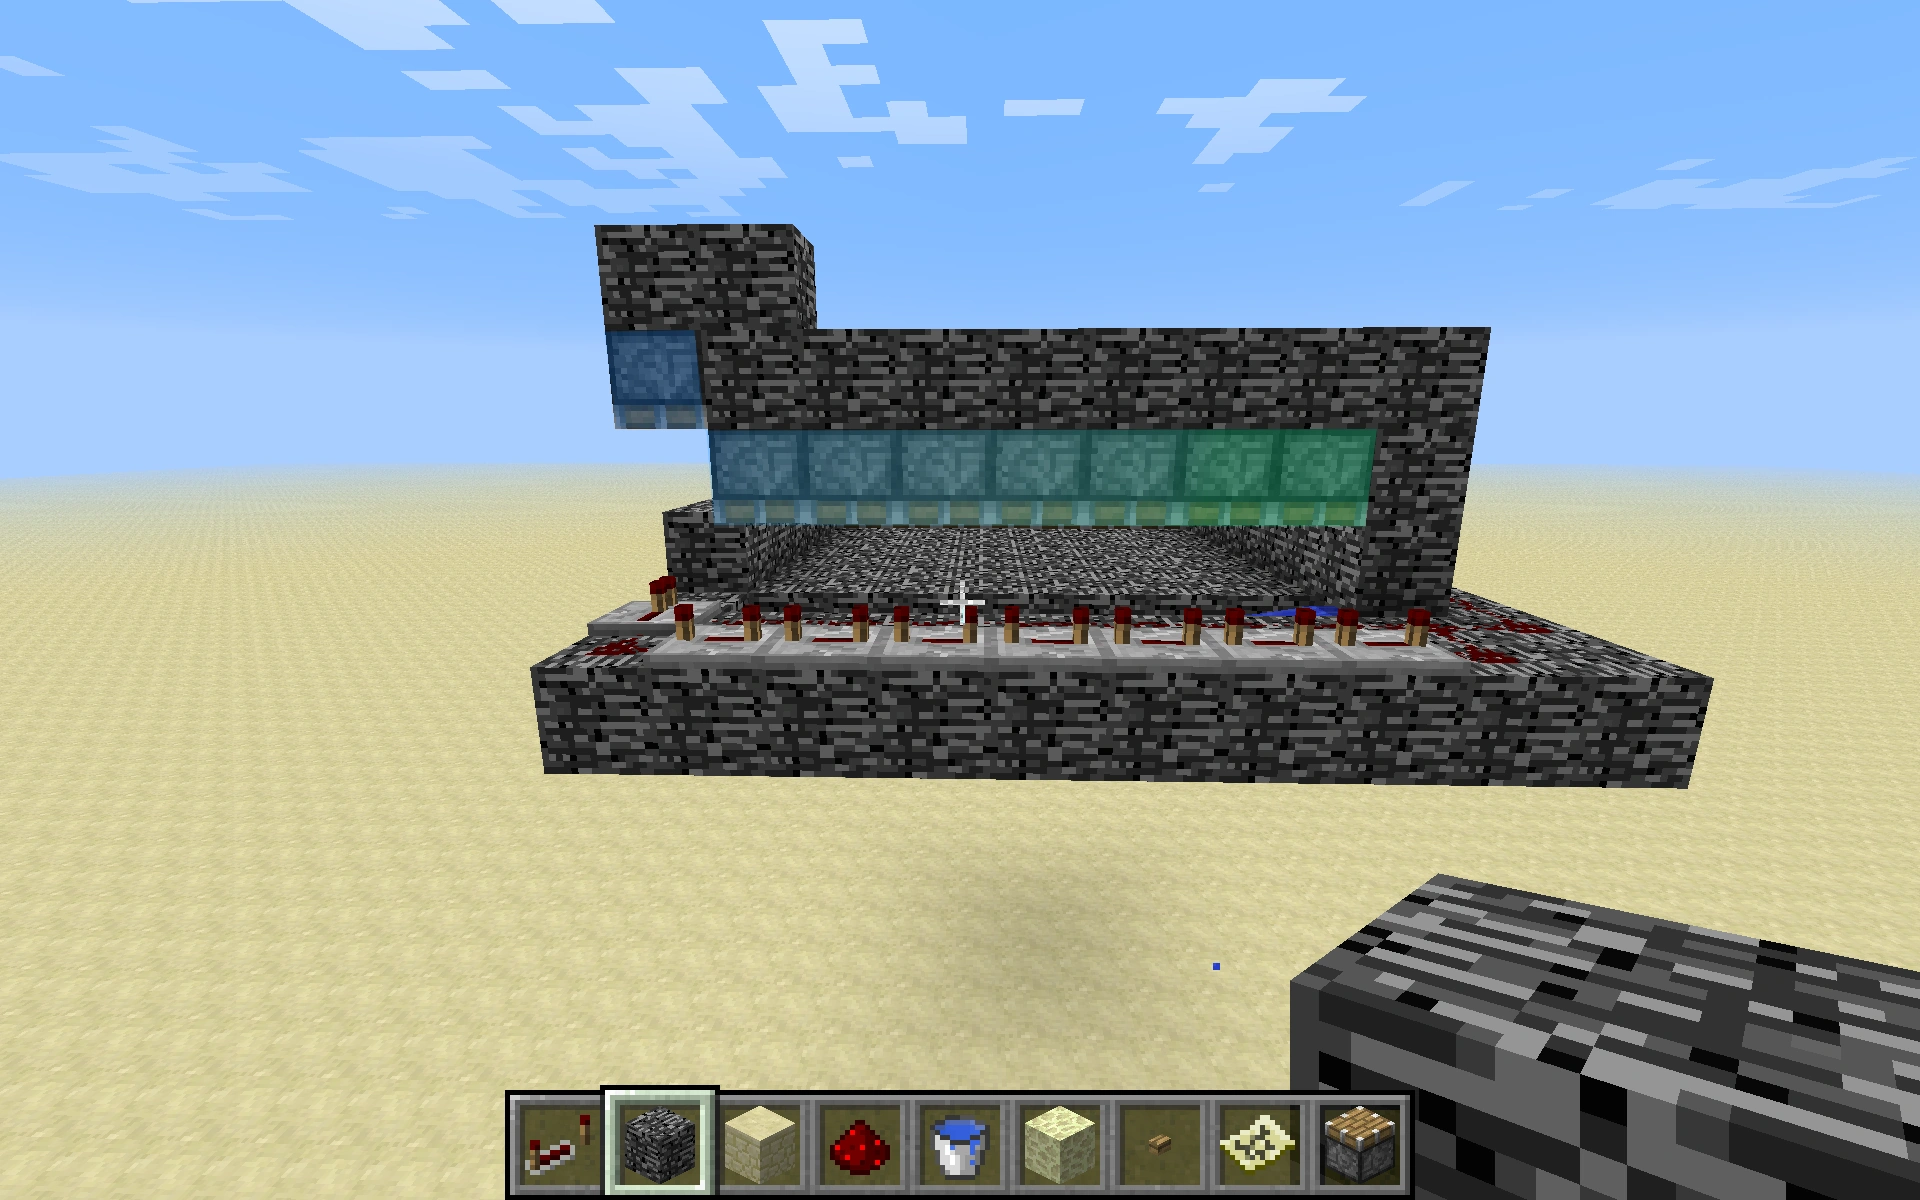

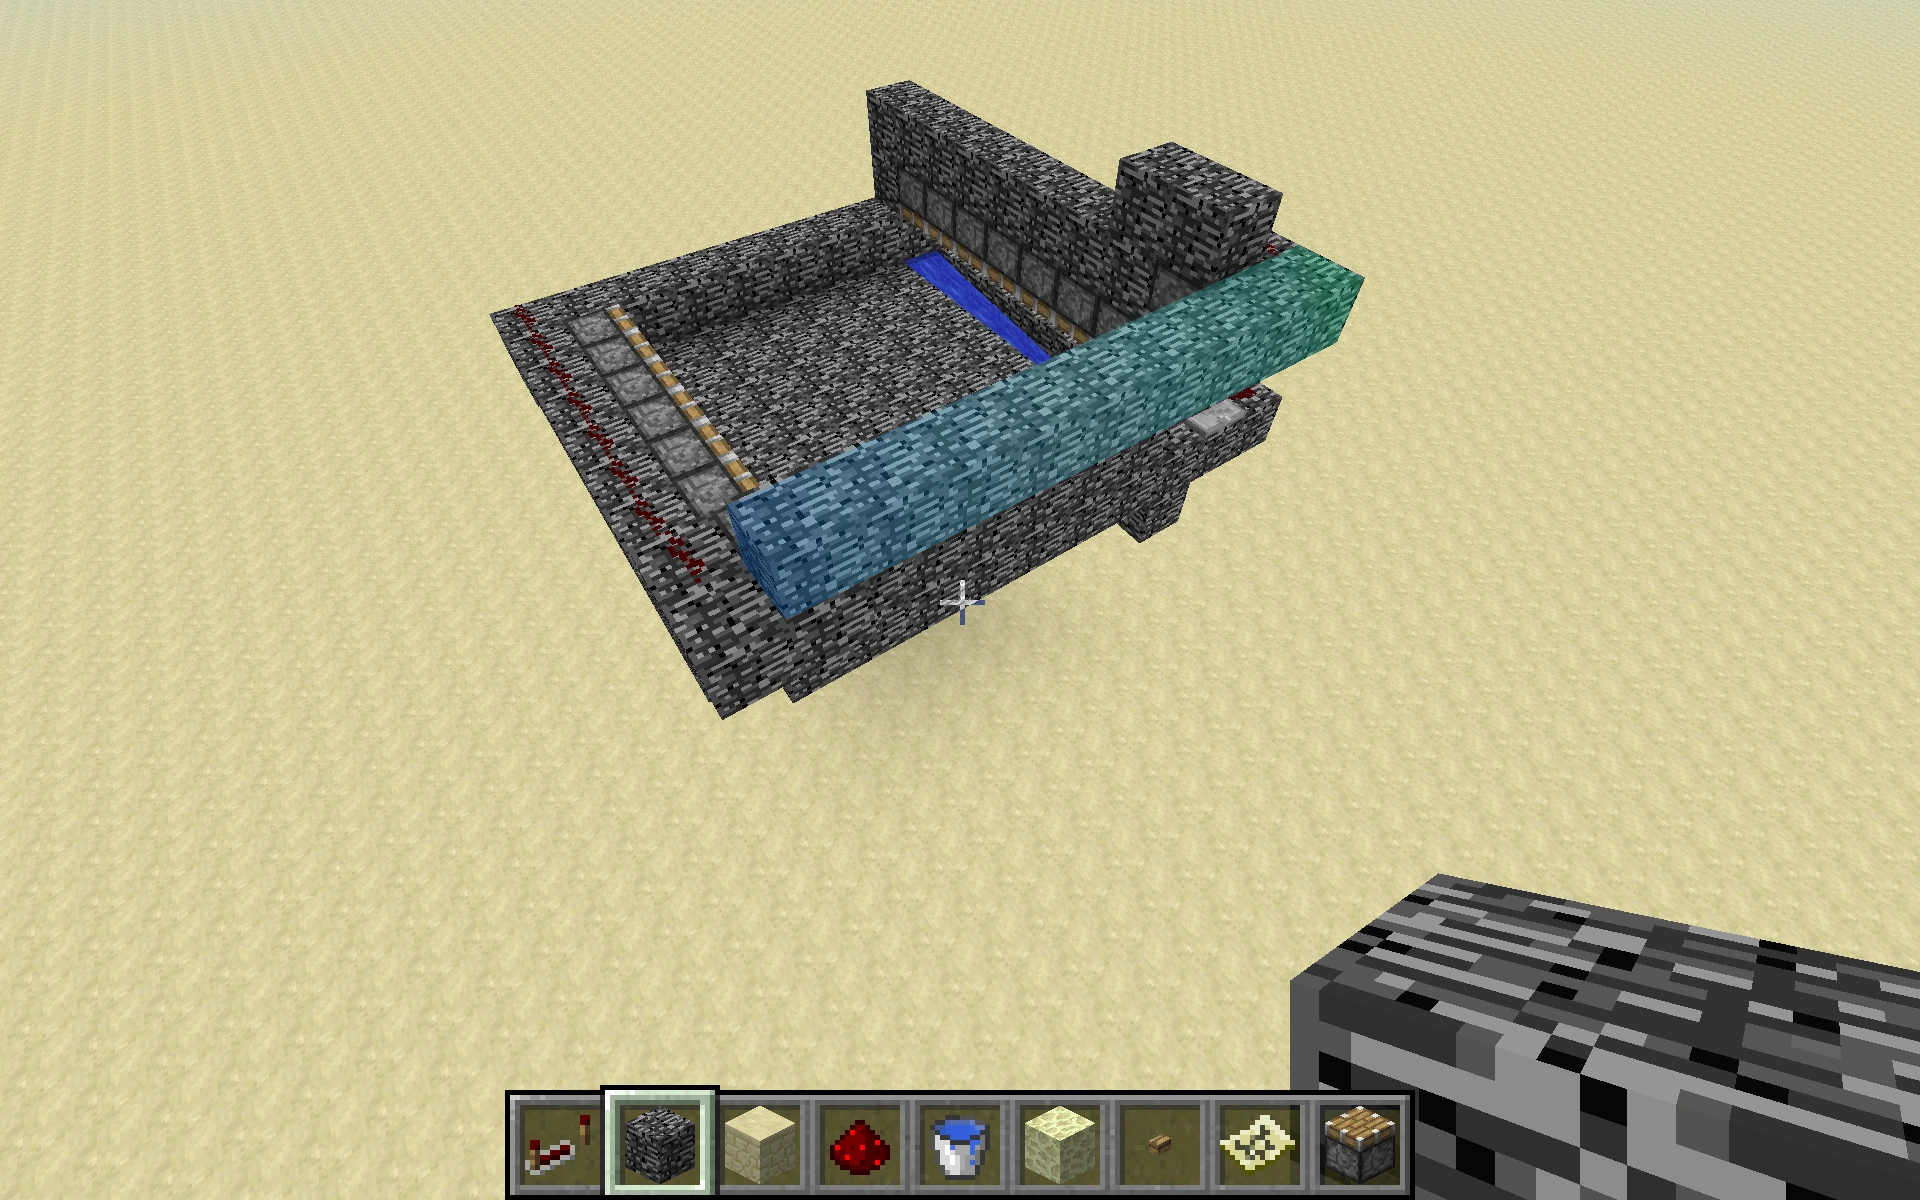
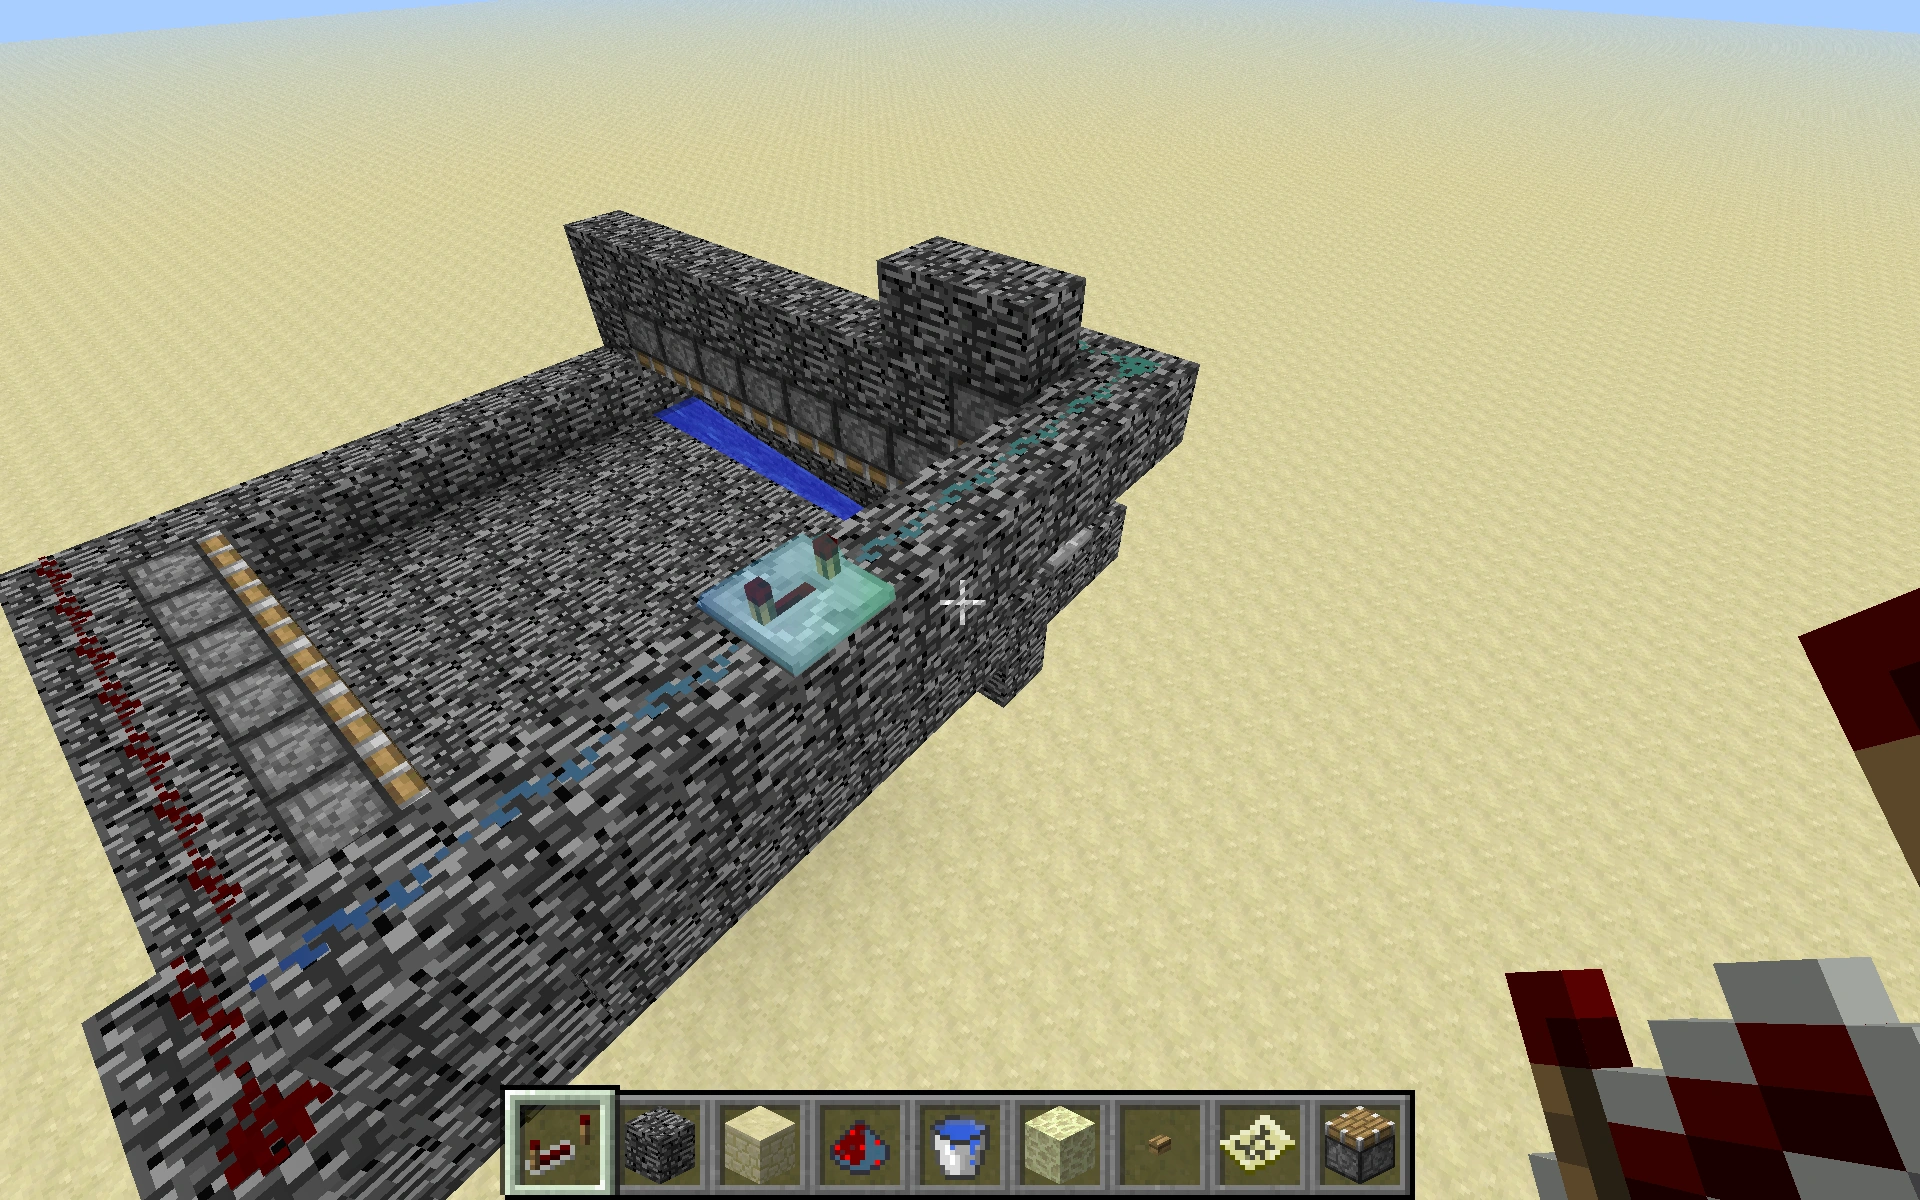
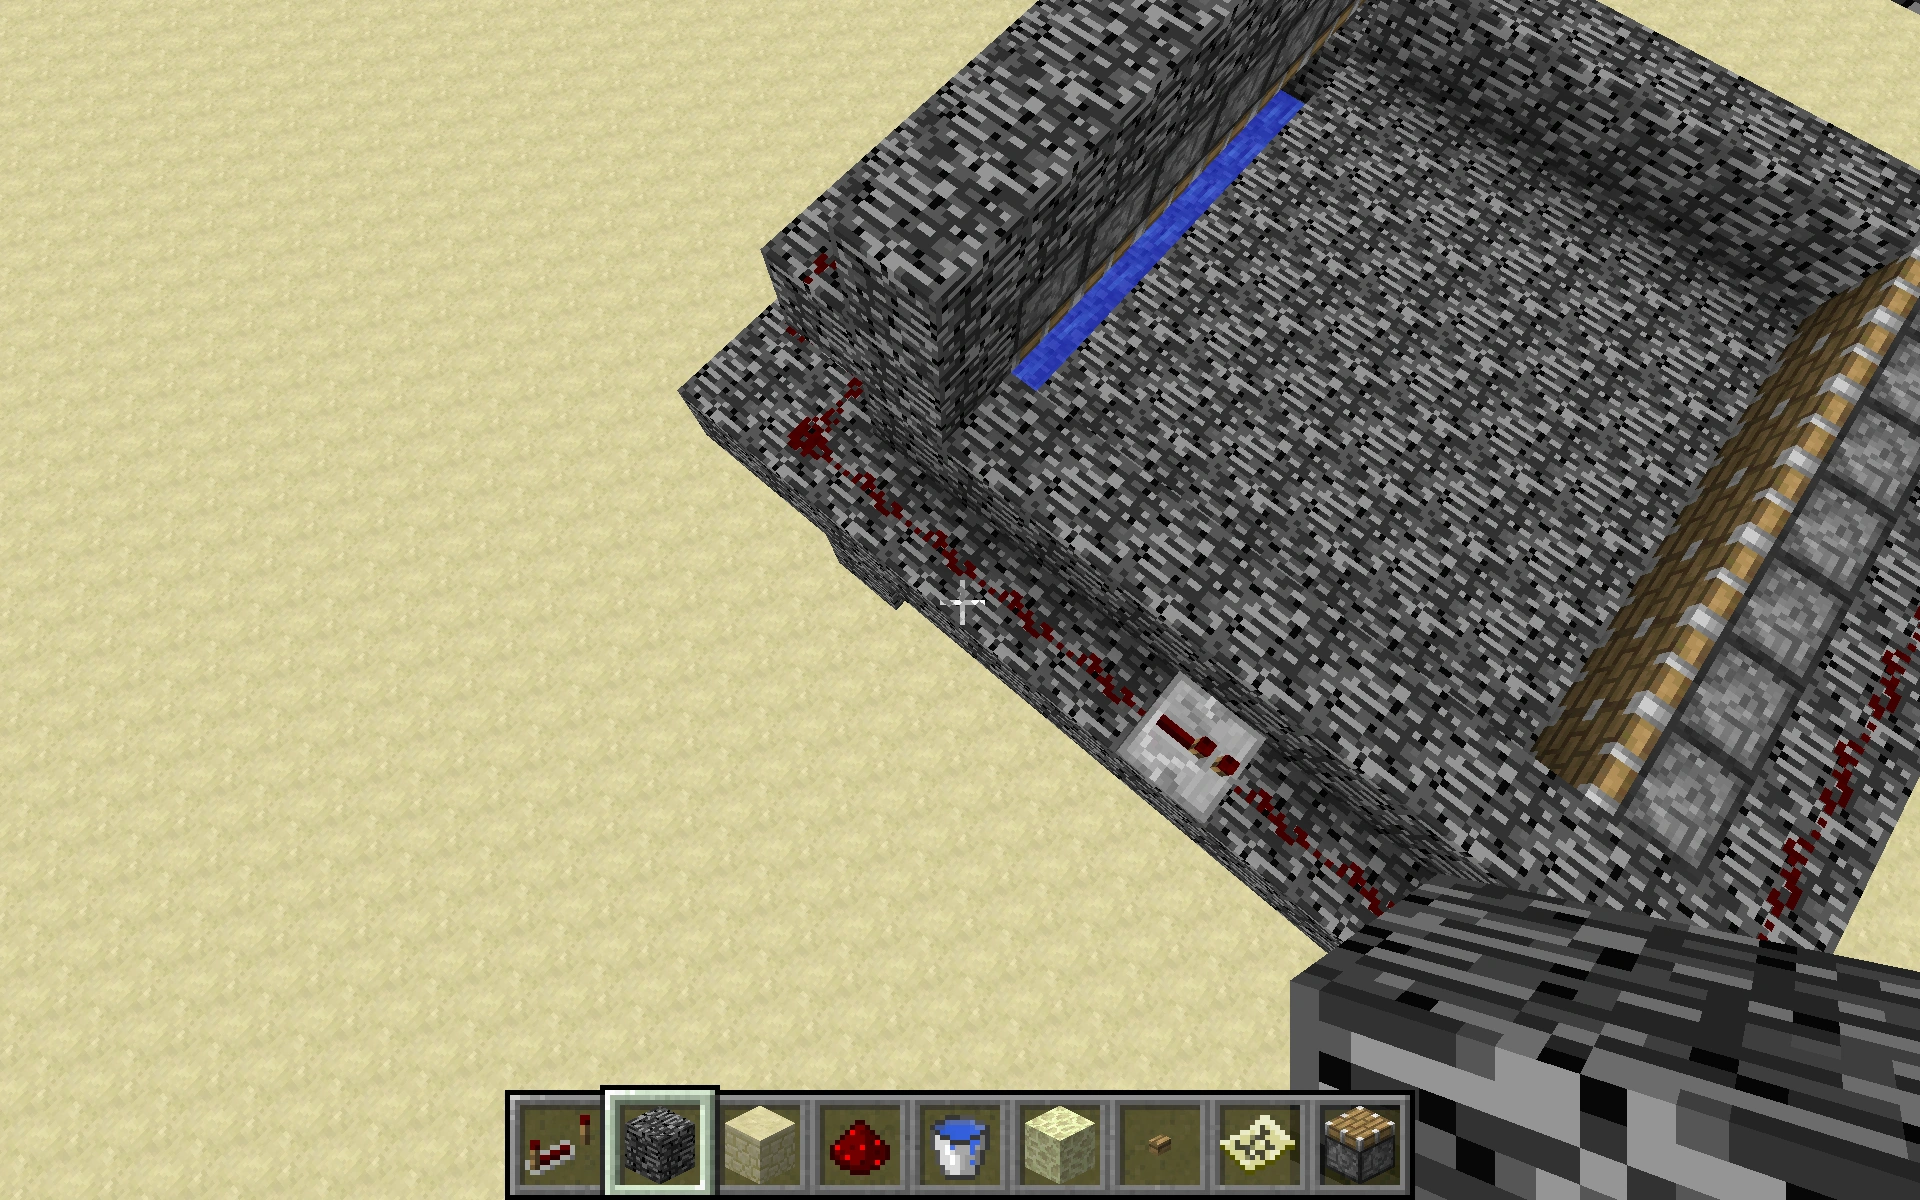
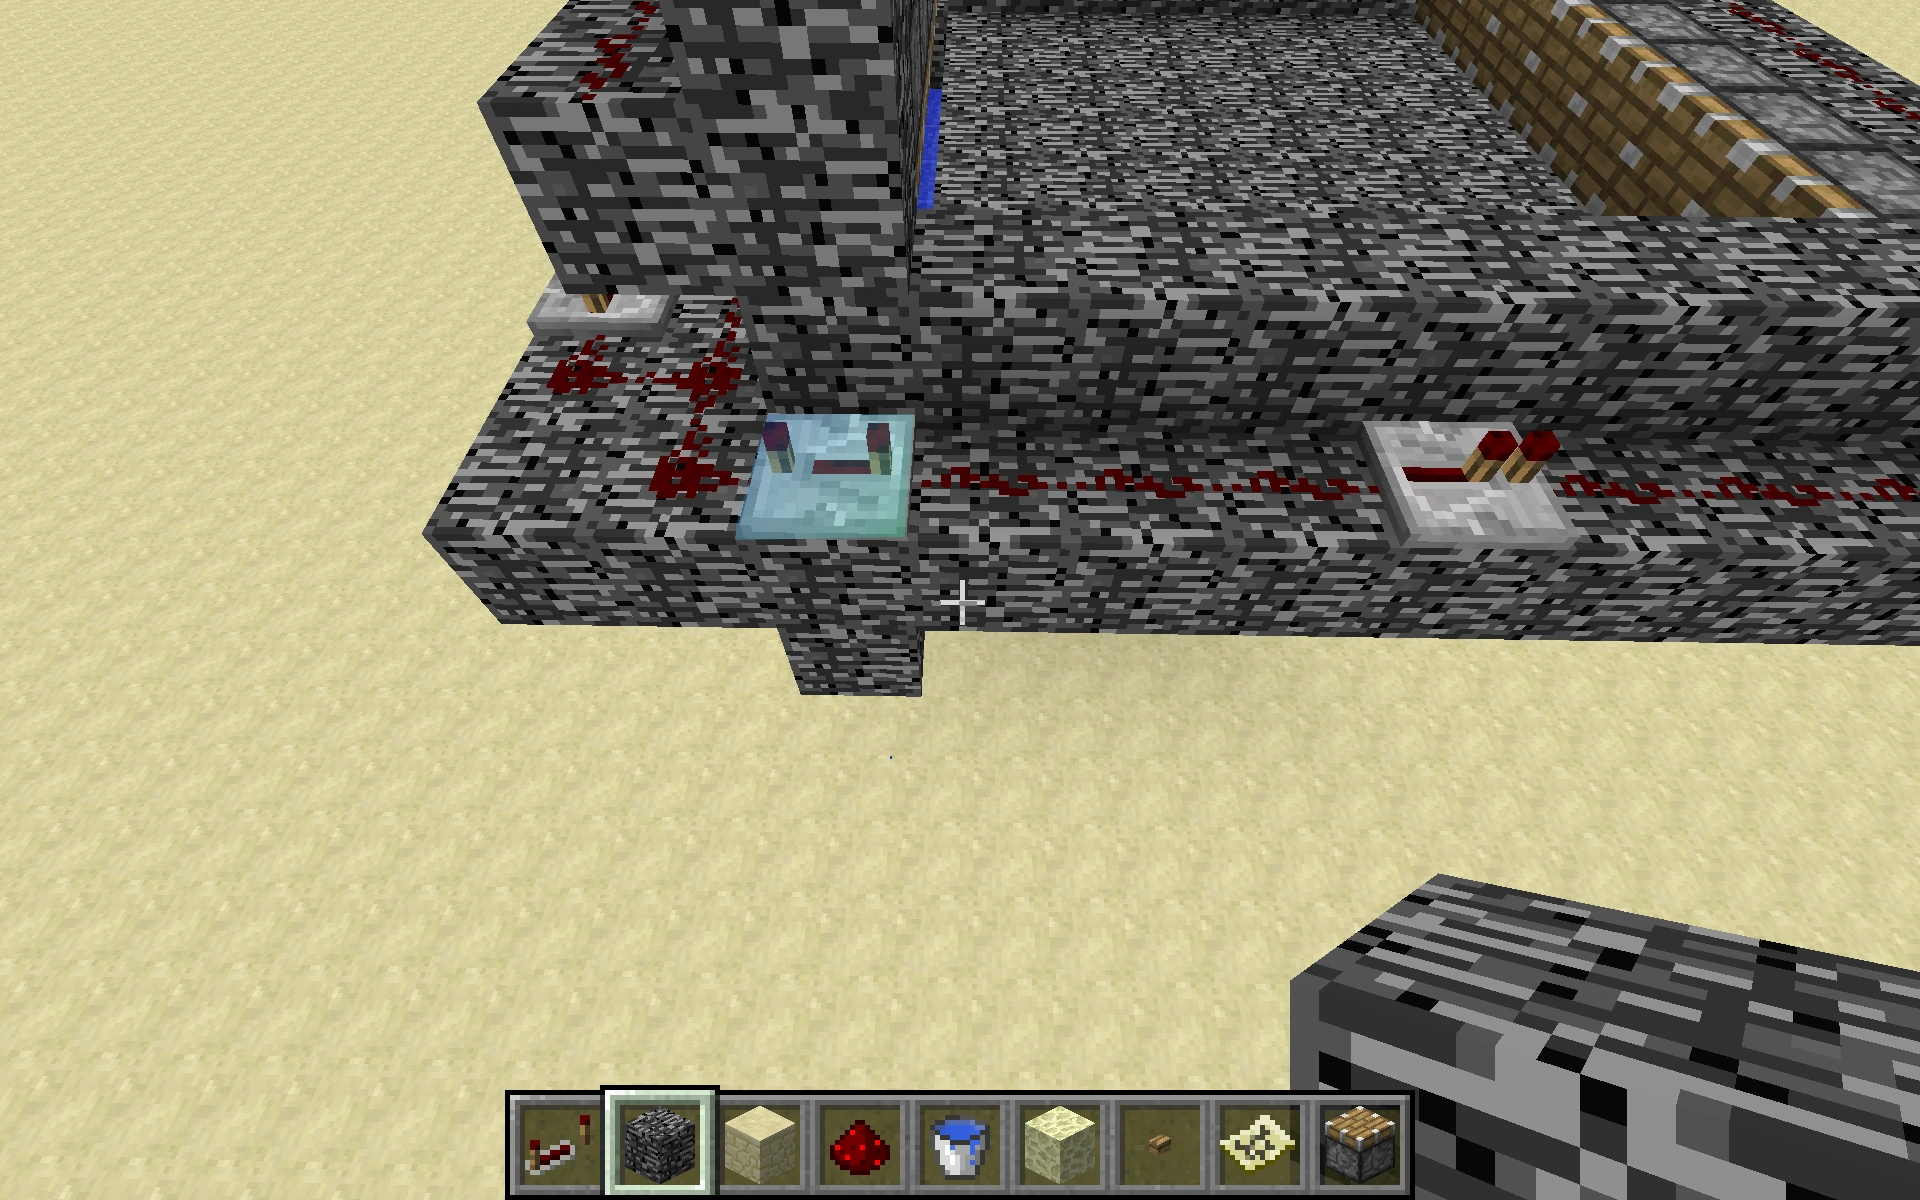
ディスペンサーでのリロード
トロッコやホッパーを使用して、全てのディスペンサーに自動でTNTを分配するように設計されたキャノン。このキャノンにも問題がある。主に、炸薬の威力が強すぎると近くのトロッコが破壊される可能性があり、レッドストーン回路とホッパーの設計が大きすぎて実用的でない場合がある。
Chaosriderがデザインした 112.OR1.2R4.1M6 Reroading WOLF はトロッコとホッパーを半効率的な方法で使用する :
近・中距離砲
キャノン
必要なもの : ブロック×14、ディスペンサー×4、レッドストーン×4、レッドストーンリピーター×6、水入りバケツ×1、ボタン×1、フェンス×1、感圧板×1、少なくとも4個のTNT。
- ブロックとディスペンサーを使用して、高さ1ブロックのU字型フレームを構築する。長さ6ブロック、幅3ブロックで、ディスペンサーはU字の内側に向ける。
- U字型の全面にブロックを3つ追加する。これは弾頭のガイドに役立つ。次に、ブロックの列に面した最後のディスペンサーを追加する。
- U字型の中央にブロックを3つ追加し、1ブロック下にする。
- フェンスと感圧板をキャノンの前に置き、水を感圧板に向かって流す。
- 2つのディスペンサーの上にレッドストーンを置き(スニークしながら)、最も遠いディスペンサーの上にブロックを置き、そのブロックの上にボタンを置く。
- 最後に、残りのスペースにレッドストーンリピーターを追加し、角にレッドストーンを置く。レッドストーンリピーターは遅延を4ティックに設定する。
- 最後に、全てのディスペンサーにTNTを入れて試してみてください!
速射砲
長所 : とてもシンプル。
短所 : 水が無いと損壊する。弓が必要。
このキャノンは、フレイムのエンチャントを施した弓、二本の矢、8個のTNTのみを必要とする(但し、水又は優れた装甲を使用する必要がある)。これはradditユーザーZecon 365 によって作製された。here
「粉砕機」超高速自動スライムキャノン
大きな破壊力をもつシンプルでコンパクトなキャノン。 スライムブロックを使ってTNTを打ち出す為に、非常に高速なクロック回路を使用する。
垂直TNTキャノン
再構築するには単純なTNTキャノン。非常に効率的で、空中で非常に高く撃てる。
| 垂直TNTキャノン([https://youtube.com/watch?v=UKyqOa8UALQ YouTube) |
|---|
下向きTNTキャノン
用途はほとんどないが、重力供給式のTNTドロッパーの代わりに使用できる。
3x9 感圧版
長所:建築、理解、使用が簡単
短所:Mobが誤って使用する場合がある
水、レッドストーン、ブロック、TNT、感圧板が必要。9x3の長方形を作成し、一方の3の中央を壊し、さらに2つのブロックを穴の両側に、ブロックの上にまっすぐに置く。反対側に水を注ぎ、水源を除くすべての場所と、最も高いブロックの間にTNTを置く。高いところの片側に階段を作り、階段にレッドストーンを置き、1ブロック先に感圧板を追加する。高いところに到達するまで、枠に沿ってレッドストーンを置く。階段のそばの3つのレッドストーンを遠くの隅に置き、別の感圧板を置く。それを踏んで、3秒または4秒のカウントを待ってから、もう一方の感圧板を踏む。高いものは、約50〜60ブロックまで飛び出す。
注:水源は、破壊を防ぐため低TNTを中和する。
ワンボタン防御用キャノン
遅延のために使用されるリピーター
自動遅延のある単純なキャノン。主に、他より大きな原型のキャノンを壊したり、地上部隊や砲兵に対する壁に取り付けられた防御として使用される。
114.0R4.4MB2 - 命名システムは上記の通り
最初にキャノンの基礎をつくる
片方に水を入れる
写真のようにブロックを2つ設置する
ボタンを付ける
側面にレッドストーンを引く
もう一方には、レッドストーントーチと最大遅延のリピータを4つ設置する。
正面にブロックを置き横にトーチを付ける
炸薬をこのように充填し、
終了。
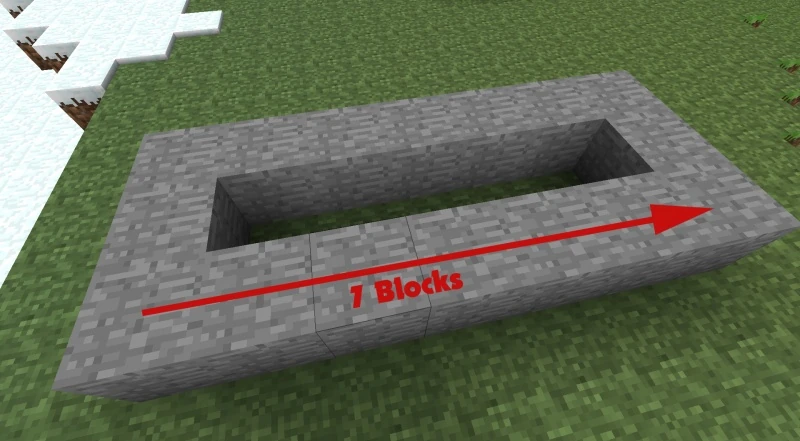
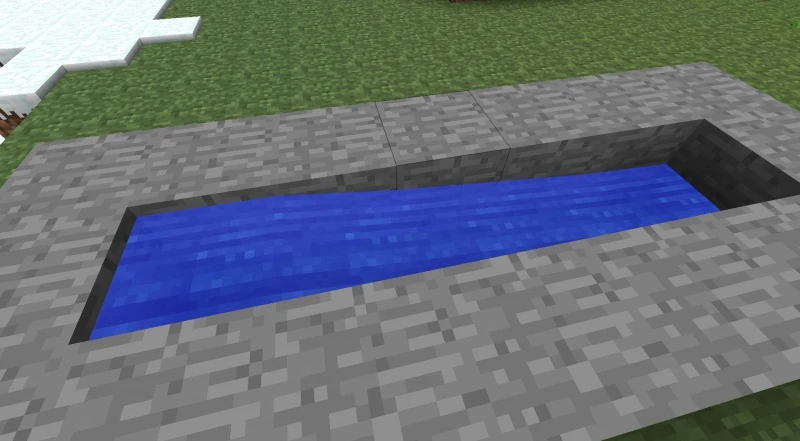
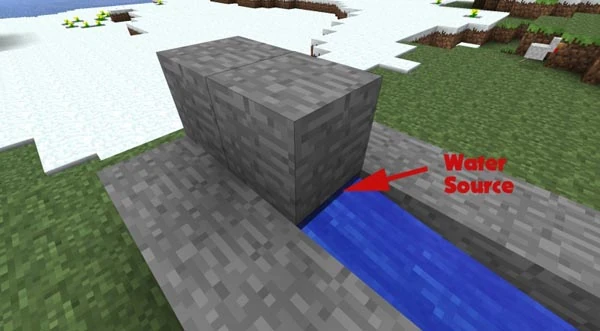
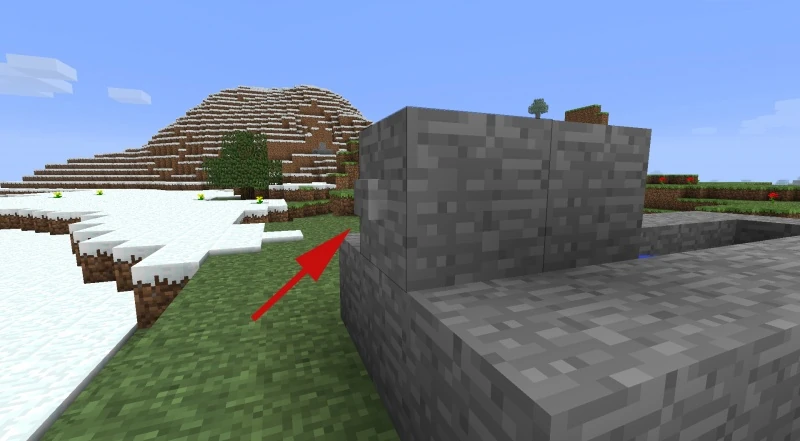
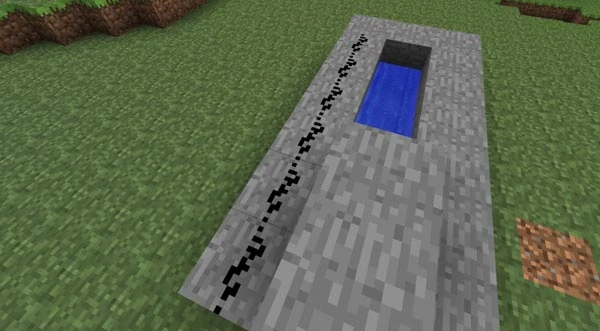
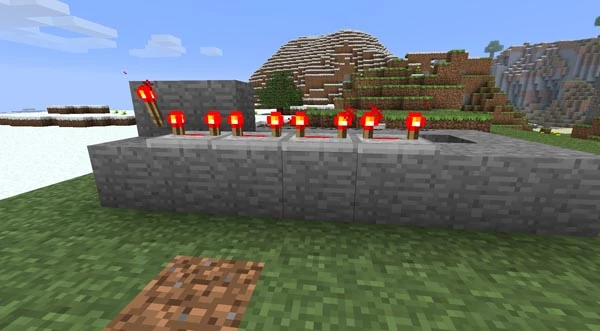
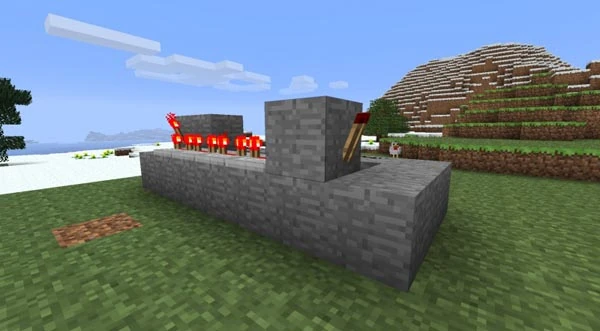
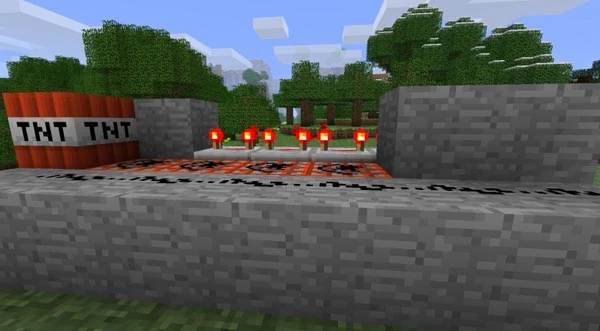
遅延のために使用されるトロッコ
スイッチをオンにすると、まず炸薬回路がオンになり、次にキャノンの周りにトロッコが送られ、ディテクターレールがオンになって砲撃が開始される。レッドストーンは節約できるが、大量の鉄が必要(ただし、廃坑からレールを手に入れると、この設計でコストを節約できる)。
| トロッコ遅延([https://youtube.com/watch?v=wA5bsZGGqqk YouTube) |
|---|
遅延のために使用されるディスペンサー
スイッチをオンにすると、まず炸薬回路がオンになり、次にディスペンサーからアイテムが発射される。アイテムはフェンスの感圧板からゆっくりと落ちて燃える。レッドストーンを節約でき、サバイバルでキャノンを作る際にリピーターを必要としない。全体として、上記の設計やリピーターを遅延として使用する通常の自動遅延キャノンよりもコストがかからない。
| ディスペンサー遅延([https://youtube.com/watch?v=42qvgVsB9to YouTube) |
|---|
プレイヤー(または他のエンティティ)発射用キャノン
他の対象や地図の領域にエンティティを放つのに使用できる。ただし、人間以外のものである場合、キャノンの中にエンティティを入れるのは少し難しい場合がある。
| 人間キャノン([https://youtube.com/watch?v=i3moNcatKC8 YouTube) |
|---|
エンダーキャノン
簡単に構築でき、非常に強力(実質的に無限)でありながら柔軟である。弾薬が展開されるのが愉快である。唯一の欠点は、起動しているエンダーポータルが必要であり、最大限の弾薬にはクリエイティブからサバイバルにする必要がある。着火されたTNTの爆発タイマーがエンドポータルを通過すると0にリセットされるという原則に基づいて動作する。つまり、潜在的に無限の量のTNTを、単純に8ブロックのスペースに凝縮することで、炸薬として使用できる。Minecraftは、最後まで爆発しないため、コンピューター自体が制限機能になる。
垂直ランチャー
しばしば垂直ランチャーと呼ばれるこの大砲は、「花火機関砲」とも呼ばれ、TNTブロックを垂直方向に発射するのに使用でき、空中で爆発する。
| 垂直ランチャー([https://youtube.com/watch?v=xIZxG9nXeF8 YouTube) |
|---|
長距離砲
長距離大砲の場合、複数列のTNTを備えたキャノンを使用して充填するのが最善であり、キャノンの高さに応じて、取り付けブロックで遊ぶのに役立つ。複数の弾薬TNTをキャノンに追加し、TNTをキャノンのどこに配置するかを試してみると、キャノンの経路にあるものはすべて効果的に破壊できる。
3X3 TNT トロッコキャノン. https://www.reddit.com/r/Minecraft/comments/7w4qsr/3x3_tnt_cannon_with_adjustable_range/dtxfx1b/
自動キャノン
レールキャノン デザイン
TNTトロッコのバグを使用したシンプルなデザイン。複数のトロッコを使用して同時に爆発させ、弾薬を空中に発射する。このキャノンは、1.5より前の従来の方法よりも少ないTNTを使用し、弾薬をさらに発射する。
L0:
L1:
ディスペンサーベース
L0:固体基礎、3X9、通常1層下に埋め込まれる
L1:
L2:
L3:
- 全てのリピーターは最大遅延に設定する必要がある。
- ここでは不発の場合に発生する可能性があるダメージを減らすため黒曜石が使用されたが、他の強力な固体ブロックは自由に使用してよい。
- 改良された完全自動のショットガンスタイルのキャノンのチュートリアルとモデルは[6]
- 全てのディスペンサーが正しい向きを向いている事を確認し、後ろの最初の水ブロックのみが水源ブロックであることを確認する。
- また、ディスペンサーの背面にホッパーを取り付けるとチェストなどからTNTを簡単に補充できる。
- デザインを改善するかのようにいつものように気楽に。ハッピーハンティング!
特殊なキャノン
爆撃キャノン
Minecraft 1.15時点で、ディスペンサーは点火されたTNTを発射するため、下向きのディスペンサーは下にある物にTNTを降らせる可能性がある。
長所:報復されずに敵基地を爆撃できる。TNTキャノンをまっすぐに発砲することはできないが、岩盤まで簡単に達することができる。基地の上に水がある場合は、砂を落とせばよい。
短所:基地の上に防護ブロックがあるファクションサーバーでは役に立たない。非常に大量のTNTが消費される。下向きのTNTキャノンよりも射程が低い。
このトラップは非常に単純である。高い所に移動し、床を建築し、ディスペンサーを下に置き、クロック回路を設定し、敵の基地が破壊されるのを見るだけである。十分な高さまでブロックの柱を積み上げるだけである。高くし過ぎるとTNTが空中で爆発し、無駄になる。ターゲットの上に直接構築する。ディスペンサーを設置し、TNTで満たす。クロック回路を設定してディスペンサーをオンにするが、その際に速度を早く設定しすぎるとTNTの衝撃波が上向きに発射され、キャノンが破壊される。ディスペンサーは後で採掘できる。降りる問題については、水を使用すればよいが、エンダーパールが便利である。
耐水キャノン
砂とTNTを融合し、水で覆われたブロックを爆破する。水はTNT大砲の敵であるが、これは水を回避する。
| 耐水キャノン([https://youtube.com/watch?v=iSHDHlCBMVk YouTube) |
|---|
照準可能なTガン
T字型のキャノン。動作方法:TNTで満たされた2つの小さなくぼみの間の取り付けブロックの上に弾薬を垂直に落とし、弾薬の水平発射速度を変更する。メインのくぼみをいっぱいにしないことで、範囲を調整できる。敵のキャノンを破壊して城に入るのに最適である。
シンプルなTガンチュートリアル
矢のキャノン
矢のキャノンは、技術的には広い範囲と効果範囲を持つディスペンサーのものと同じ機能をする。作成する一般的な方法:通常のキャノンの取り付けブロックがある場所にピストンを伸ばす。これは、正確に9個のリピーターにひっかけられ、反転されピストンが伸びたままになる。残りは、通常のキャノンのように配線された単純な炸薬のくぼみである。次に、弓を使用してピストンヘッドに矢を設置し、炸薬のくぼみをロードして、ボタンを押す。すると、TNTが爆発する直前にピストンが収縮して矢が落ち、TNTがオフになり、矢が長距離に発射される。このキャノンは、ブロックが壊れたくない一般的な中距離の場面で一般的に使用される。
他のデザイン:
.png)
このキャノンは、砂を矢の取り付けブロックとして使用する。リピーターの遅延に注意。

右図のキャノンは、遅延を使用して全面上部の砂を砕き、矢を加速させる。右下の図は上面図である。
砂のキャノン
砂のキャノンは無害なTNTキャノンの一種である。概念は同じだが、弾薬として砂を使用する。また、キャノンのTNTが爆発するにつれて砂が落下し、砂が撃たれる。砂を積み上げて「砂ショットガンキャノン」を作ることができる。これは異なる距離で複数の砂ブロックを発射できる。通常、キャノンは一方向にのみ発射され、破壊的ではない。クリエイティブのマルチプレイヤープロットサーバーのプレイヤーのプロットに砂を投げ、ホストを怒らせるのに使用できる。砂のキャノンは、マルチプレイヤーサーバーの荒らしにもよく使用される。被害者が主張する土地の改修を行っている間、荒らしは捕まらないようにできるだけ早く砂の大砲を建設し、被害者がそうすることを望んで建設をしている間に被害者の家の頂上に砂のブロックをいくつか発射する。屋根のブロックを壊し、その上に砂を落とす。
砂はTNTとは異なる速度で落下するため、砂を使用するTNTサンド変数キャノンを作成し、砂を使用してTNTを発射する場所を決定することはできない。ただし、照準可能なキャノンを使用している場合、同じ水平角で砂を発射する。
砂のキャノンを構築するには、ピストンを使用してTNT炸薬の前で砂を押し出すか、反転器に取り付けられた粘着ピストンを使用して、砂の下のブロックを取り外す。
注:使用できるのは砂だけではない。落下する物はすべて使用できる:
金床とドラゴンの卵はピストンで押せないため、上記のブロックを構築する二番目の方法だけが機能する。
ドライキャノン
ドライキャノンは、TNTを使用してTNT(またはクリエイティブモードのプレイヤーも)を飛ばす。ドライキャノンはシンプルで組み立てやすく、効果的だが、多くの黒曜石またはその他の耐爆性材料が必要である。
ドライキャノンの他との主な違いは、水が無いことと低密度ブロックを使用するということである。
- 弾薬を推進するのは大量の炸薬TNTである。これらのTNTはすべて同時に点火する必要がある。
- 低密度ブロックは、任意の種類のブロック(黒曜石、岩盤、その他の耐爆性ブロックを除く)にすることができ、炸薬と弾薬の間の緩衝器の役割をする。砂, 雪, 羊毛など柔らかいブロックが最高の効果を生み出す。
- 弾薬はTNTまたは、ユーザーがクリエイティブモードであり時間通りに位置に落ちる場合はユーザーでも良い。
縦型キャノン
- このデザインは垂直方向のキャノンだが、水平方向にも回転できる。
- キャノンは完全に黒曜石で作られている。
- 5×5×4の直方体をつくり、内部に3×3×2の空間を残す。
- 直方体の上部中央に穴をあける。
- 中の底の中央のブロックに黒曜石を1つ置く。これが取り付けブロックとなる。
- 中の最下層に炸薬であるTNTを詰める。
- 低密度ブロックを取り付けブロックの上に置く。
- 低密度ブロックの上に弾薬を置く。
- 全ての炸薬ブロックが同時に起動するようにレッドストーン回路を組む。
- 後ろに立ち、スイッチを押す!
水平キャノン
真ん中が空洞の長い黒曜石の筒(3x3x6または3x3x7で最適に動作する)を作成する。次に、上部に黒曜石を2つ置く。くり抜く。TNTを満たし、前面の最後のスペースに耐爆性ブロックを置く。上部をレッドストーンで覆い、背面にボタンを設置する。必要に応じて、起動した際に立つ床を作成する。また、地面から少し離れたところに設置する必要がある。以下の図を参照。オレンジは低密度ブロックを表す(側面の断面図で表示):
ターゲットでTNTがいくつか起動するが、高価で非常に長い距離飛ばない。だが大きなキャノンでは、各弾薬で大量の土地を細断処理できる。大きなキャノンを持っている場合は、レッドストーンが吹き飛ばされることがあるため、レッドストーンを手元に置いておくと良い。村の防衛に適す(大砲が近づきすぎるとモブが爆発する!)。 各弾薬に大量のTNTが必要なため、クリエイティブモードに最適。
TNTカタパルト
1.8で導入されたスライムブロックは、エンティティを特定の高さに跳ね返すことができる。また、ピストンに押されると、他のブロックを一緒に押すことができる。これらの機械は、この概念を利用してTNTカタパルトを作成する。
長所
- 低コスト
- 長距離であり、弧を描いて発射する
- 他のキャノンよりも使うTNTがはるかに少ない
- 非常に速く発射できる
短所
- 必要なスライムブロックとピストンの入手が難しい場合がある
- カタパルトのターゲットは固定され、範囲が限られる
NiceMarkMC'sデザイン
Morzeysminecraft'sデザイン
参考動画
- シンプルなダブルレバーキャノン
- シンプルなダブルレバーキャノンとエンドでの剣の防御エフェクト
- Mortar - はしごを用いた高射砲
- Compact - 弾頭は手で着火出来るが、火打石と打ち金を使用する必要がある
- Super large cannon - 他のエンティティを発射
トリビア
- TNTキャノンの発射はMinecraftで最もランダムなイベントの1つである。これらは、数十(または数百)の異なるベクトルを決定するために数千の異なるサンプルポイントが取られ、それらが加算されて弾頭の基本軌道を形成するためである。ただし、いくつかのキャノン、特に垂直迫撃砲を99%正確にすることができる(炸薬はバレルに戻り、特定の高さで爆発する)。
- あなたが本当に怠け者でオペレーター権限を持っている(またはコマンドを使用するシングルプレイ)場合は、コマンドまたはコマンドブロックを使用するといい。コマンド
/summon minecraft:tnt ~ ~2 ~ {Fuse:12,Motion:[1.0,0.0,0.0]}は、あなたの頭の真上から東へ向けてTNTを発射する。
| 新人向け |
| ||||||||||||
|---|---|---|---|---|---|---|---|---|---|---|---|---|---|
| 全般 | |||||||||||||
| チャレンジ |
| ||||||||||||
| 建築 | |||||||||||||
| 生産 |
| ||||||||||||
| エンチャントと製錬 | |||||||||||||
| ブロック破壊 |
| ||||||||||||
| メカニズム |
| ||||||||||||
| サーバー |
| ||||||||||||
| 技術的なチュートリアル |
| ||||||||||||
| 古いチュートリアル |
| ||||||||||||