モンスタースポナートラップはモンスタースポナーを使用するトラップである。これはダンジョンなどで見つかるスポナーを利用している。このトラップの目的はスポナーによってスポーンした Mob から効率よく、無限にアイテムを得ることである。このトラップを利用するにあたって、プレイヤーの安全を確保しつつ Mob をスポーンさせることが目標となる。
このタイプのトラップは1つの Mob を対象にする。複数の Mob を対象としたトラップについては Tutorials/Mob Farm を参照してほしい。また、スポナーについてはモンスタースポナーを参照。
ダンジョンを探そう
ダンジョンは洞窟を探索している時や掘っている時、時には廃坑内で見つかる。それらはランダムの場所に生成されるように見えるが、ほとんどは地下にあり、通常、Y=30 から Y=60 の範囲にある。Mod やコマンド、外部ツールを使わずにダンジョンを見つけるには運はもちろん、幾つかのテクニックがいる。まず、地下探索中、溶岩の近くでないにもかかわらず、見覚えのない丸石や苔石が生成されていることがある。これがダンジョンであり、その中にスポナーが設置されている。地下探索をしている時に同じ種類の Mob が多く感じたら周囲を探索しよう。ダンジョンがある可能性がある。また、砂利や砂といった重力の影響を受けるブロックはよくダンジョンを四角く囲んでいる。これは砂漠の地表でよく目にするだろう。
スポナーは周囲の暗い場所を松明などで照らすことで Mob のスポーンを止めることができる(これはよく「制圧」と呼ばれる)。通常は明るさを9以上にすることで制圧できるが、ブレイズとシルバーフィッシュは明るさを12以上にしないと制圧できない。スポナーがスポーンさせる Mob は通常、6種類ある(ブタを含めれば7種類。しかし、ブタのスポナーはコマンドで入手した場合のみ)。この Mob には背の高いものと背の低いものが存在し、前者はゾンビやスケルトン、ブレイズ、後者はシルバーフィッシュ、クモ、洞窟グモがいる。
ネザーではブレイズのスポナーがネザー要塞に生成される。このスポナーを利用してブレイズロッドと高い経験値を得ることができる。しかし、このスポナートラップ作りは最も危険である。構造物の高度に加えて周囲を溶岩で囲まれていることが多いからである。高さや溶岩、ブレイズ、そして外部の Mob によって死なないよう、充分に準備をするように。
シルバーフィッシュのスポナーは要塞のエンドポータルの前に必ず生成される。しかし、シルバーフィッシュは倒しても何も落とさず、経験値も少ないのでトラップにするメリットはない。それどころか周囲の地形を破壊していくのでこの Mob のトラップを作りたいのでなければこのスポナーは壊すべきである。
クモのスポナーは比較的容易にトラップが作れる。1ブロックサイズの穴には進入できないからだ。これを利用すればクモの攻撃を受けることなくスポナーに松明を立てることができる。
洞窟グモのスポナーは廃坑に生成される。ゾンビやスケルトン、クモとは違い、丸石や苔石で囲まれておらず、通路の途中で見かける。このスポナーの周りには大量のクモの糸が張り巡らされているため、いい目印になる。洞窟グモから攻撃を受けると、難易度ノーマル以上で、毒の効果を受けるため、出来るだけ早く制圧してしまおう。その際は、周りのクモの糸をハサミや剣で破壊するか水入りバケツで流すといいだろう。洞窟グモのスポナーはクモのスポナーよりもトラップにしづらい。毒の効果に加え、洞窟グモはサイズが小さく、1 ブロックの隙間やハーフブロックの間を進入することができるからだ。トラップにすればそれなりのメリットはあるが、危険を伴うので初心者や中級者はこのスポナーは壊してもいいだろう。このスポナーの特長は他のものよりも頻繁に見かけることである。場合によっては 20 ブロック以内で他の洞窟グモのスポナーが見つかることがある。そのため、非常に高効率のトラップが制作できる。しかし、それでもわずかな隙間から漏れ出る危険性があるため注意した方がいい。
ゾンビも少しばかり厄介である。子どもゾンビがスポーンすることがあるからだ。子どもゾンビのサイズは 0.3 × 0.975 と小さく、1 ブロックの隙間も通り抜けてしまう。しっかり閉じ込めておこう。また、ゾンビのスポナーからは通常のゾンビや子どもゾンビの他に、村人ゾンビがスポーンすることがある。トラップにする場合はこれらの種類を仕分ける必要があるだろう(特に子どもゾンビ)。ゾンビはドロップするアイテムが豊富なため、トラップに対する見返りは大きい。
単純なトラップ
上記のスポナーのうち、ゾンビやスケルトン、クモ]のスポナーはよく見かける。いずれの場合も、簡単に敵からの攻撃を受けずにアイテムや経験値を得るトラップを作ることができる(洞窟グモも同様に扱えるがこれらより危険である)。次のように実行するとよい。
- ダンジョンとその周辺の安全を確保し、明るくする。部屋とスポナーを明るくし、モンスターに作業を邪魔されないようにしよう。
- チェストの中身を頂こう。トラップの、Mob を処理したい場所に作業台とチェストを設置するとよい。モンスターの処理にはコストの低い石の剣を使うといいだろう。
- 部屋をスポナーが Mob をスポーンさせる範囲まで広げよう。この範囲は、スポナーを中心として、9 × 9 × 3 である。この範囲にはスポナーの上下のブロックも含まれているので必要に応じて丸石と苔石を取り除いて床の位置を下げよう。この範囲に広げれば、想定外の場所で Mob がスポーンした、というようなことは起こらなくなる。
- 余計な隙間を埋め、フェンスや他のブロックを置くなどして Mob を処理したい場所に運ぶ機構を作る。
- おまけとしてレッドストーン機構を作るのもいいかもしれない。
The three most common types of spawner are for zombies, skeletons, and spiders. In each case, it's fairly trivial to set them up so that you can attack the monsters without retaliation, forming a simple farm for XP and their drops. (Sometimes cave spider spawners can be treated similarly, but this is more hazardous.) Proceed as follows:
- Secure and light the area around the dungeon! Light the room and spawner while you work on it, so the monsters don't interrupt you.
- Ransack and clear out the chests. Choose and prepare a "front" area for the farm, with a chest and crafting table to supply stone swords for cheap slaughter. Make sure you have a clear approach and/or room to back away quickly, in case you come by and find one or more creepers spawned inside, and you need to shoot them.
- Prepare the spawner area, and especially, open up the entire spawning range: Horizontally, that's 9x9, centered the spawner. That range also includes a block above and below the spawner, so take up the original cobblestone and moss-stone floor, if necessary supplying a new floor one level below. Extend the front to match, so you don't have monsters or items hiding in corners.
- Now seal off extra exits and alcoves, fill stray holes, and place fences or other barriers to channel mobs toward the front. If you want any redstone circuits, now is the time to set up the alcoves and access tunnels.
- Optionally, set up redstone systems:
- Most important is a flood system, to wash monsters and stray drops toward the front. If you've opened up the full 9x9 area under the spawner, you can get a nice sheet of water from three dispensers at the back, each containing a water bucket. This will push monsters forward and bring all drops within reach of the front. If you still have items being stuck in one corner, you might resort to a side tunnel and a sticky piston to get at them without exposing yourself.
- If you're ambitious, you can build a system to light up the dungeon when desired. This will be much easier if you have redstone lamps.
- Prepare the front according to the monster type. You will always want fence gates, in case you want to dash in between spawns to collect drops, or to fix something up.
- For zombies, a simple gated fence will do. Maximize your view of the spawner, so that they come to the fence quickly.
- For spiders, you want one or more 1-block wide slits, 2 or 3 blocks high. You can attack them, they can't come through. To defend against creepers and other non-spider spawns, you can make these slits two-high, between top and bottom slabs. (That is, three blocks total, but with the top and bottom spaces half-blocked by slabs.) The "tall" monsters will not recognize these as passable, but you can move or attack through them easily.
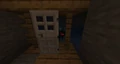
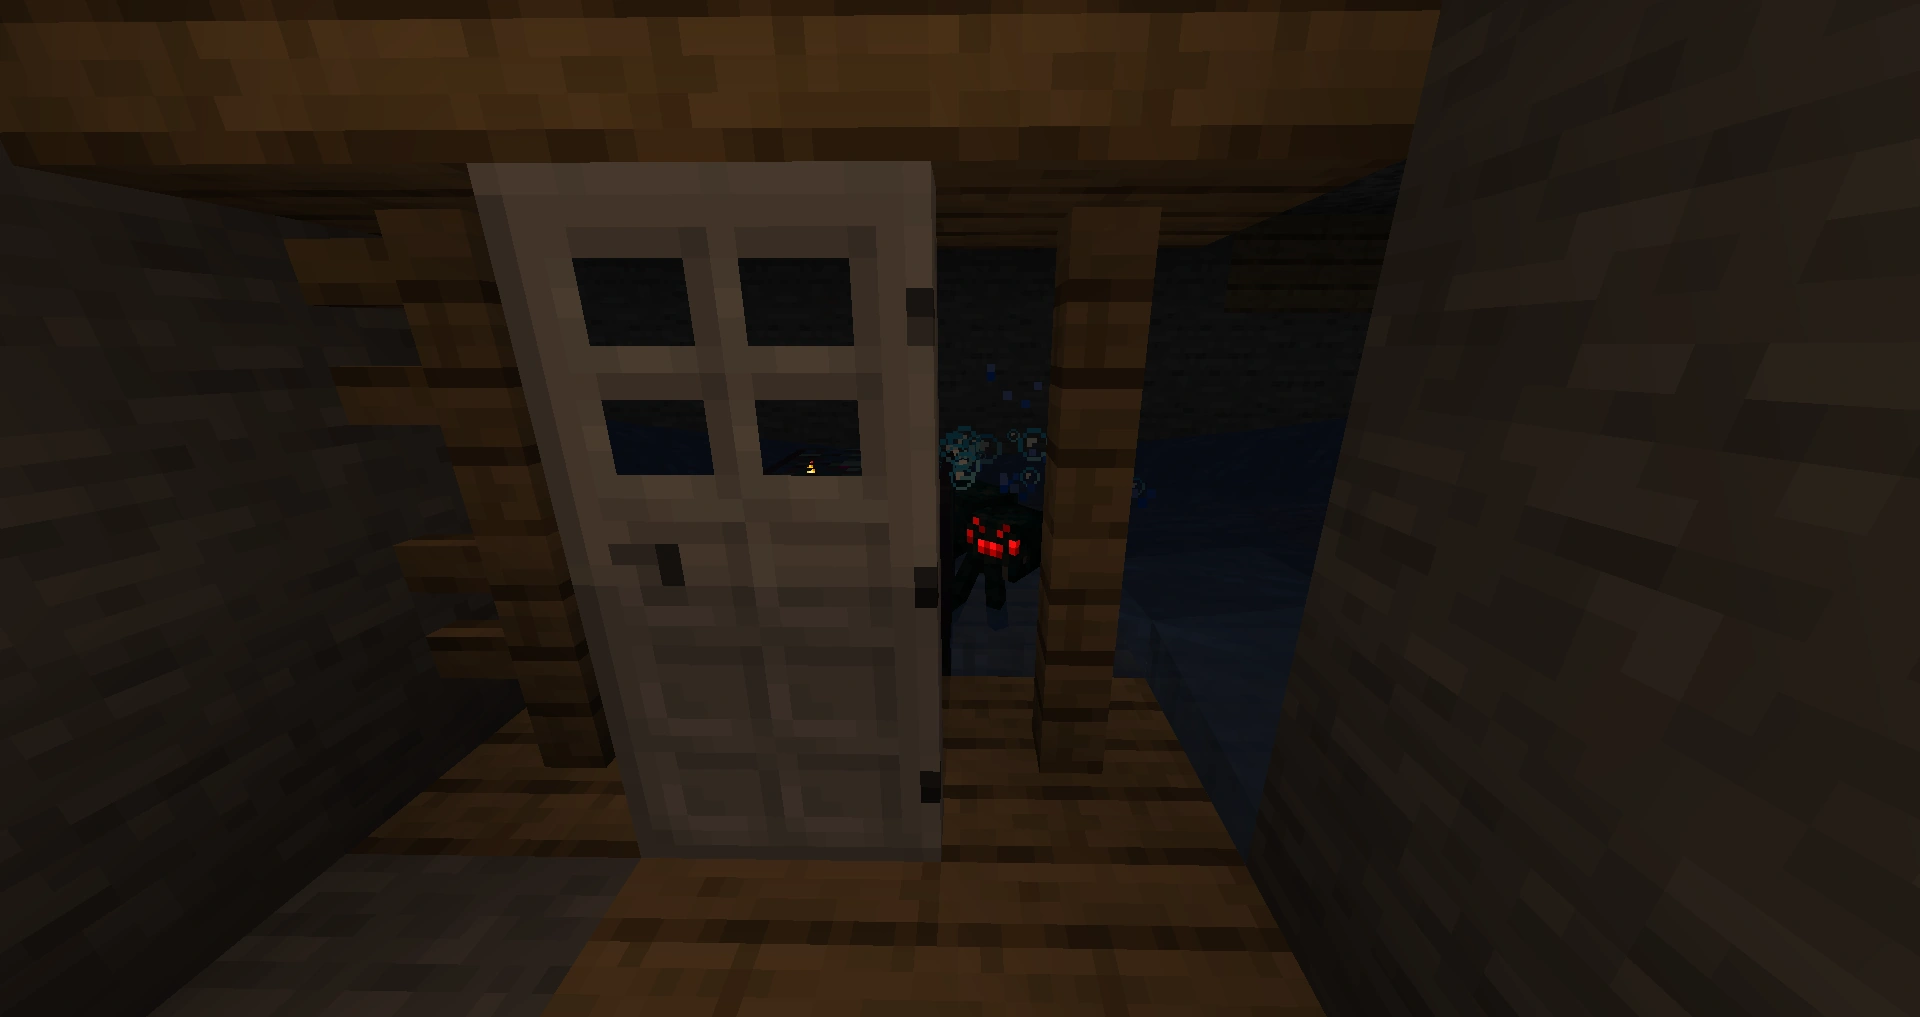
- For cave spiders (if you must), you can place a door between floor-to-ceiling fences (see pictures below). Iron doors are better, so that you can't accidentally open it while you're whacking at the spiders.
- Note that cave spider spawners don't come pre-enclosed in a dungeon, so you'll likely need to start by building a room around them. Remember that the spiders can appear up to 4 blocks away (depending on direction) from the spawner, whether or not there's a wall in the way.
- Skeletons are trickiest: They can shoot through even brief gaps, the moment they get the angle. For the actual killing zone, you want fences/gates at eye level (so they can't shoot you), with an open row below (so you can attack). If you stand directly in front of the fence, they will usually come up to the front so you can attack them. That row in front of the fence can also be a trench—you can reach further into the room, but then they will occasionally get an arrow or two under the fences.
- Once your farm is prepared, remove most or all of the lights. Beat a hasty retreat to the front.
- Special case: If you found a dungeon in a mushroom biome, congratulations! Since creepers can't spawn, you can pull out all the lights in the dungeon room, and get maximum output from the spawner.
- Make some stone swords and whack away. Keep bow and arrows handy near the entrance, in case a creeper spawns while you're away or approaching, or otherwise sneak into the room. (Normal darkness spawns are suppressed within 24 blocks of a player.) It is also possible to kill creepers by hitting them, backing off, and repeating. With an iron sword you can just rush a creeper and kill it before it explodes.

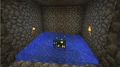
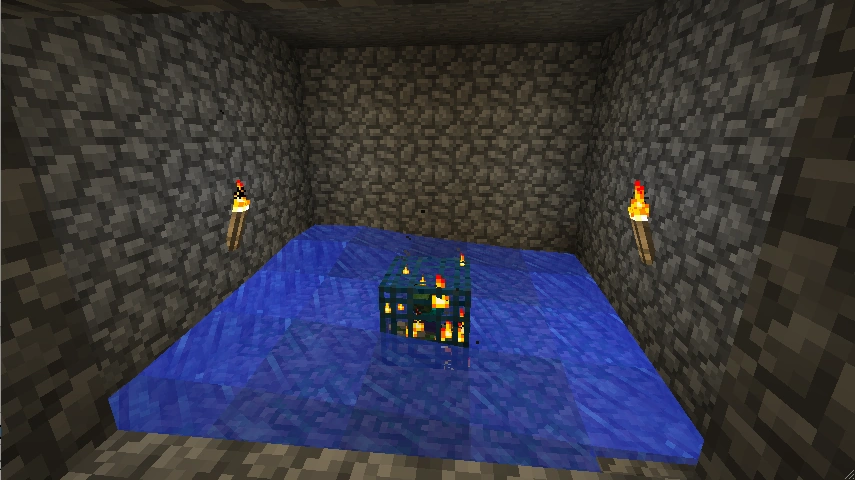
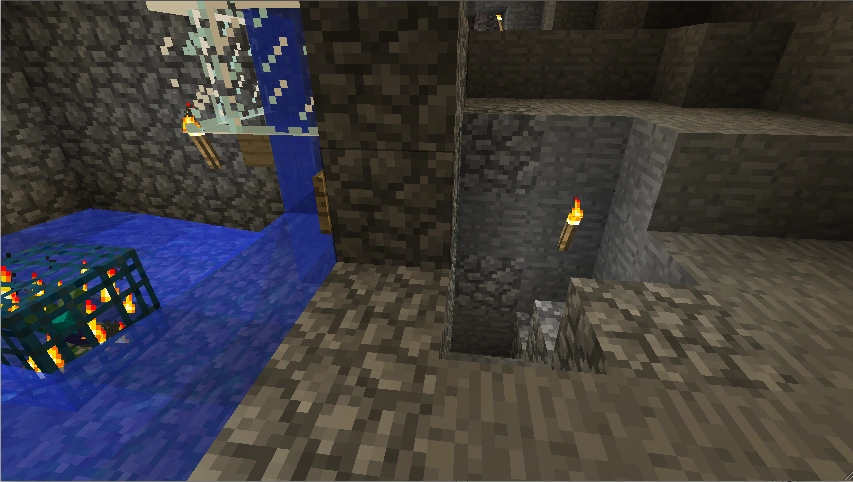
A classic water floor for normal dungeons
- Dungeon redstone lamps.png
Redstone lamps controlling a spawner
- Cave spider farming.png
Containing cave spiders
A more elaborate farm, using water to wash them forward

処理層
どんな標準的な Mob処理機でもダンジョンに接続することができる。しかし、この機構の目的はあまり資材を持っておらず something larger を作れないプレイヤーのためにある。1.5からはホッパーを用いてチェストにアイテムを集めることができる。
溶岩ブレードトラップ
この場合の溶岩ブレードトラップはスポナーの下に水を設置し、Mob を1つのラインに集める。その先には看板や丸石の壁などの上に設置した溶岩(溶岩ブレード)がある。これにより、Mob を処理することができ、アイテムを集めることができる。
水没トラップ
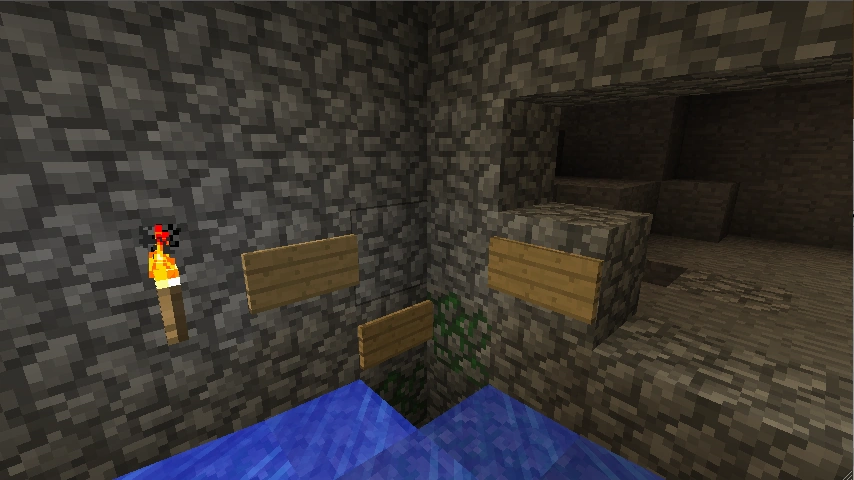
水没トラップは水により敵対的Mobを溺死させる。Mobは浮き上がろうとするがアイテムはそのままドロップする。そのため、簡単に分離することができる。 ここにその一例をあげる。この例では5×5のダンジョンのゾンビスポナーを利用している。下の画像も参考にするとよい。
- まず、スポナーを囲い、1つの角に水を流す。反対側の角には水を流さないこと。
- 水を流した角の反対側の角に穴を掘る。この穴にアイテムが落ち、この角でMobは溺死するだろう。
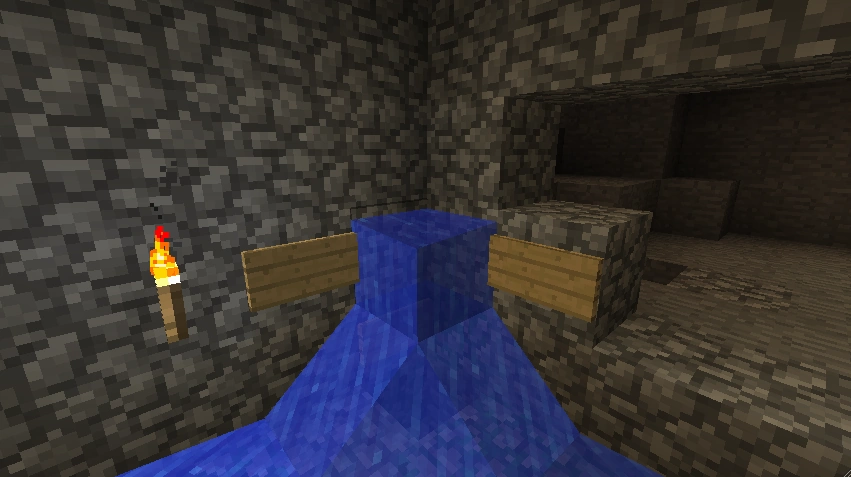
- 下の3枚目の画像のように看板を設置する。水は看板を固体ブロックと見なすだろう。
- 4枚目の画像のように、看板と看板の間に水を設置する。この時水が逆流しているように見えるがきちんと保持されている。
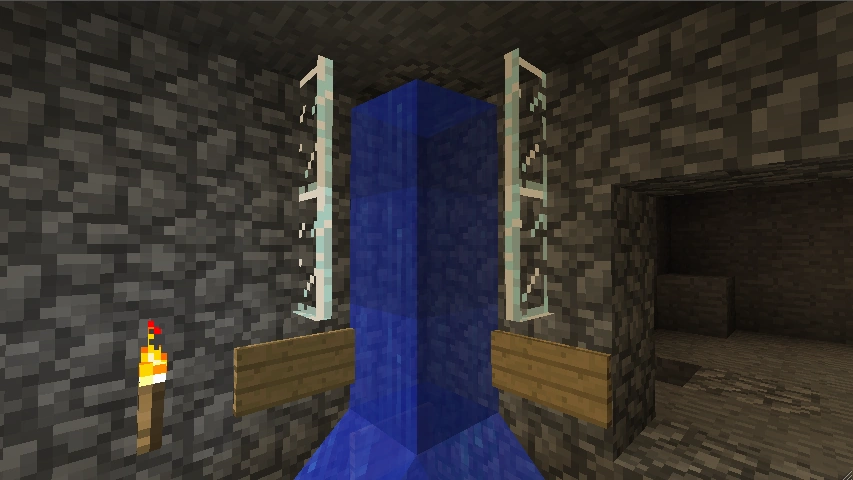
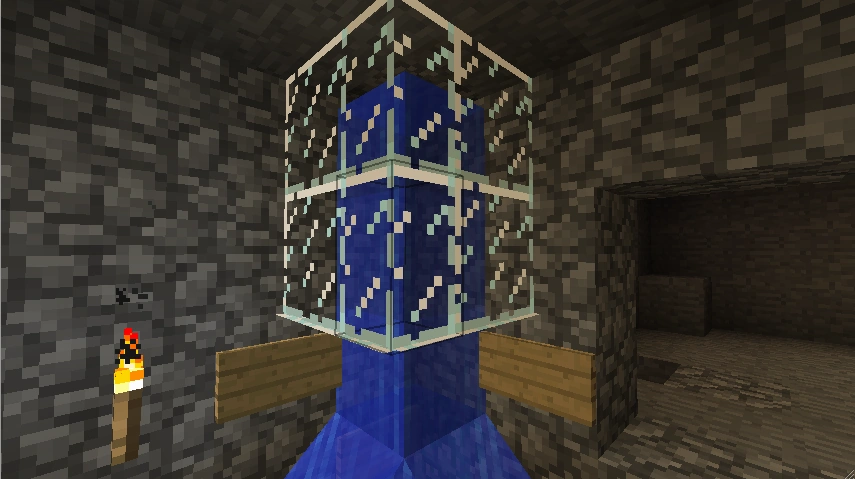
- 5枚目の画像のように、看板の上に2つガラスを設置する。これでMobの処理スペースのできあがりだ。固体ブロックならなんでもいいが画像のように板ガラスや鉄格子はおすすめできない。隙間ができてしまい、このトラップが役に立たなくなるからである。
- 先ほど作ったスペースを水で満たす。
- ステップ2で掘った穴からアイテムを集めるための水を流す。この段階でダンジョンから松明を取り除き、壁を閉じよう。
これは背の高いMob用ではあるが水没層を広くすることでクモにも応用できる。
ここで、下の画像は必ずしも上記の通りではことに注意してほしい。
スポナーを囲う

部屋の角に水を流す。反対側の角には穴を掘る。
看板を設置
水没層に1つ目の水を設置
板ガラスを設置
水没層を水で満たす
水没層を密閉する。
アイテム収集用の水流


Please note that this video shows the incorrect process. You must fill up the column using source blocks, not just one at the top.
Flow trap
This trap is highly recommended. It's effective and safe on all mobs, except blazes, since you need water. Disable the spawner, and then make an 10×10 room around the spawner. On one side, place water on every other block. On the opposite side, make a one block deep trench extending along the side opposite the water. Light up the trench well. If you want, you can add a pool for fish and get a fishing rod to fish. Then, make a wall with a line of air at eye level to look through and strike. The holes have to be next to water. Now, get plenty of food, a few chests, and two or three swords. Now, remove the torches and let mobs spawn. The water will bring them and the drops to you, and you can shoot them and hit them. Also, make a room to eat and heal in safety, just in case you didn't build the trap thoroughly. With this trap, You can go for hours in one go, and gain hundreds of experience levels and items at minimum risk. The trap system is built in a way where you can easily leave when you want, with almost no creepers or non-spawner mobs popping up.
- If the spawner is a spider, make these adjustments:
- Add iron doors with levers to control mob flooding and possible death.
- Bring milk.
- This precaution is for cave spiders.
- Add an on/off lighting system.
- Bring bows to help control mob flooding and possible death.
Sunlight based traps
This type only applies to zombie and skeleton mob spawners. Sunlight based traps are made by placing water below a spawner. This water will flow from one side to another. Where the water stops, dig a pit a few levels down. This will drop the mobs into the pit. To finish, make sure that the pit is open to sunlight. This sunlight will burn the mobs alive. An example of this can be found "here".
Potion-based trap
This is a fairly expensive and hard to make trap, so it's not recommended.
First: Light up the room to prevent mobs from spawning.
Second: On top, dig out 2 blocks from the spawner room top without breaking the spawner roof
Third: Place the wires and dispensers like shown:
DWWWWWD    X - Roof Block
XXXWXXX    W - Wires
XXXWXXX    D - Dispenser looking in the spawner room
XXXLXXX    L - Lever, button or even a redstone clock, whatever you want to power
XXXWXXX        the dispensers up!
XXXWXXX
DWWWWWD
Fourth: Put inside the dispensers:
HARMING POTIONS: Used to damage spiders. HEALING POTIONS: Used to damage skeletons and zombies. POISON POTIONS: Used to weaken any mob that is not undead.
Fifth and last, but not least: Take the lights out, get up, and when you hear the roars, push the lever/activate clock/ whatever you used to power it up.
Again, it's expensive, so it's a lot better to use water or lava traps until you got a blaze trap, a lot of patience and potions, or just playing Creative/Having TooManyItems, or you can use witch to let witch throw potions to the trap filled with mobs, but it'll despawn if you're going too far away from them, and witches don't throw healing potions, so it's only usable for any mob that is not undead.
When you're bored, a fun thing to do with this trap, in creative, is to splash Potions of Poison II (II because it's faster) on a pit of mobs to weaken them down to 1 health, and then throw a Potion of Instant Harming II to kill them all instantly. Just a bit of cruel fun.
Iron golem traps
In this trap an iron golem is used to kill the monsters for you. To make it, simply make an iron golem in the dungeon and watch it kill for you. However, the iron golem will eventually die (especially if more than 1 enemy is spawned), so you'll have to replace it with another, or link it to an iron golem farm.
サボテントラップ
このトラップはクモを処理するためのものである。この方法ではアイテムがロストしてしまうが、サボテンの2つ上にブロックを置くことでちょっとしたサボテン農場としても使える。
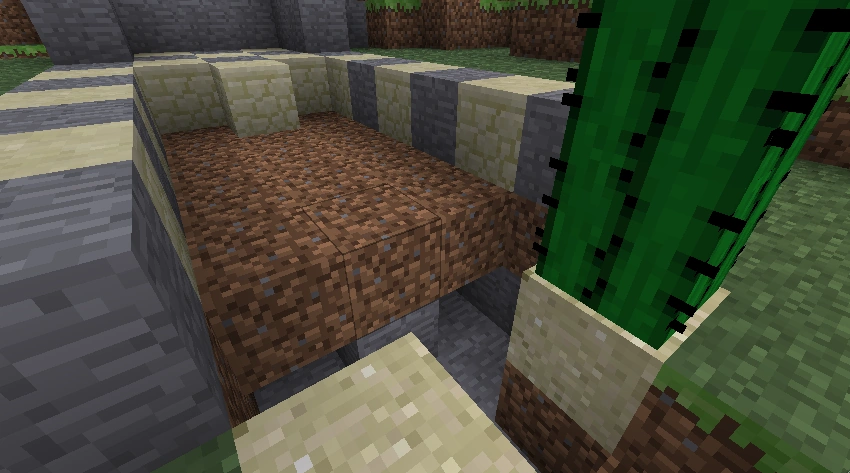
- Dig the main channel. The spider spawner is left in the wall forcing spiders to spawn on the small dry patch.
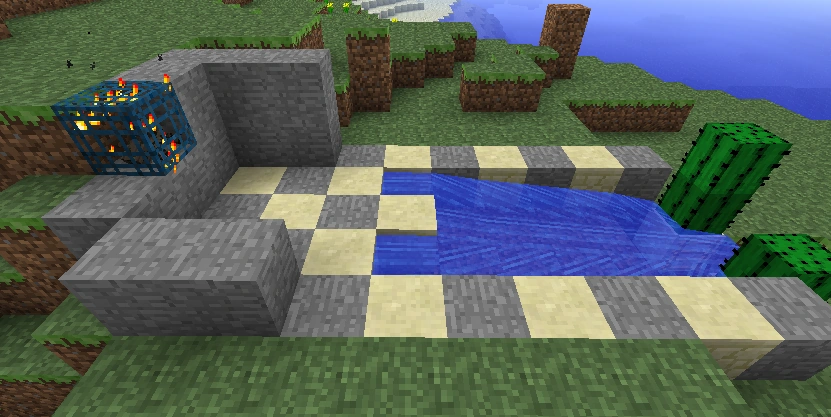
- Dig two blocks down and one block in just before the cacti. These two holes will hold the collection water sources.
- Place three ladders on the far side of the collection output. Place one on either piece of sand. Place the two water sources in the holes.
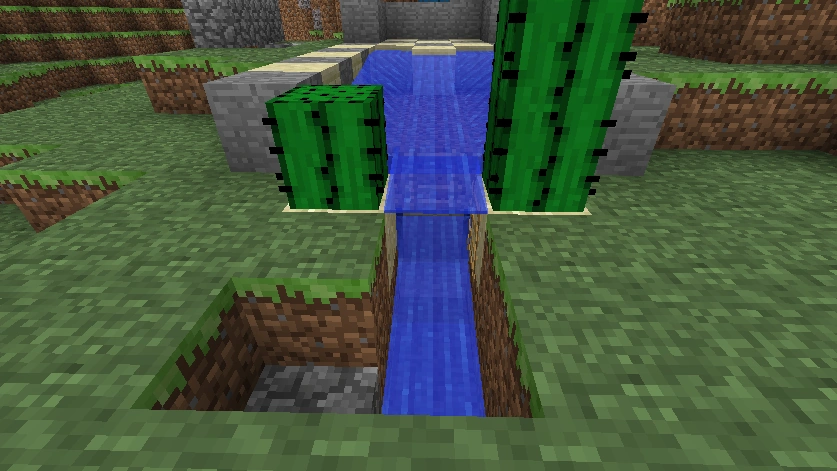
- Place the main water in the two openings. The block between them makes the water flow towards the gap in the cacti, slightly improving the collection rate of string.
- Cover the entire trap and remove all lights.
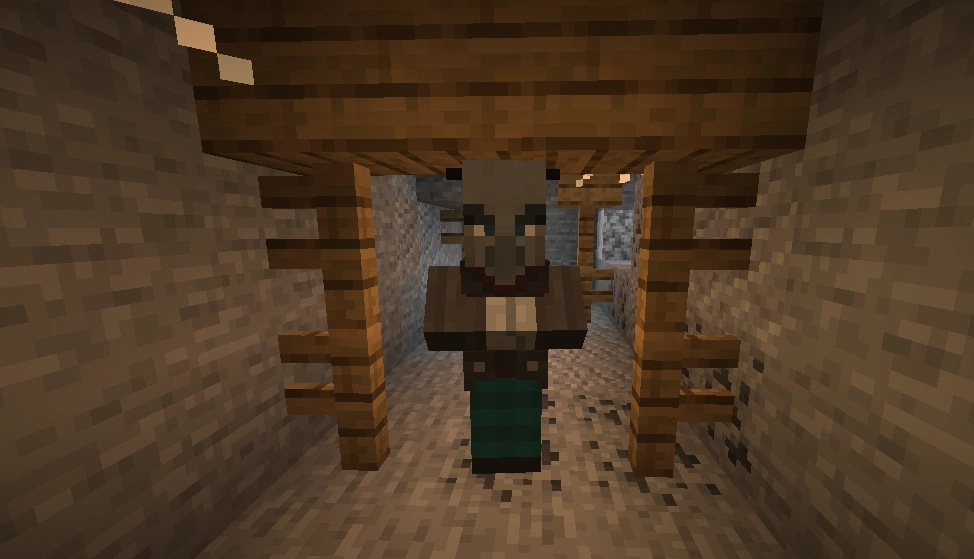
Villager traps
- First make a room high above the ground and move at least 2 villagers to it.
- Now put at least nine doors in it.
- Next change one of the one wall in the room to glass.
- Attach another room to the side that the glass wall is on.
- Mine a hole in the floor of the empty room.
- Line the hole with open trap doors (if your hole is 2 by 2 you will need 4 trap doors)
- Directly under the hole, make a room without a roof on the ground.
- This trap only works with zombies
- Both rooms that are in the sky must be very dark
- The zombies will try to get the villagers, they will fall through the hole, and if the room was high enough kill themselves in doing so and drop some awesome stuff!
Main channel, dry
Collection channel, dry
Collection channel, water and ladder placement
Main channel, water flow
Both channels. Front view.


Blaze traps
Since it is impossible to obtain water in the Nether for a drowning trap, this trap takes advantage of blazes' weakness to snowballs. To create this trap, one must disable the blaze spawner and fence a snow golem into a nook in a wall. Once the spawner is re-enabled, the snow golem will shoot snowballs at the blaze until it dies. Alternately, one may create a redstone mechanism that brings out glowstone or turns on redstone lights to prevent the blazes from spawning until the mechanism is switched. Fenced access to a snow golem's nook can allow the player to construct a new one should the blaze defeat it. However, in Minecraft version 1.2, Snow Golems die in the Nether, making this trap need a splash potion of fire resistance.
Another way to make a blaze farm is to box in the spawner so that the blazes can't fly away. leave a space at the blazes foot level and stand so that your eye level is at that space. That way the blazes can't hit you (mostly) but you can hit them. This is also a pretty good experience farm since each blaze is worth 10 xp. Be warned however that sometimes blazes will spawn outside the box so it is advised that one box themselves in as well.
(Patched) However, if you are playing on the Xbox 360 edition (This no longer works due to recent updates.), you can make a MUCH easier trap using ice, cobblestone/nether brick, and light sources. First, make an 8×8×3 space around the spawner (recommended you do this on peaceful and creative as you could be killed by blazes, fall in lava, or the spawner may be destroyed by ghast fireballs, as well as ice not being available in survival). This will require destroying the fences around the spawner. Next, place ice in a row along the back of the trap and place a light source above it (recommended glowstone) so that the ice will melt. Once the ice melts, you can destroy the light source above it. Repeat this step until you get flowing water to the front of the trap. Afterwards make a place where you will sit and wait for the blazes to spawn so you can kill them (The water alone will kill them, but you will not get any loot or xp.) Make a hole as wide as the trap's insides and one block high. If you let water flow into the area, you will not catch on fire if you are hit by a fireball (though you will take impact damage), at the cost of being faster to get to the loot, so make a platform out of the water to move around. Then, get your Looting sword (preferably diamond with Sharpness and no Knockback, as Knockback will send the blaze into still water caused by the ice, which will keep it from flowing toward you) and beat the blaze rods and glowstone dust out of them!
Alternatively, see [[1]] <-this for video tutorials. (I couldn't get it to work for me.)
A note on lava
Lava can quickly kill mobs and can be suspended on either a ladder or a sign. To suspend the lava, create a 3-long channel then put a sign or ladder on the last block. Lava spreads three blocks away from the source, so the last section of the lava will be left suspended on the sign or ladder.
Lava generates light, which can lower the spawn rate in the dungeon unless placed far away; however the increased turnover of mobs may compensate for this. (Only one trial - lava 'blade' is approximately 7 blocks away from spawner. Significantly increased rate with lava closer as opposed to having a dark spawn room with lava further away.)
"Here" is a video example of how to make a dungeon trap using a lava grinder in 1.2.5.
"Johnny" Vindicator Trap
Since 1.11, you can use an Anvil, Name Tag and a Vindicator to make a Monster spawner trap. First, you need to find a Spawner, then you need to make a wall with a door to make no monsters to leave the trap, then lure a vindicator to inside the trap.
Then you go to your anvil and rename the Name Tag to "Johnny", then Right Click the Vindicator with the Name Tag (Note: It's recommended to kill all the mobs so no mobs will kill the vindicator), After renamed, the Vindicator will attack any other mob except other Vindicators and Evokers.
It's recommended to put more Vindicators inside the Trap. and also it's recommended to heal your vindicator using Potions of Healing.
- Step1-Johnny-Vindicator-Trap.png
Step 1
- Step2-Johnny-Vindicator-Trap.png
Step 2, Note: Glass is optional.
Step 3, Note: Any ways to lure a Vindicator works.
- Step4-Johnny-Vindicator-Trap.png
Step 4 (Have a Name Tag with "Johnny" in it)
- Step5-Johnny-Vindicator-Trap.png
Step 5: Profit!
Auto meat cooking trap
This is when you have peaceful mobs spawn and are burned to death which cooks the dropped meat. First you cause peaceful animal mobs to spawn. Then you cause them to fall into lava that is one block high with a sign below it. This prevents the lava from flowing. Below the signs you put a block of cobweb. This causes mobs that have been caught on fire by the fire to burn and die without losing the drops. Just have a way to collect the fallen meat, and you have an Auto Meat Cooker. You can also make a chicken trap by making a big pit of fire and then go high up and put a spawner. The chickens will fall into the fire and drop cooked chicken.
A working Auto-Pork Cooker
Other
Traps that use unusual methods, such as huge pits, fall into this category.
Note: Using a half slab of cobble, planks, or sandstone in murder holes will prevent creepers and skeletons from seeing you, then you can retrieve items without breaking blocks, place the half slab on top of where the mobs would usually stand.
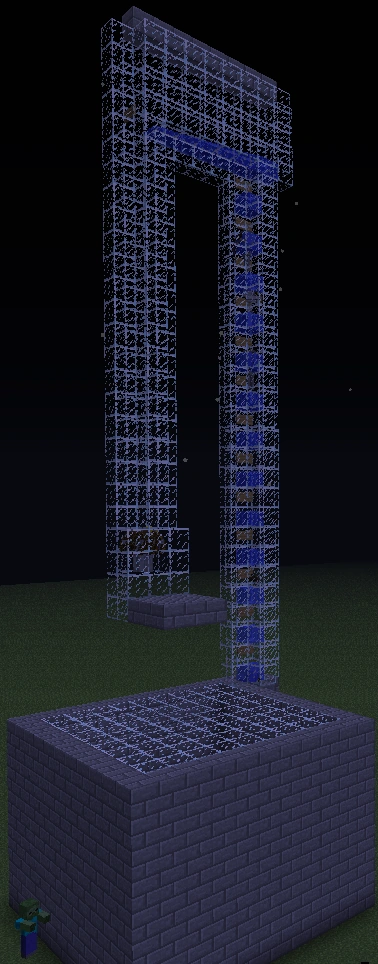
落下式トラップ
- ダンジョンから下に落とす穴を作り、Mobに落下ダメージを与える方法である。Mobは3ブロックで0.5の落下ダメージを負い、1ブロック高くなる事に0.5ダメージ追加する。少ない資材で作れるが、採掘量が多く、手間がかかるという欠点がある。また、Mob専用水流エレベーターと呼ばれるものを23ブロック以上の水と看板を設置して作ることでMobを23ブロック以上上の高さに運び、そして落としてもいいだろう。経験値トラップに使いたければMobが死ぬギリギリの高さに調整すればいい。例えばゾンビやスケルトン、クリーパーは21.5mか22mくらいにするといい。
Experience trap
- For this trap, you need to dig a large pit 22 blocks deep under the dungeon, or make a water elevator taking them upwards so you can stay near the monster spawner. Go to the bottom of the pit and place water in a fashion so that it should flow towards a wall. Then make a room where the water is flowing. This is where you will stay while finishing off the mobs. Make the room so that it has a one-block hole where you can see the mob drop zone. Hopefully, mobs should spawn, fall down the pit and survive with half a heart, get pushed towards you by the water current, and get killed by a single hit. If you like, you can bring food along as your hunger will deplete over time. This should provide normal as well as rare mob drops and experience levels, making it quite useful. Another technique is to leave your player by the dungeon for a couple of hours, overnight is suggested, and there will be at least a hundred monsters waiting to be harvested. There is a possibility of the number of monsters causing large lag spikes, glitches, and maybe even crashing on weaker computers.
Efficient pit + experience trap w/ TuT (by Epiiik)
- *Note, all dimensions are given the format: Horizontal x Vertical. This method is an indirect hybrid of the aforementioned traps, utilizing both fall damage and mob control with water. In the mob spawning room, dig 1 block down so that the spawner is at eye level, and place water blocks at two adjacent corners. On the wall opposite of the two water blocks, dig a 1×2 hole for three blocks in the middle of the wall (allowing mobs to pass through).
- Begin digging upwards in a 1×2 fashion for 24 blocks. To get up, place signs on the long-faced wall (your left/right) in a zig-zag pattern going up while placing water blocks in between the signs. The first sign should be placed as furthest, lowest space possible. Stop placing signs after the 23rd level. The last water block should be against the wall furthest away from the mob spawner on the 24th level.
- On the 25-24 block levels, dig a 1×2 hole for seven blocks in the direction the mob spawner. On the seventh block in, dig one block downwards. Dig in the forward direction for eight more blocks (again, 1×2). You should notice the water block placed on the 24th level should stop where the path drops by one block. Place a water block against the wall of the drop. Notice how this water block stops 1 block short of the path.
- Dig further for two block and begin to dig downwards in a 1×1 fashion for 22 blocks, Face the direction of the mob spawner and dig another 1×2 hole one block deep. Dig down one and fill the top level with one block so that you can only see through one block of the pit you just created. (If you are using a skeleton spawner, you will need to stand one block away from this hole so that the skeletons cannot shoot you.) You are now standing at the loot point. Now that the almost-dead mobs are depositing into your 1×1 hole, simply attack them with any item to gain their loot and experience! You may use TNT + water to do splash damage to kill all mobs at once at the risk of lag spikes. Splash potions of Healing will also work, as they do damage to most hostile mobs.
note: you must have 2 block tall non-exploding mobs to do this or the mob will either destroy or get out of the trap
Useful tips on this design by Duck//Marvin: When you make the opening in the spawn chamber for the mobs to exit, make it 3 blocks high and place a sign or half slab at the top. This lets the mobs into the elevator more easily and prevents water spillage from the elevator. Also making the transport corridors at the top 3 blocks tall instead of 2 allows the mobs to be transported faster as they will not hit the ceiling when they try to swim and get stuck.
- Screenshot 2013-12-01 06.29.29.png
- Screenshot 2013-12-01 06.29.43.png
- Screenshot 2013-12-01 06.29.58.png
Alternative layout 1
As you can see in the picture above, there are 2 spawning rooms for the hostile mobs to spawn. This is very useful if you can silk-touch mine mob spawners. Anyhow, the dimensions for the room are 5 across, 13 down, and 9 long. The picture is slightly deceiving, because you can't see behind the wood. To construct the spawning room(s), you will need a very durable pickaxe, or several pickaxes. You shall dig out the full room, and make a redstone lighting system to control when the mobs can and cannot spawn. You will then make a 2×7 water elevator, bringing the mobs up 5 levels above where you will hit them. You shall then make a 1×2 area to hit the mobs, and if room allows, a spot where water may flow to bring mob drops to you. You will be able to pick up most mob drops without this, but there are still few you won't be able to.
Alternative layout 2
- An alternative layout with a smaller footprint takes advantage of the fact that a player must be within 16 blocks of a spawner for it to activate, but that spawners only check 9 blocks vertically for spawned mobs. Build the trap as above, except instead of being off to the side, the killing floor is 4-16 squares directly above the monster spawner. This requires less materials, less x,z space and less precision in construction, though is 3-15 blocks taller.
- To construct the trap this way, build a 9×5×9 room around the monster spawner with flowing water leading the mobs into a corner. Build a water ladder in this corner going 26-38 blocks upwards as measured from the top of the monster spawner. At the top of the ladder, direct the mobs a couple blocks in any direction with water, and into a 22 block drop chute. At the bottom of the drop chute, create a platform 1 block lower, with a 1x1 "window" into the chute through which you can strike the mobs safely from the platform.
Another experience trap (by AlexxShadenk777)
- Firstly it should be noted that this was made with a zombie spawner in mind. Basically you just make a balcony of sorts and wail on the zombies as they approach you while being unable to hit you.
- Seal the zombie spawner in a 5×5×5 chamber, naturally you want it to stay in the center of the chamber at the lowest height. Outside of the chamber make a platform that is 2 blocks high that surrounds the outer wall, and while standing on this platform, punch a wide hole in the corner of the chamber 1 block above the platform. Remove the corner block so you can stand in the corner while the zombies practically funnel toward you. They'll be able to push you but not hit you at all, so you're free to smack them on the head with your weapon of choice.
- Naturally the rotten meat they drop will remain inside the chamber but the experience points will hover toward you. If for some reason the points end up too far just walk around the chamber to their nearest corner.
- Optional: lead some tamed wolves into the chamber before sealing it!
Experience trap
- Place torches to turn off spawner
- Place water in two corners
- Make a hole where the water ends
- Make a 3×2 path until the water ends
- Make it so mobs will stop at the end.
Recollect the torch and stand where the end of the tunnel is.
If done correctly you can slay the mobs and get experience and rare drops from mobs.
Humanoid monster spawner xp trap (by HeofShadow)
This type of spawner is made for Humanoid type monster spawners (skeletons, zombies, and in some cases zombie pigmen), but can be modified for a spider spawner. First disable the monster spawner and areas around it with Torches so Mobs do not spawn and disrupt the creation of the trap. Now make a room 17 blocks wide by 9 blocks long and anywhere from 4-7 blocks high, with the spawner being in the rough center and 1-2 blocks above the ground. Now dig out the bottom row 1 down everywhere except the center, which should be dug down around 7 blocks. Place a water source block on each end of this dug out area and it should stop just before the center. Now place water source blocks at the top so that it should stop before running into the dug out area. Remove the torches so that the mobs start spawning, and go down so that you are at eye level with where the center area was dug down 7 blocks. Make it so you can only see the mobs feet on one side, and on the other use a slab to make it so you can just see the top of its head. This allows good use of both swords And bows (Also, some servers give bonus damage for Headshots). *Screenshots Coming Soon*
S-bend design
This type of trap allows a one-hit kill on zombies and skeletons; however, the drops and the experience are farther away.
Expand the floor so that there are two blocks of air below the spawner, and the walls so that the room is 9×9. Dig four blocks down on the block directly below the spawner and place water source blocks in each corner.
Dig one block north and two blocks south (three blocks tall for each direction), then go towards the south end, and make an access shaft. At the north end, dig a shaft, 30 blocks deep, and three pointing west. At the bottom, make a small room and light it up. Place ladders on the west end, and make an access shaft to the top of the ladders. Place blocks to the east of the ladders, except for the bottom few.
Place two bottom slabs on the block south to that directly below the spawner, and place trapdoors liberally (zombies and skeletons can climb ladders). Optionally, place hoppers at the bottom of the collection room.
Multiple spawners of the same species
To maintain maximum efficiency a trap must take on an increased complexity in keeping mobs separated or moving quickly when dealing with multiple spawners of the same species. Minecraft first checks within the 17 wide by 17 long by 9 high area with the spawner in the center (or 8×8×4 radius from the spawner) for mobs of the same species as the spawner. If there are fewer than 6 mobs of the same species in the checking zone, it will spawn a mob within half the distance of the checking radius. This means that with two spawners of the same species near to each other, there will be a zone that mobs will count for both spawners and severely impact the spawn rates. It would be a wise idea to work out where these checking zones overlap and ensure that mobs being funneled to the trap do not enter that zone and/or leave the overlapped / checking area as quickly as possible to maintain peak monster spawner output.
Videos
This design is easy to build and doesn't require too many materials. It allows mobs to enter, but blocks them from leaving with pressure plates and pistons.
ユーザー:KKMNNOIR/サンドボックス:モンスタースポナートラップ/video
| 新人向け |
| ||||||||||||
|---|---|---|---|---|---|---|---|---|---|---|---|---|---|
| 全般 | |||||||||||||
| チャレンジ |
| ||||||||||||
| 建築 | |||||||||||||
| 生産 |
| ||||||||||||
| エンチャントと製錬 | |||||||||||||
| ブロック破壊 |
| ||||||||||||
| メカニズム |
| ||||||||||||
| サーバー |
| ||||||||||||
| 技術的なチュートリアル |
| ||||||||||||
| 古いチュートリアル |
| ||||||||||||